Unfortunately, The Tor Project no longer publishes a standalone Tor binary for Windows, so the recommended way to get it is with the Tor Browser Bundle. You can download it here.
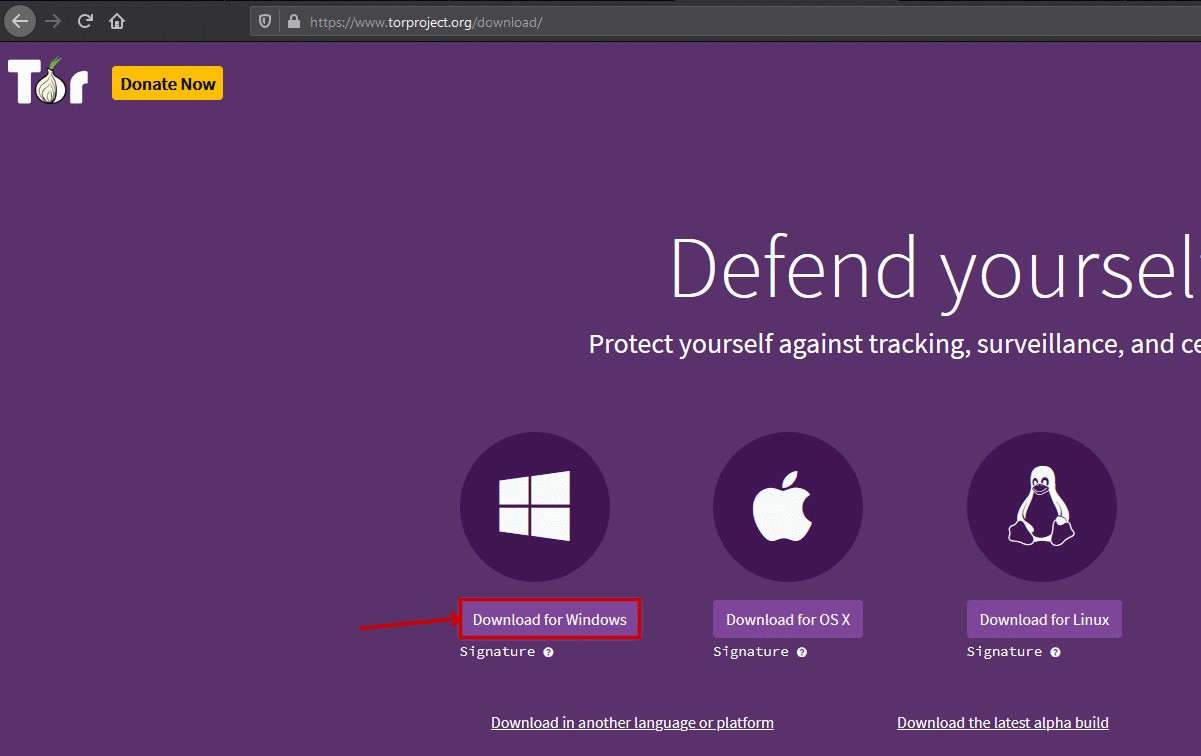
Download Tor for Windows
Once it is downloaded, run the installer by right clicking on it and selecting Run as Administrator.
Once you have selected a language, you should see a menu like this:

We will install it to C:\Program Files\Tor Browser. If you choose a different folder, it needs to not be anywhere under C:\Users\. Note the path you use here for the step after next.
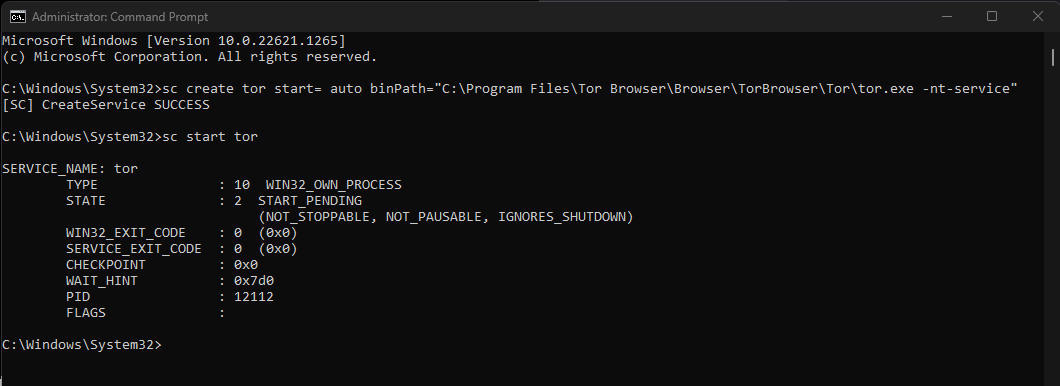
Now you want to set up Tor to run as a service: to run in the background and keep itself running so you don’t have to worry about it again. To do so, you need to open your Command Prompt as an administrator.
In Windows 10+, you can simply type cmd in the Windows search bar (but don’t hit enter). Under the Command Prompt result, select “Run as Administrator”.
Once it opens, you can run the following commands, inserting your destination folder (from above) between binPath=” and the Browser subfolder, like this:
sc create tor start= auto binPath="C:\Program Files\Tor Browser\Browser\TorBrowser\Tor\tor.exe -nt-service"
Tip
If you get the error “Access denied,” please ensure you are running the command prompt in Administrator mode. You can tell because the prompt will show C:\Users\YOUR-USERNAME> if you are NOT in admin mode, and it will show C:\WINDOWS\system32 if you ARE in admin mode.
sc start tor
When you run this, it should look something like this:
Note
If you get the error “The specified service already exists,” complete the following steps:
Run the command:
sc delete tor
Uninstall the Tor Browser, following these steps.
Begin this guide again from the beginning.
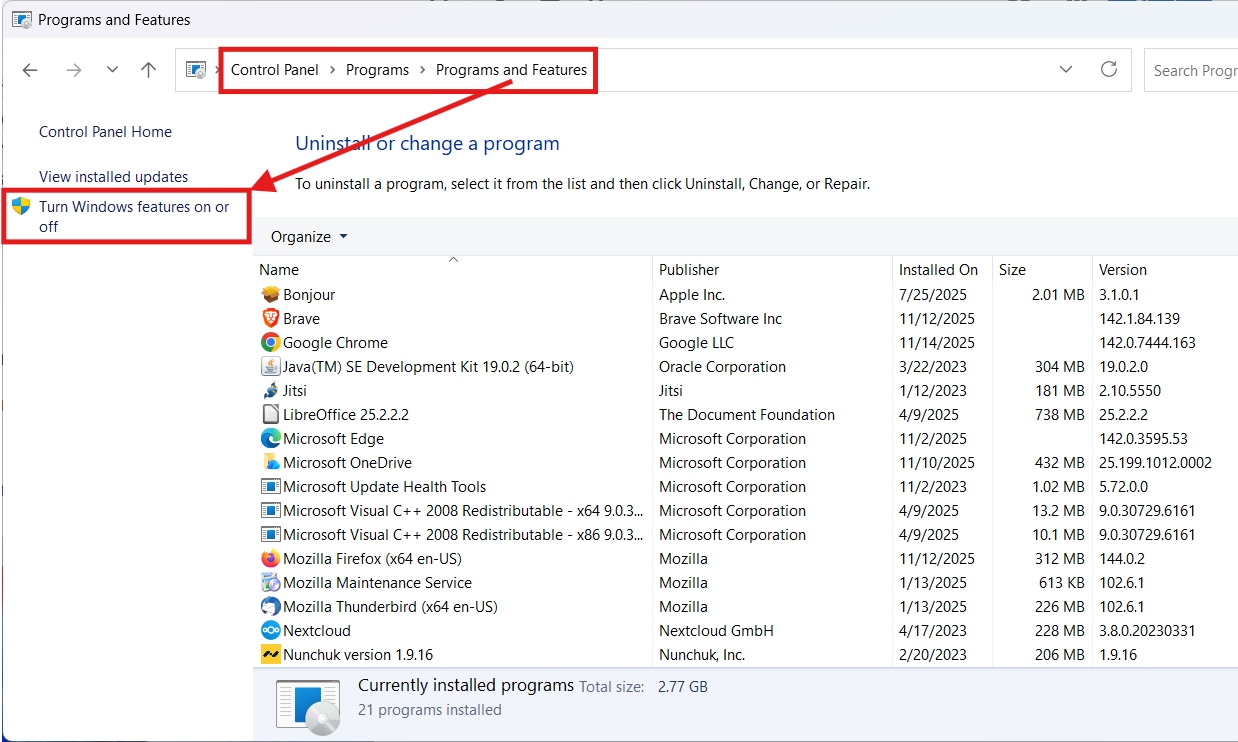
Enable IIS: * Open the Start menu and select or type in Control Panel, then select Programs > Programs and Features > Turn Windows features on or off
In the Turn Windows features on or off dialog box, enable “Internet Information Services”
Go to the Start menu, type “cmd” into the search box (but don’t hit enter). “Command Prompt” will be the first search result. Select “Run as Administrator” underneath it.
You may be prompted for your password, then the Command Prompt will open. Run the following two commands in succession: .. code-block:
cd C:\inetpub\wwwroot\
curl -O https://start9.com/assets/proxy.pac
Configure the proxy.pac MIME type in IIS Manager:
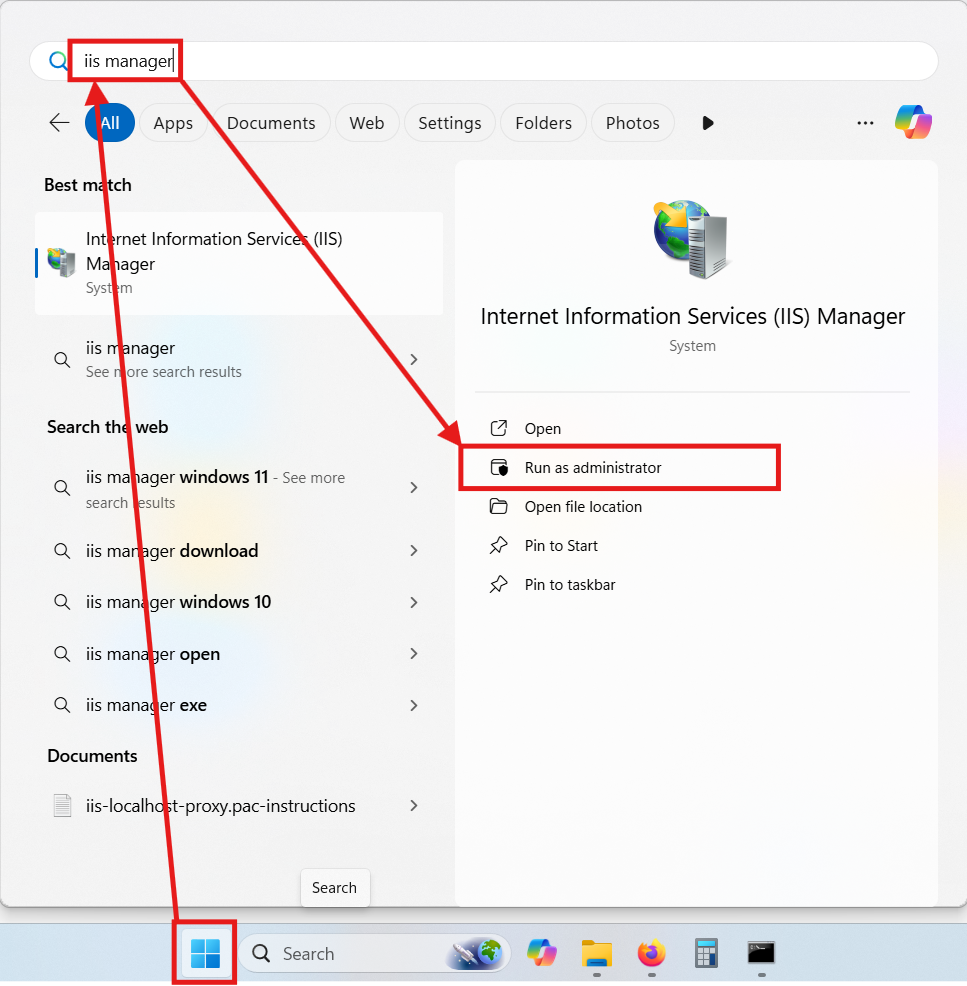
Open IIS Manager as Administrator. You can search for IIS Manager in the Start menu or find it under Control Panel > System and Security > Windows Tools:
In the Connections pane on the left, expand your server name, then expand the Sites node, and select Default Web Site
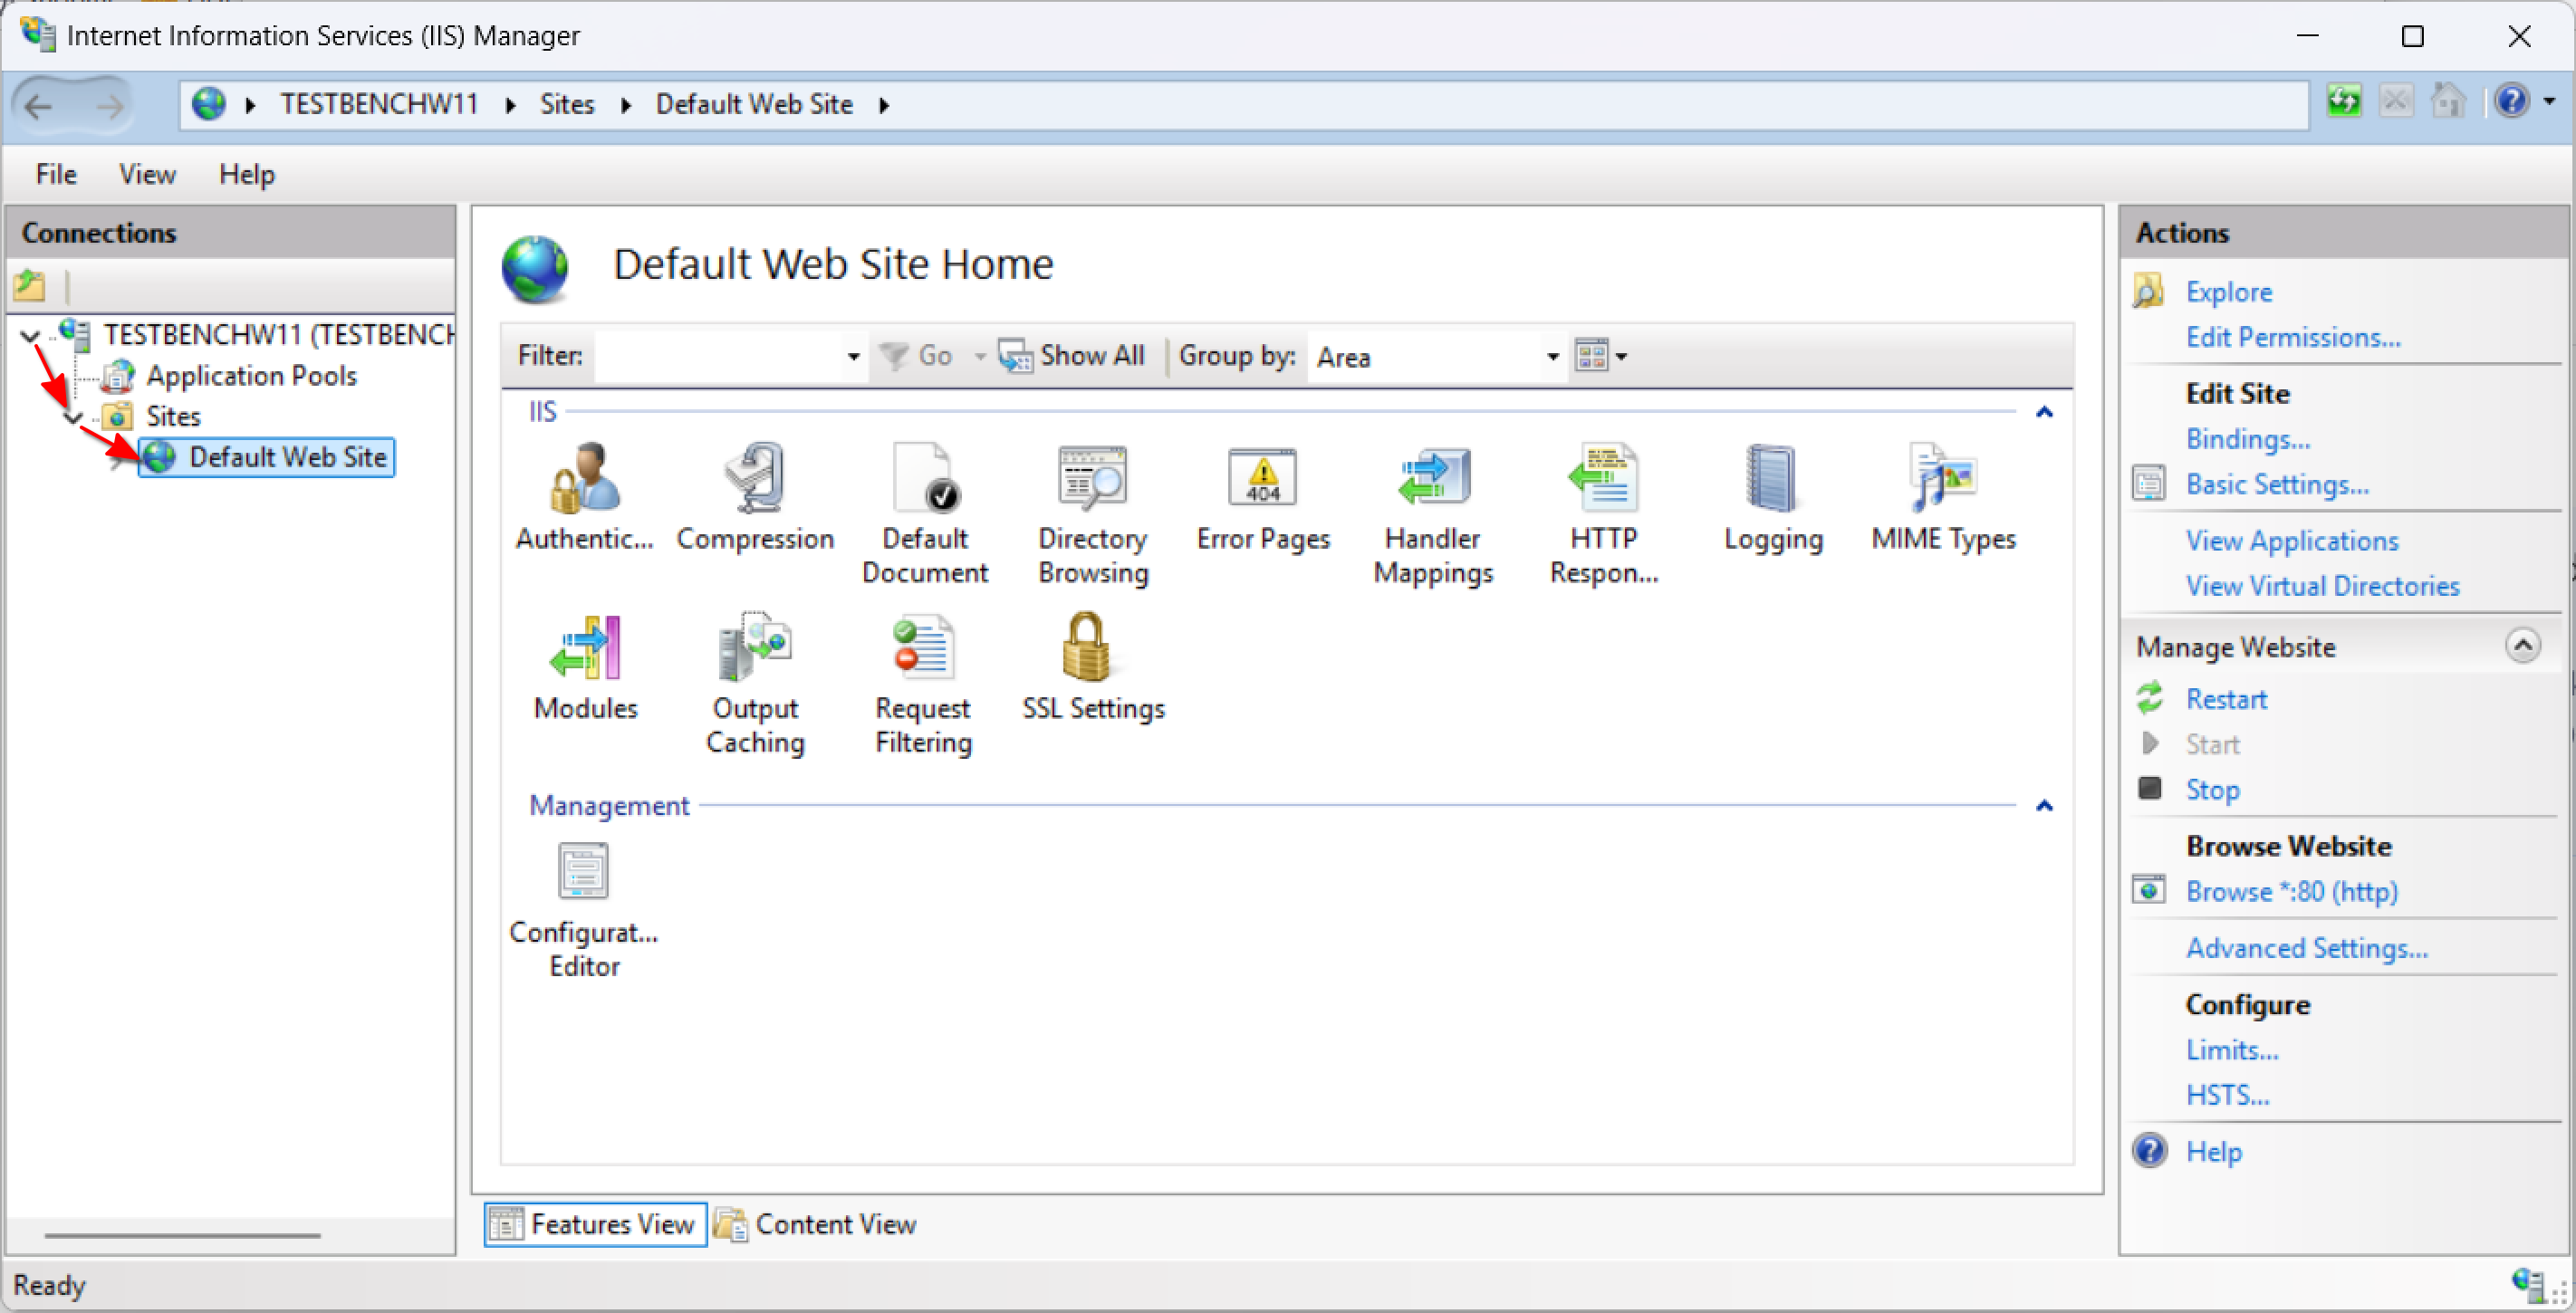
In the central Home pane, double-click the MIME Types feature icon.
In the MIME Types pane on the right, click Add…
In the Add MIME Type dialog box, enter the following information: File name extension: .pac MIME type: application/x-ns-proxy-autoconfig
Click OK to save the new MIME type.
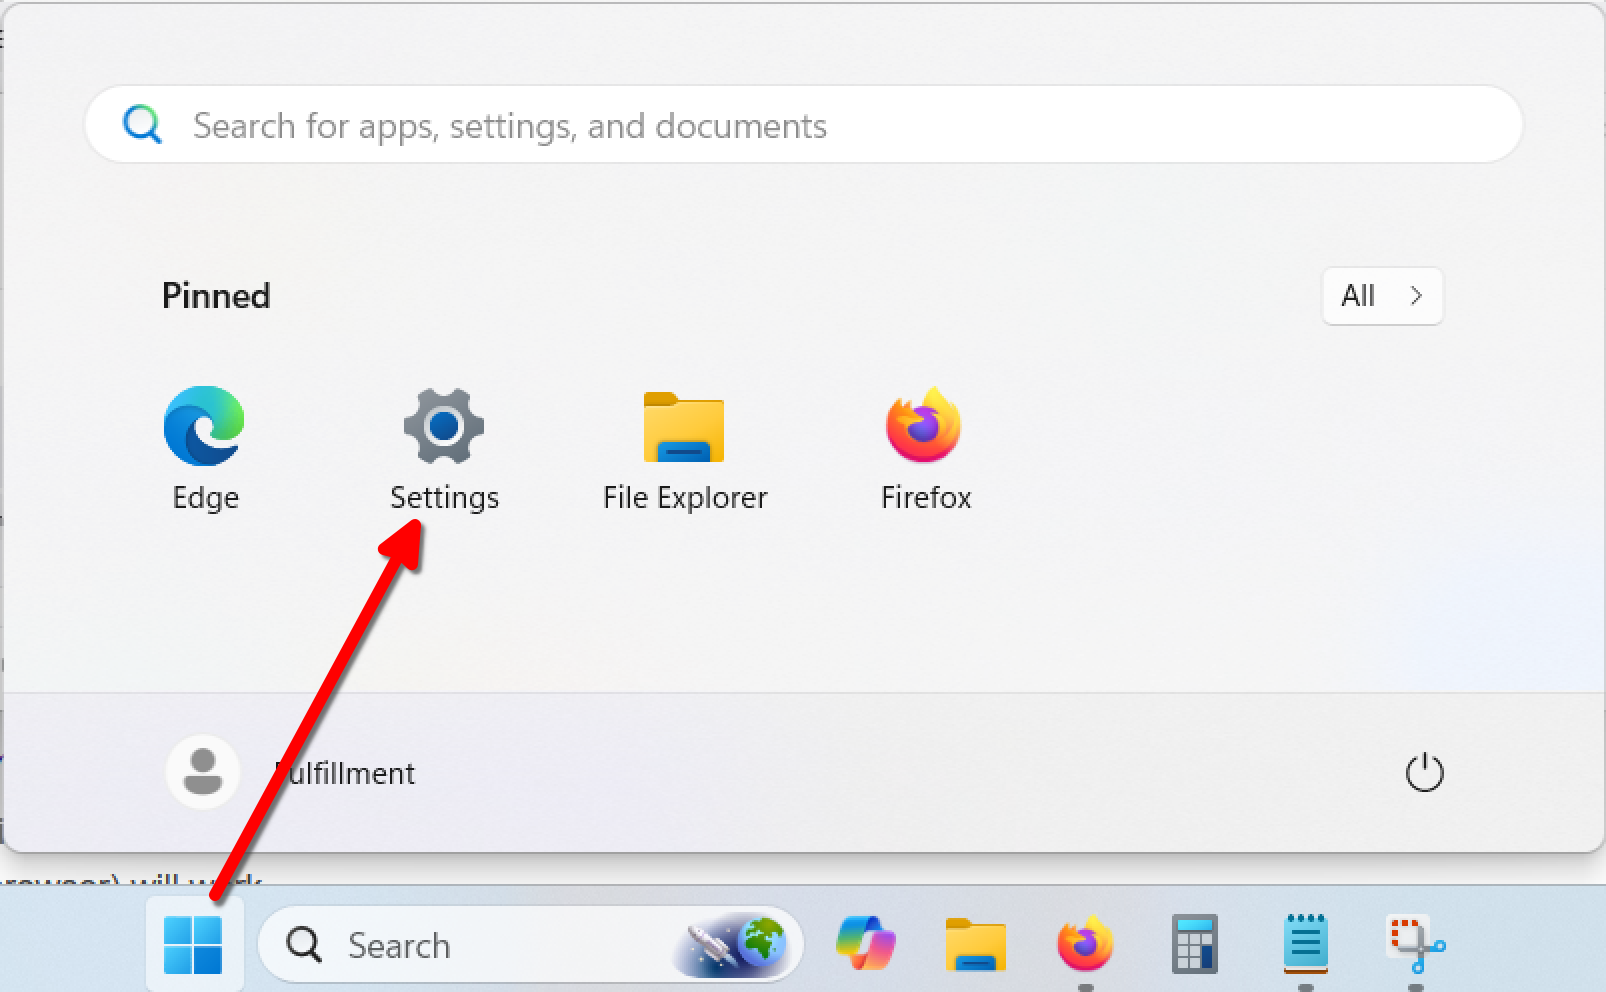
Go to your Start menu and select Settings:
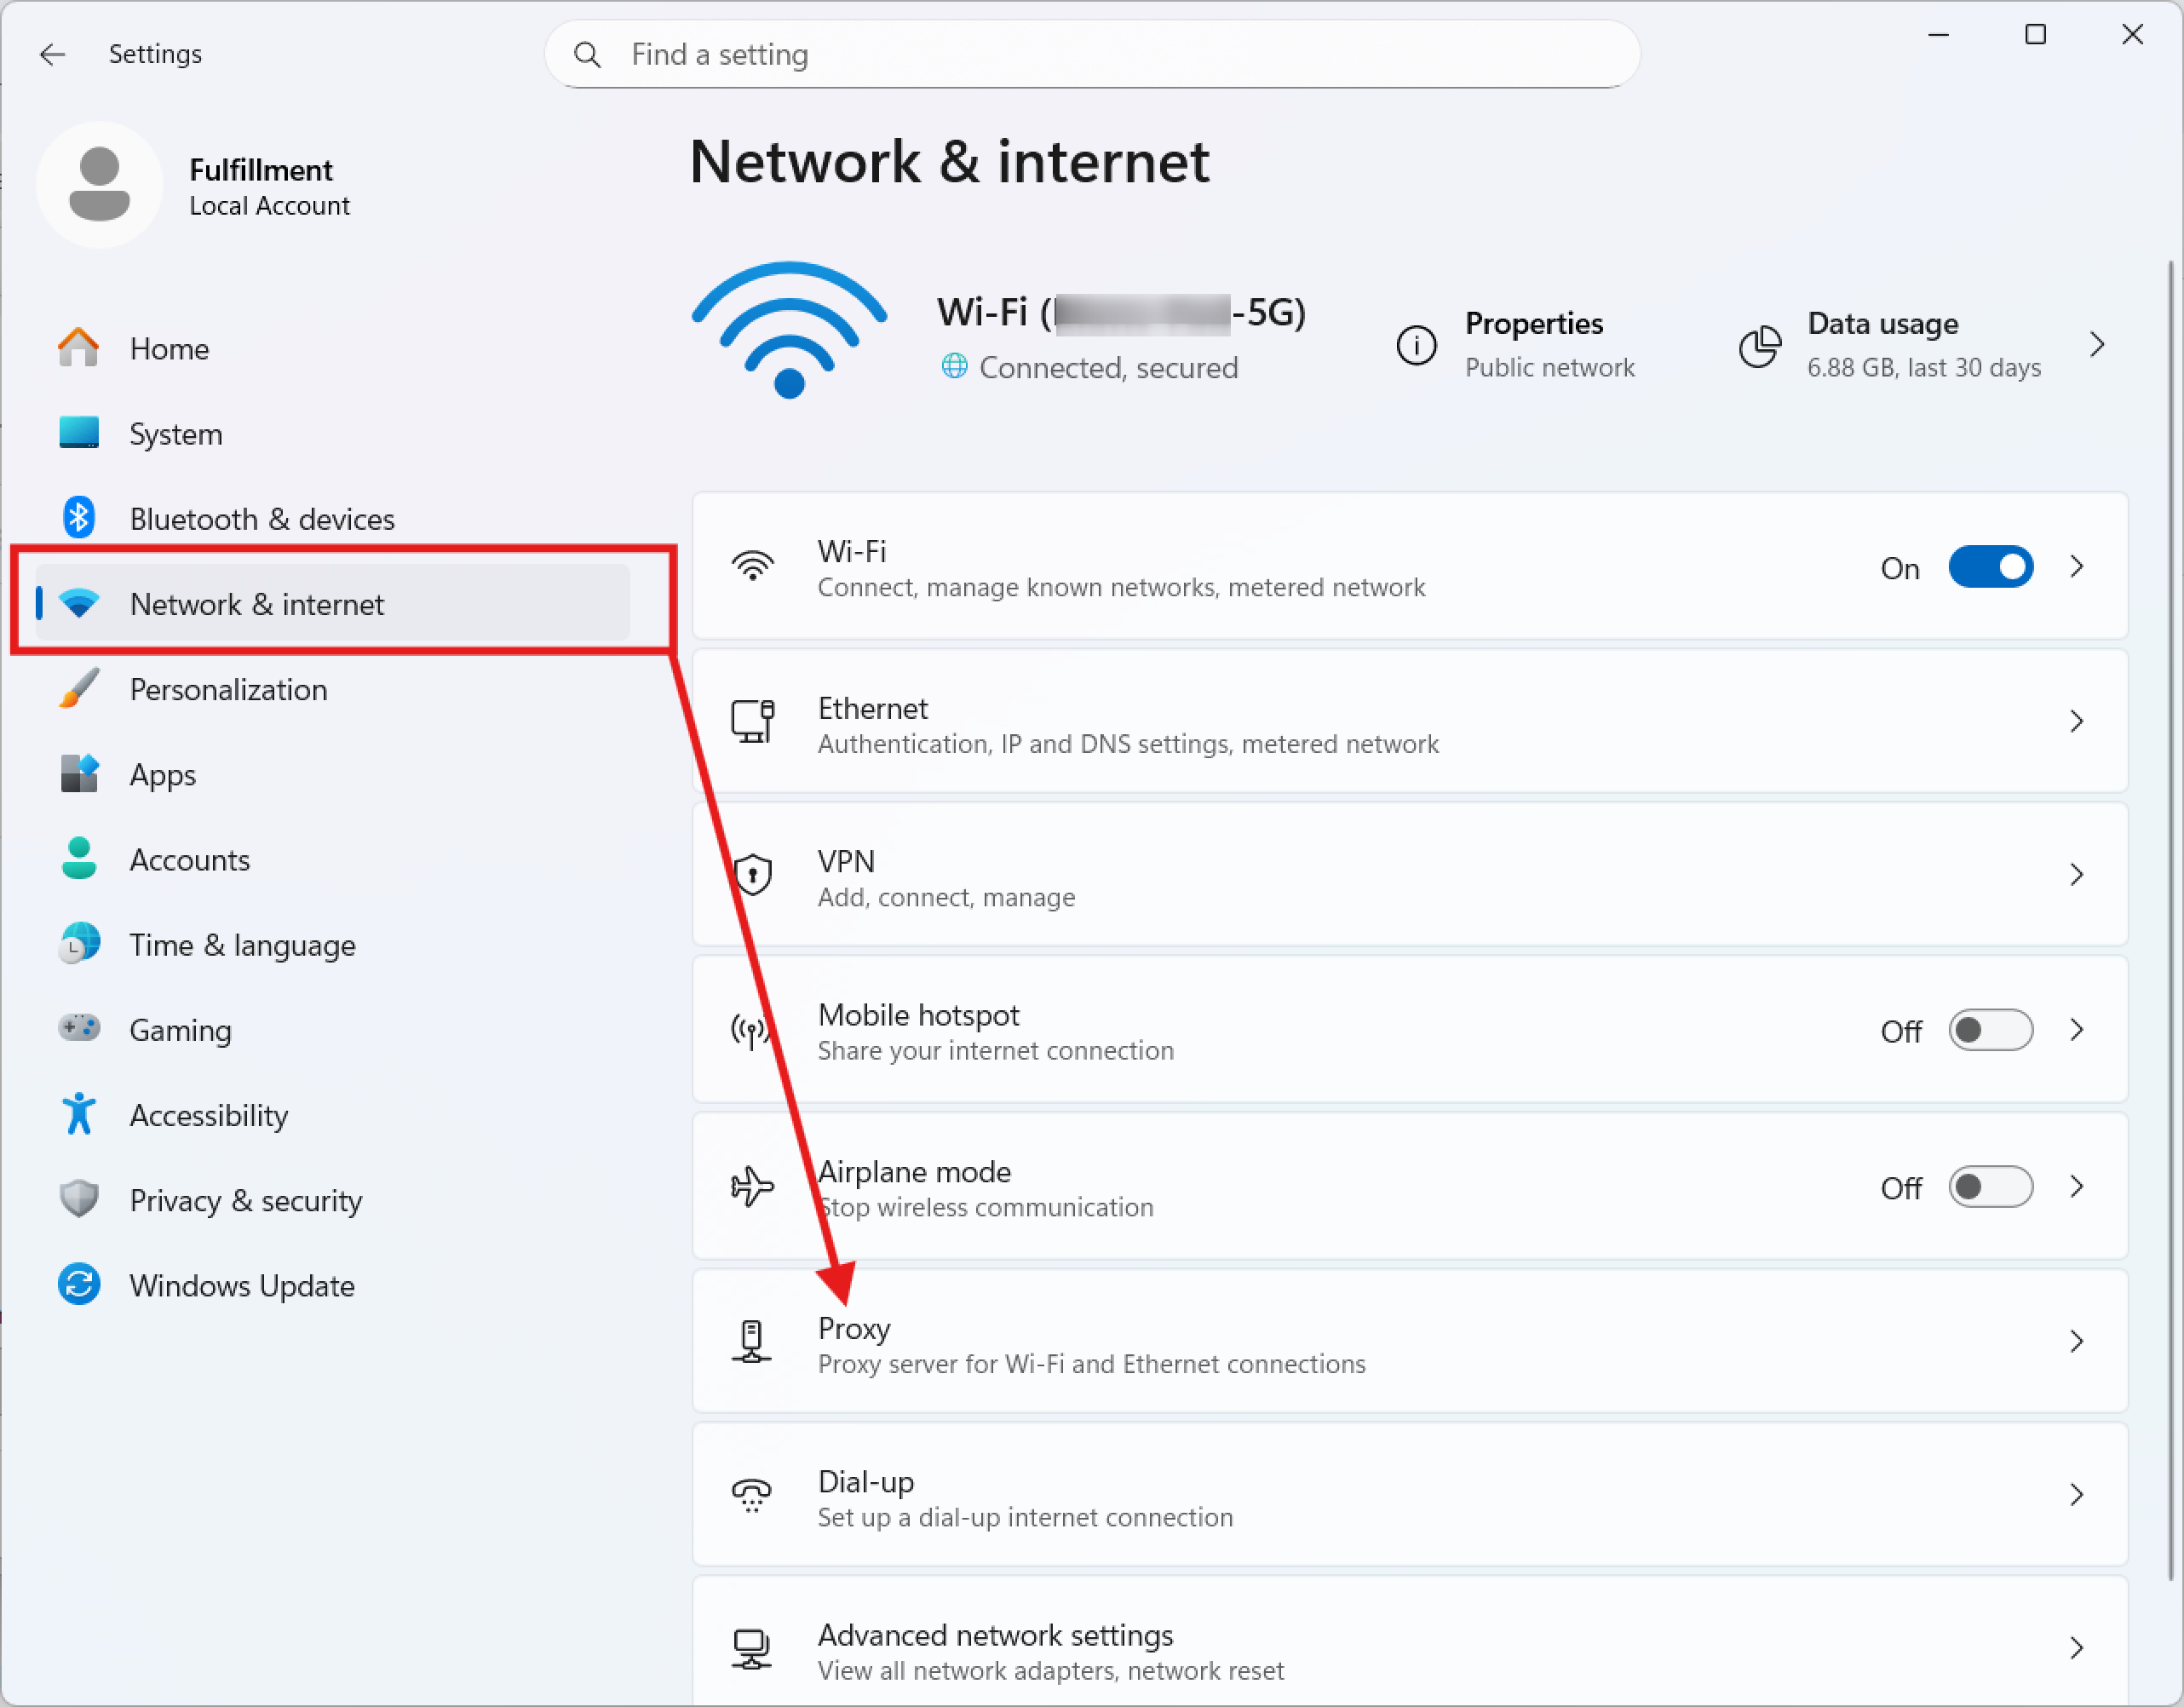
Select Network & Internet > Proxy
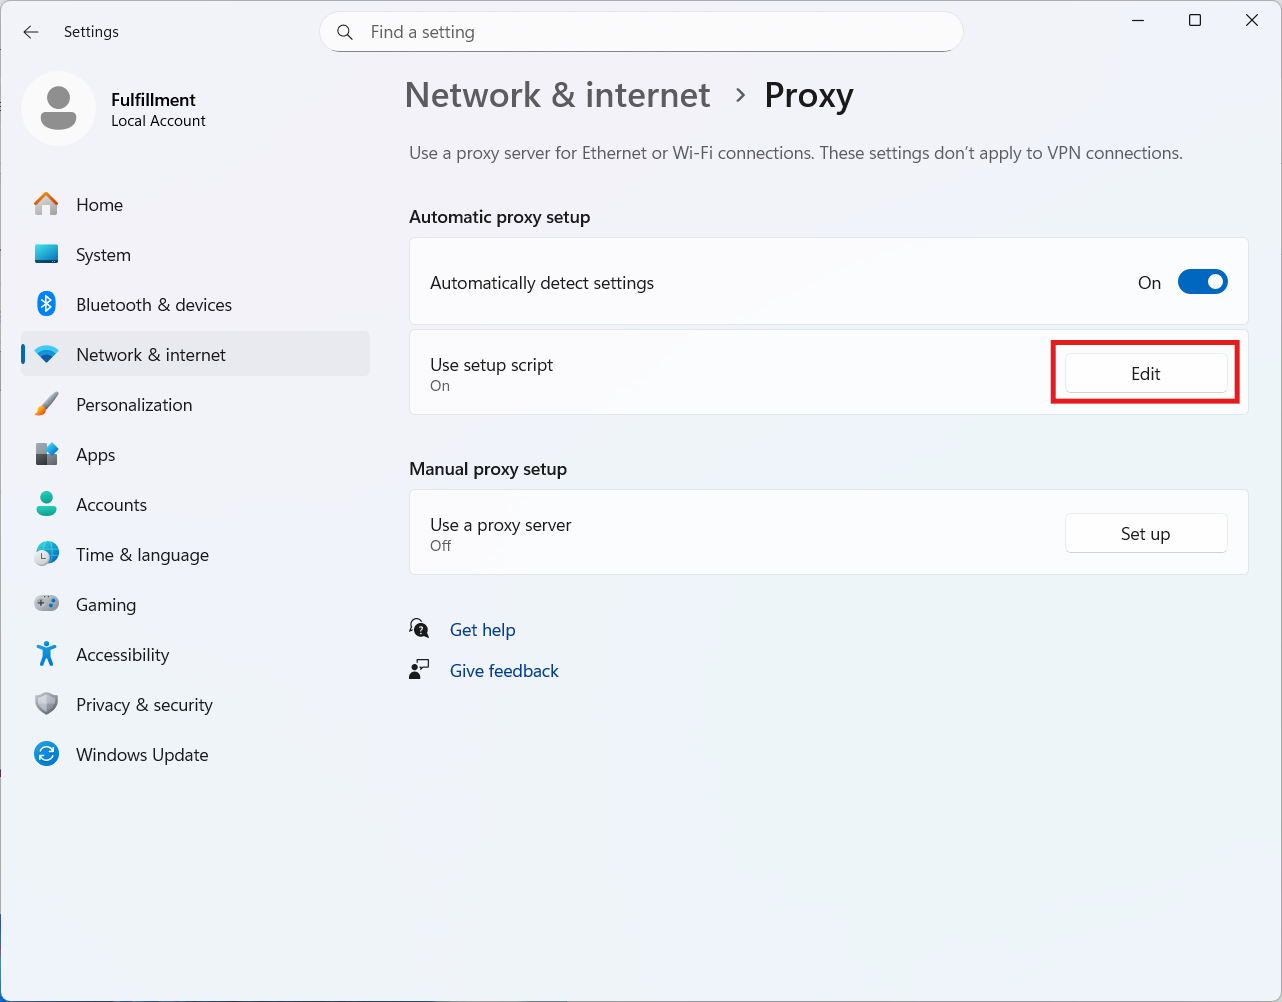
Under Proxy, select Use Setup Script -> Edit
In the “Script address” field, enter: .. code-block:
http://loalhost/proxy.pac
Hit Save
Now your browsers (and any other application system-wide) should be able to access .onion domains.