If connecting via Tor (i.e using the .onion address) the Bitwarden browser extension will only work with a Tor enabled browser. You can use Firefox (recommended), Tor Browser or Brave Browser.
We recommend using Firefox as it is the most compatible browser with Start9 Servers.
In this example we will use Firefox, though these instructions will work just the same for Brave. First, install the Bitwarden browser extension.
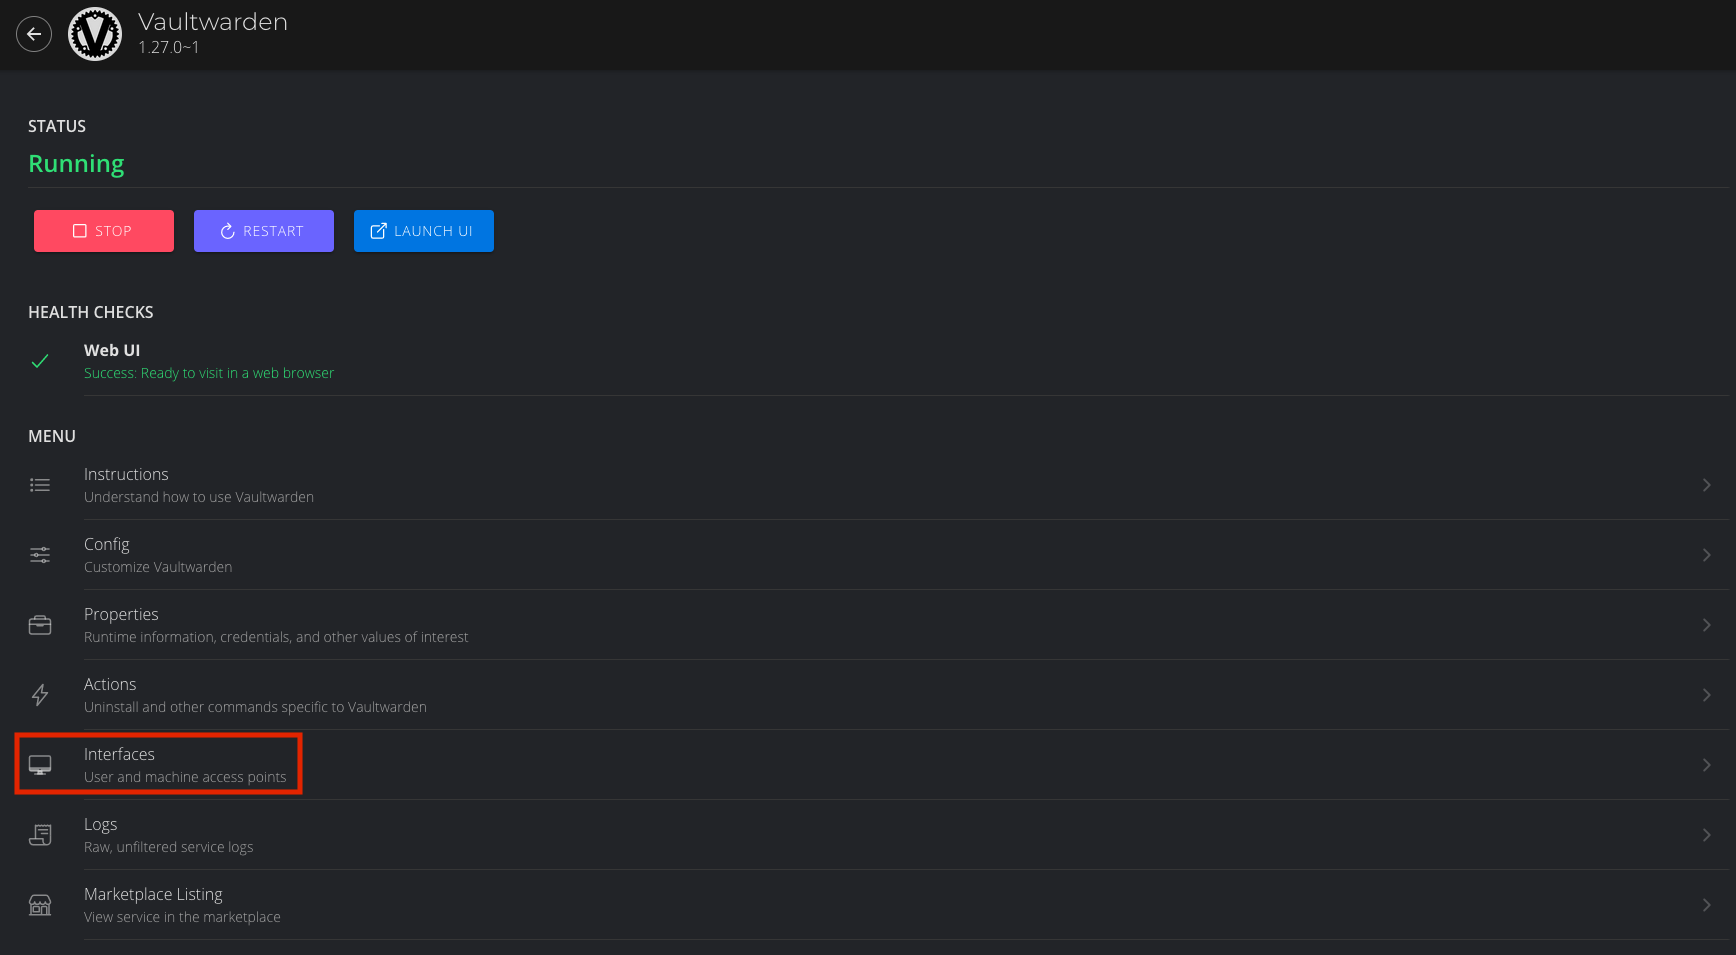
Head to the “Interfaces” tab in the Vaultwarden service on your Start9 Server:
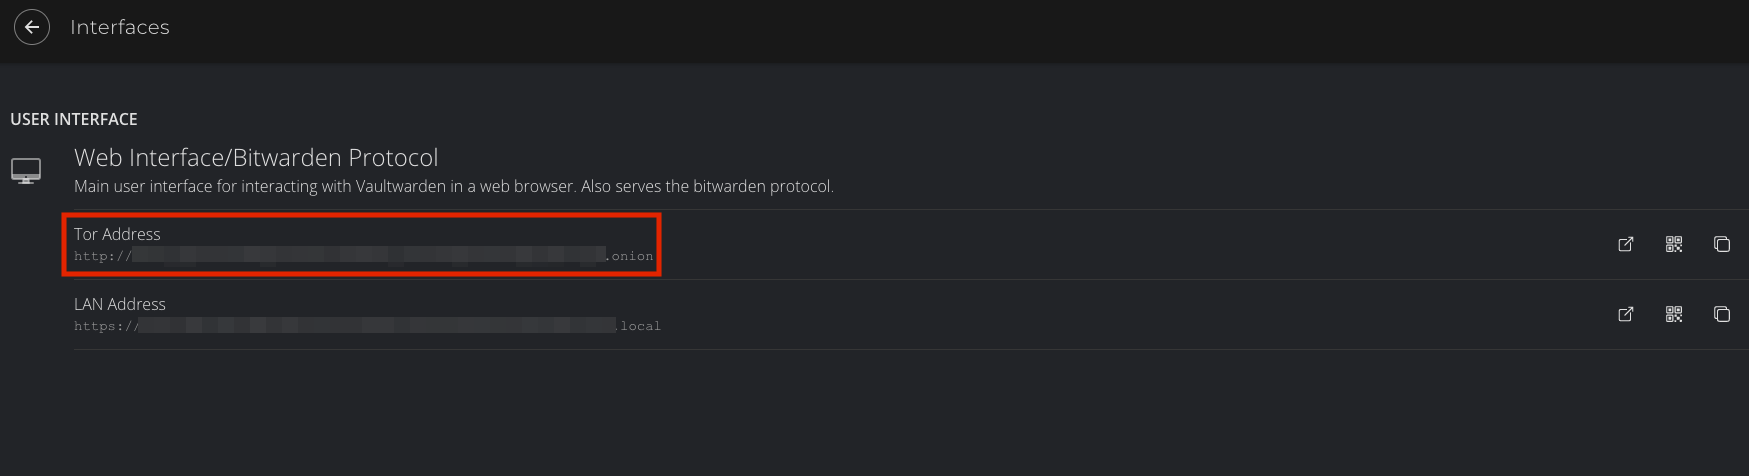
Copy the Tor address:
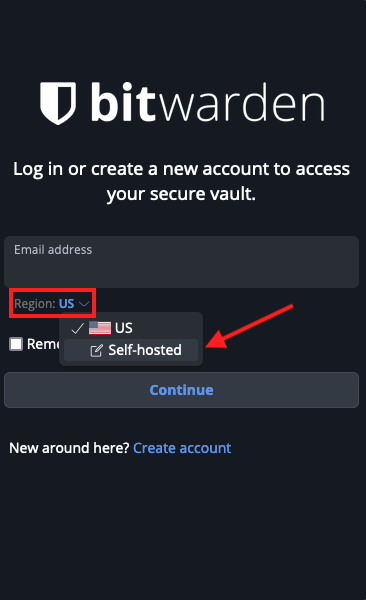
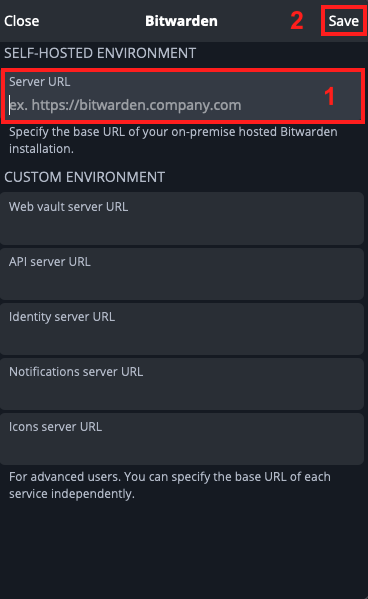
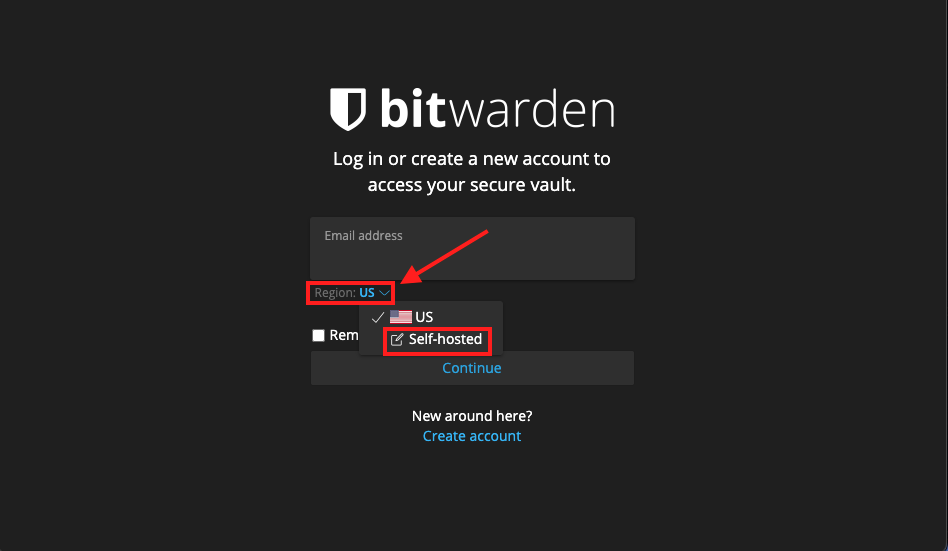
Now head to the Bitwarden extension and click the “Region” dropdown menu and choose self-hosted. Under Self-hosted environment you will see a field for Server URL.
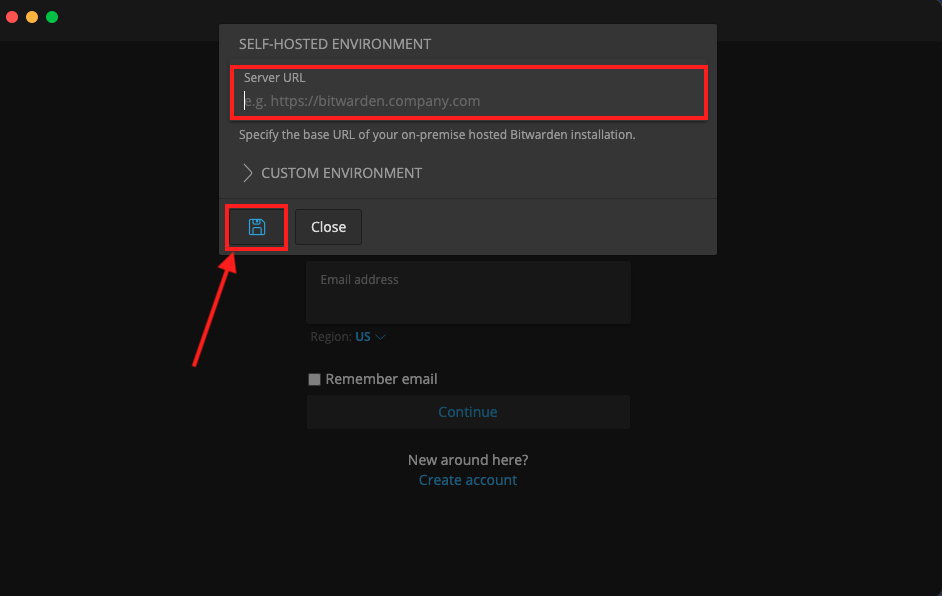
Now we need to grab the address of our Vaultwarden server.Paste the address into your extension and click “Save”.
Now enter your credentials and the Bitwarden extension will be logged into your self-hosted Vaultwarden server!
We suggest using Tor, however it is possible have a good experience with LAN. Once synced, your app and all your passwords will be cached and available when you are on the go and not connected to your Start9 Server, and you will only need to be on LAN to update any edits to your vault.
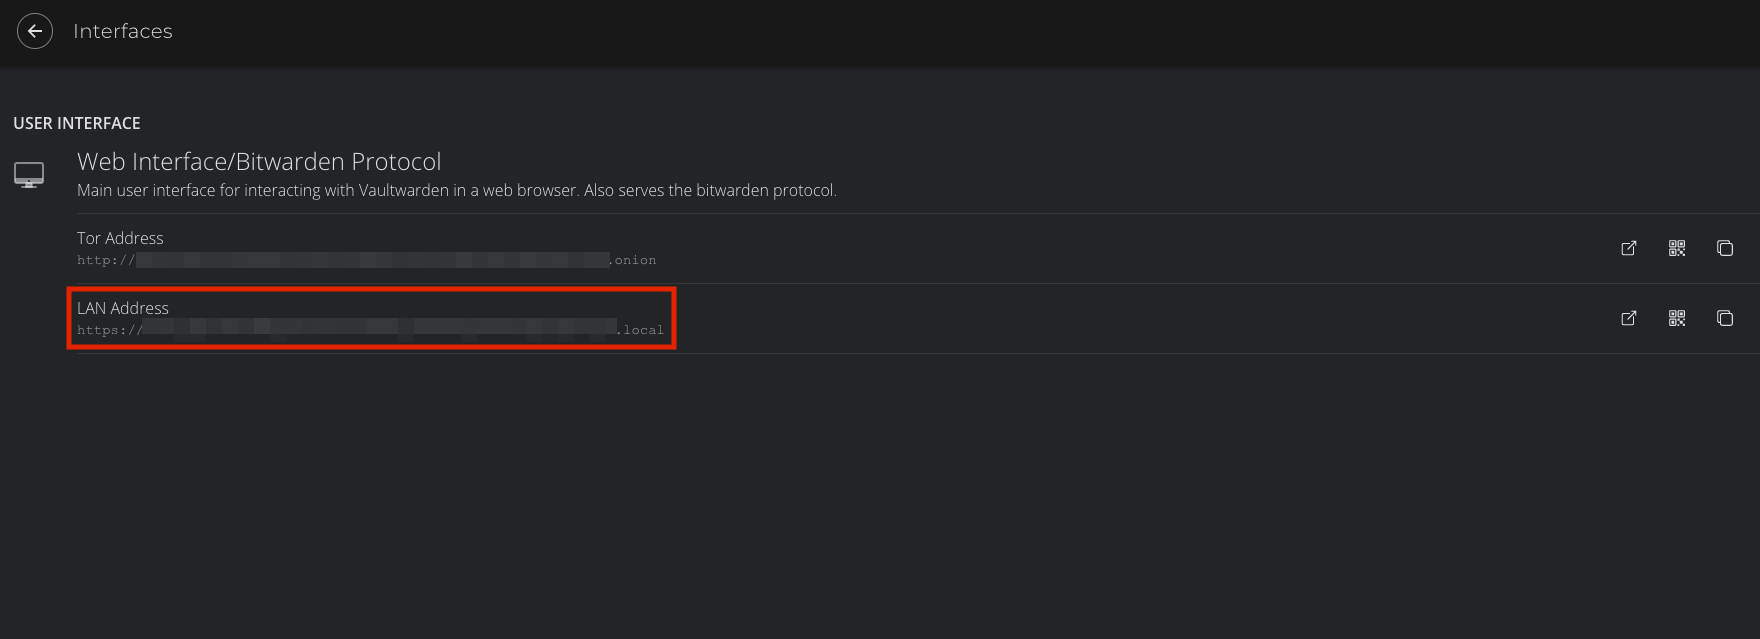
Head to the “Interfaces” tab in the Vaultwarden service on your Start9 Server:
Copy the LAN address:
Now head to the Bitwarden extension and click the Region dropdown menu and choose self-hosted. Under Self-hosted environment you will see a field for Server URL.
Now we need to grab the address of our Vaultwarden server.Paste the address into your extension and click “Save”.
Now enter your credentials and the Bitwarden extension will be logged into your self-hosted Vaultwarden server!
Visit your app store of choice and download the Bitwarden app. Once downloaded and installed, let’s go into Orbot, and add the app to the VPN apps list. You may need to hit the refresh button in the top left to get it to populate.
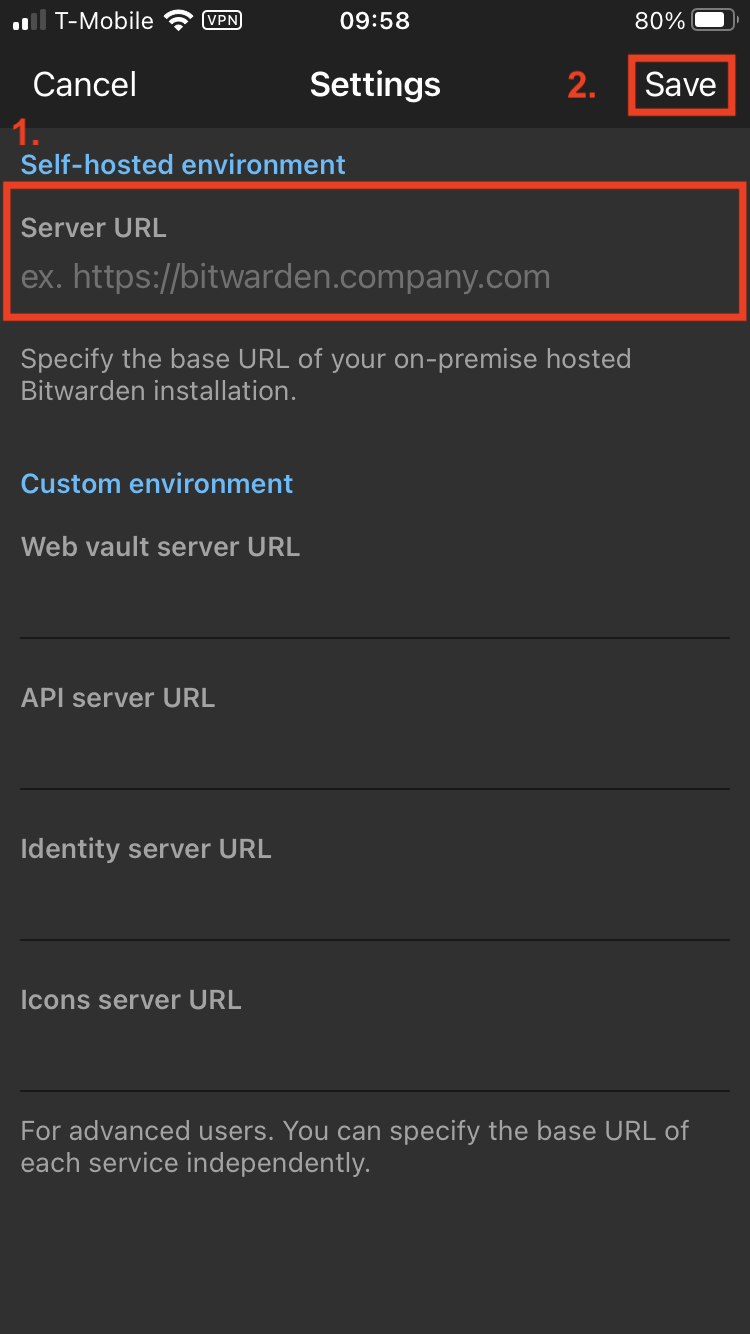
Next, enter the Bitwarden app. You’ll be greeted with a log-in screen. Go to the top left gear icon to enter the settings.
Head to the “Interfaces” tab in the Vaultwarden service on your Start9 Server:
Copy the Tor address:
Now send that address to your phone and paste it into Bitwarden.
Hit save.
Go ahead and tap ‘Log In,’ enter your credentials, and you can access your Bitwarden app / Vaultwarden server.
We suggest using Tor, however it is possible have a good experience with LAN. Once synced, your app and all your passwords will be cached and available when you are on the go and not connected to your Start9 Server, and you will only need to be on LAN to update any edits to your vault.
Visit your app store of choice and download the Bitwarden app. Once downloaded and installed, let’s go into Orbot, and add the app to the VPN apps list. You may need to hit the refresh button in the top left to get it to populate.
Next, enter the Bitwarden app. You’ll be greeted with a log-in screen. Go to the top left gear icon to enter the settings.
Head to the “Interfaces” tab in the Vaultwarden service on your Start9 Server:
Copy the LAN address:
Now send that address to your phone and paste it into Bitwarden.
Hit save.
Go ahead and tap ‘Log In,’ enter your credentials, and you can access your Bitwarden app / Vaultwarden server.
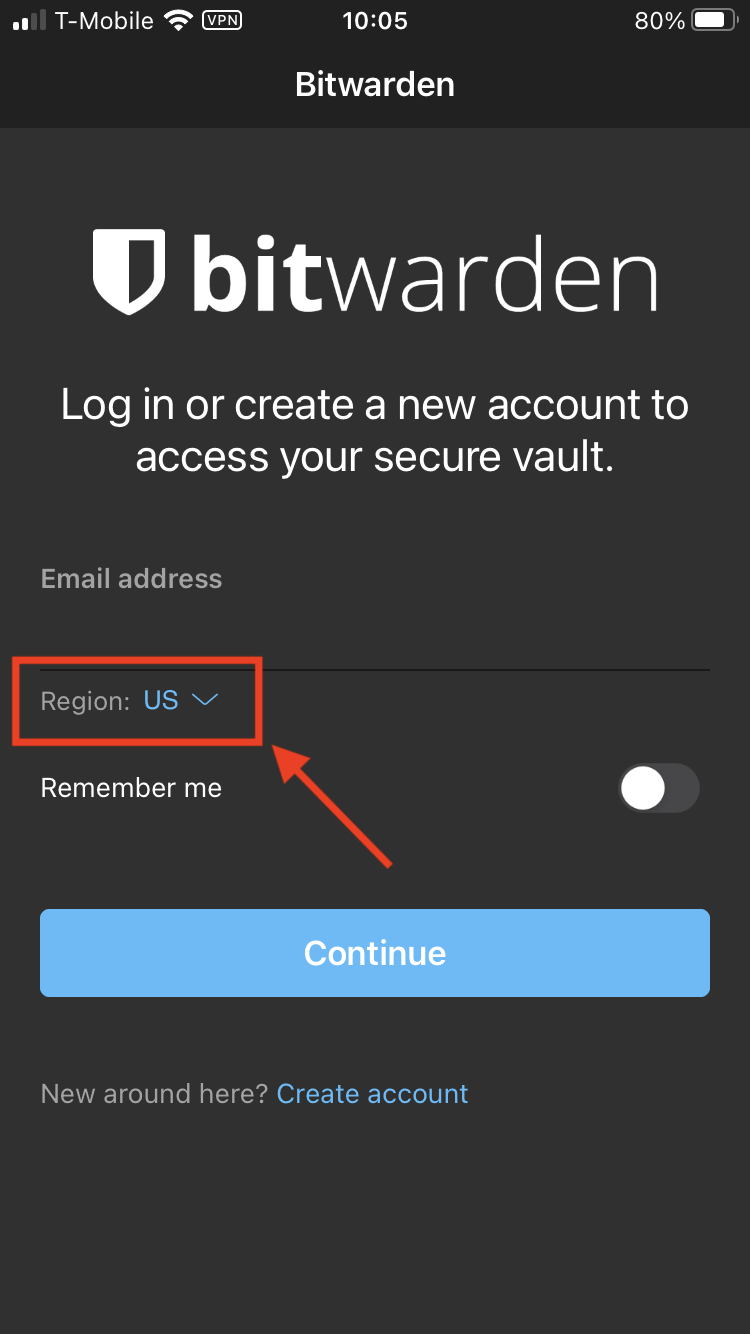
Open the Bitwarden app. You’ll be greeted with a log-in screen. Click the “Region” drop-down menu.
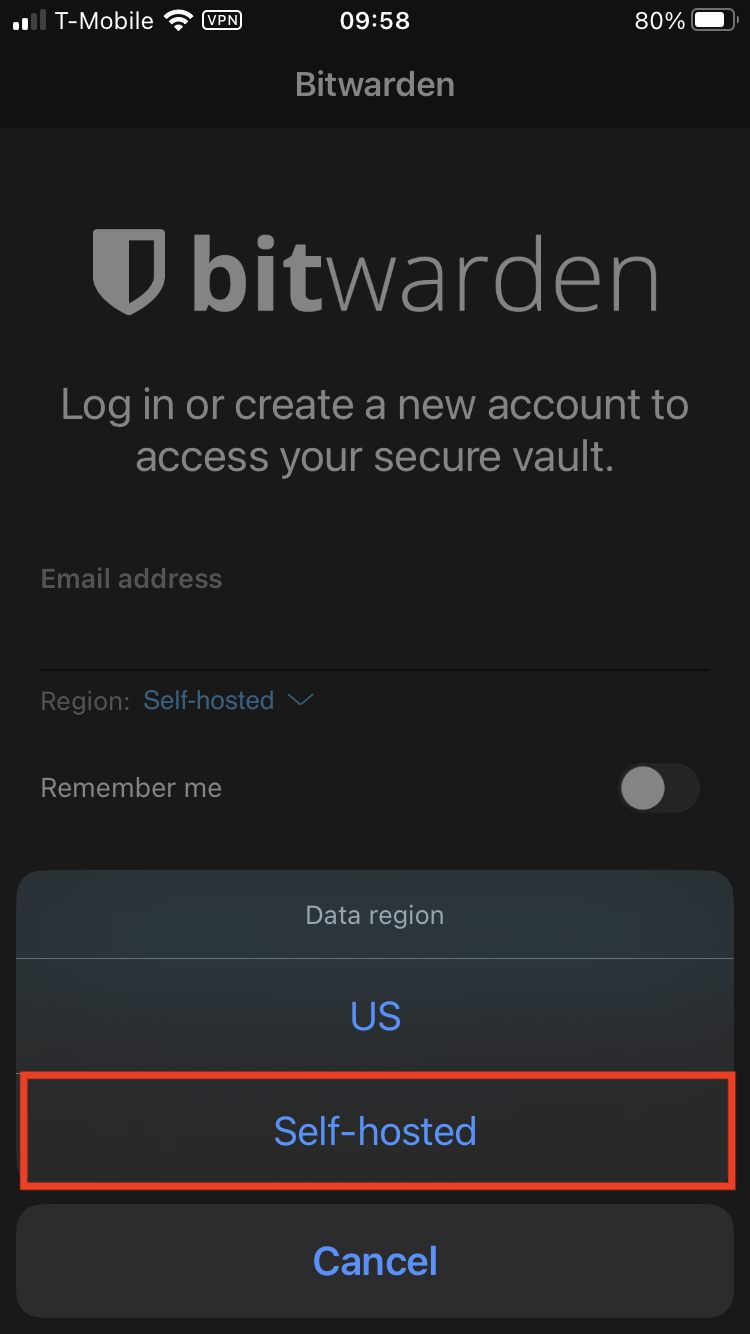
Choose the “Self-hosted” option.
Head to the “Interfaces” tab in the Vaultwarden service on your Start9 Server:
Copy the Tor address:
Now send that address to your phone and paste it into Bitwarden.
Caution
Before you hit save: The Tor address you will have copied will begin with http - Please change this to https instead of http
Now you can hit save, and you’ll be returned to the log-in screen.
Go ahead and tap ‘Log In,’ enter your credentials, and you’ll be able to access your Bitwarden app / Vaultwarden server!
We suggest using Tor, however it is possible have a good experience with LAN. Once synced, your app and all your passwords will be cached and available when you are on the go and not connected to your Start9 Server, and you will only need to be on LAN to update any edits to your vault.
Install Bitwarden either by using a package manager like apt (we recommend against using snap) or download it from here.
Run the program with the flag --proxy-server=socks5://127.0.0.1:9050 behind it. You can run this from a terminal, and if you’d like to use a shortcut, edit that shortcut file to include the flag.
As with the other solutions above, click the ‘Settings’ icon, and enter your Vaultwarden Tor address. You can then log in to your vault.
Alternatively, you may be able to run using your LAN address, but this has proven finicky, especially on Debian/Ubuntu systems. You will have better luck if you have the Root CA installed at the OS level. First, be sure to Setup LAN natively.
Open the Bitwarden app and click on the “Region” drop-down menu:
Head to the “Interfaces” tab in the Vaultwarden service on your Start9 Server:
Copy the Tor address:
Paste the address into Bitwarden and click the save button:
Enter the email used to create the account, followed by the password, then click “Log in with master password”.
We suggest using Tor, however it is possible have a good experience with LAN. Once synced, your app and all your passwords will be cached and available when you are on the go and not connected to your Start9 Server, and you will only need to be on LAN to update any edits to your vault.
Follow the Tor setup in the instructions below. Make sure the Bitwarden directory is located in your user’s directory, C:\Users\YOURUSER\AppData\Local\Bitwarden. This is because you need permission to run over a proxy. You can make a shortcut wherever you’d like.
Right-click the shortcut and click ‘Properties.’ Add the flag --proxy-server=socks5://127.0.0.1:9050 to the end of the ‘Target’ field. Click ‘Apply,’ then ‘OK.’ Close Properties and launch the shortcut.
As with the other solutions above, click the ‘Settings’ icon, and enter your Vaultwarden Tor address. You can then log in to your vault.
This is not known to work at this time - LAN is tricky with Windows due to the often unreliable Bonjour and Bonjour Print Services required for handling mDNS. We suggest using Tor anyway if you are able as you will then be able to maintain connectivity to your server from anywhere in the world.