Caution
You are not reading the latest stable version of this documentation. If you want up-to-date information, please have a look at 0.3.5.x.
Joplin is an open source note-taking app. Capture your thoughts and securely access them from any device. First set up your client devices, so that Nextcloud will automatically keep your notes synced.
Clients available for:
Linux
Mac
Windows
Android
iOS
This guide will go over how to connect Joplin running on a desktop machine to your Start9 server’s Nextcloud over LAN.
Note
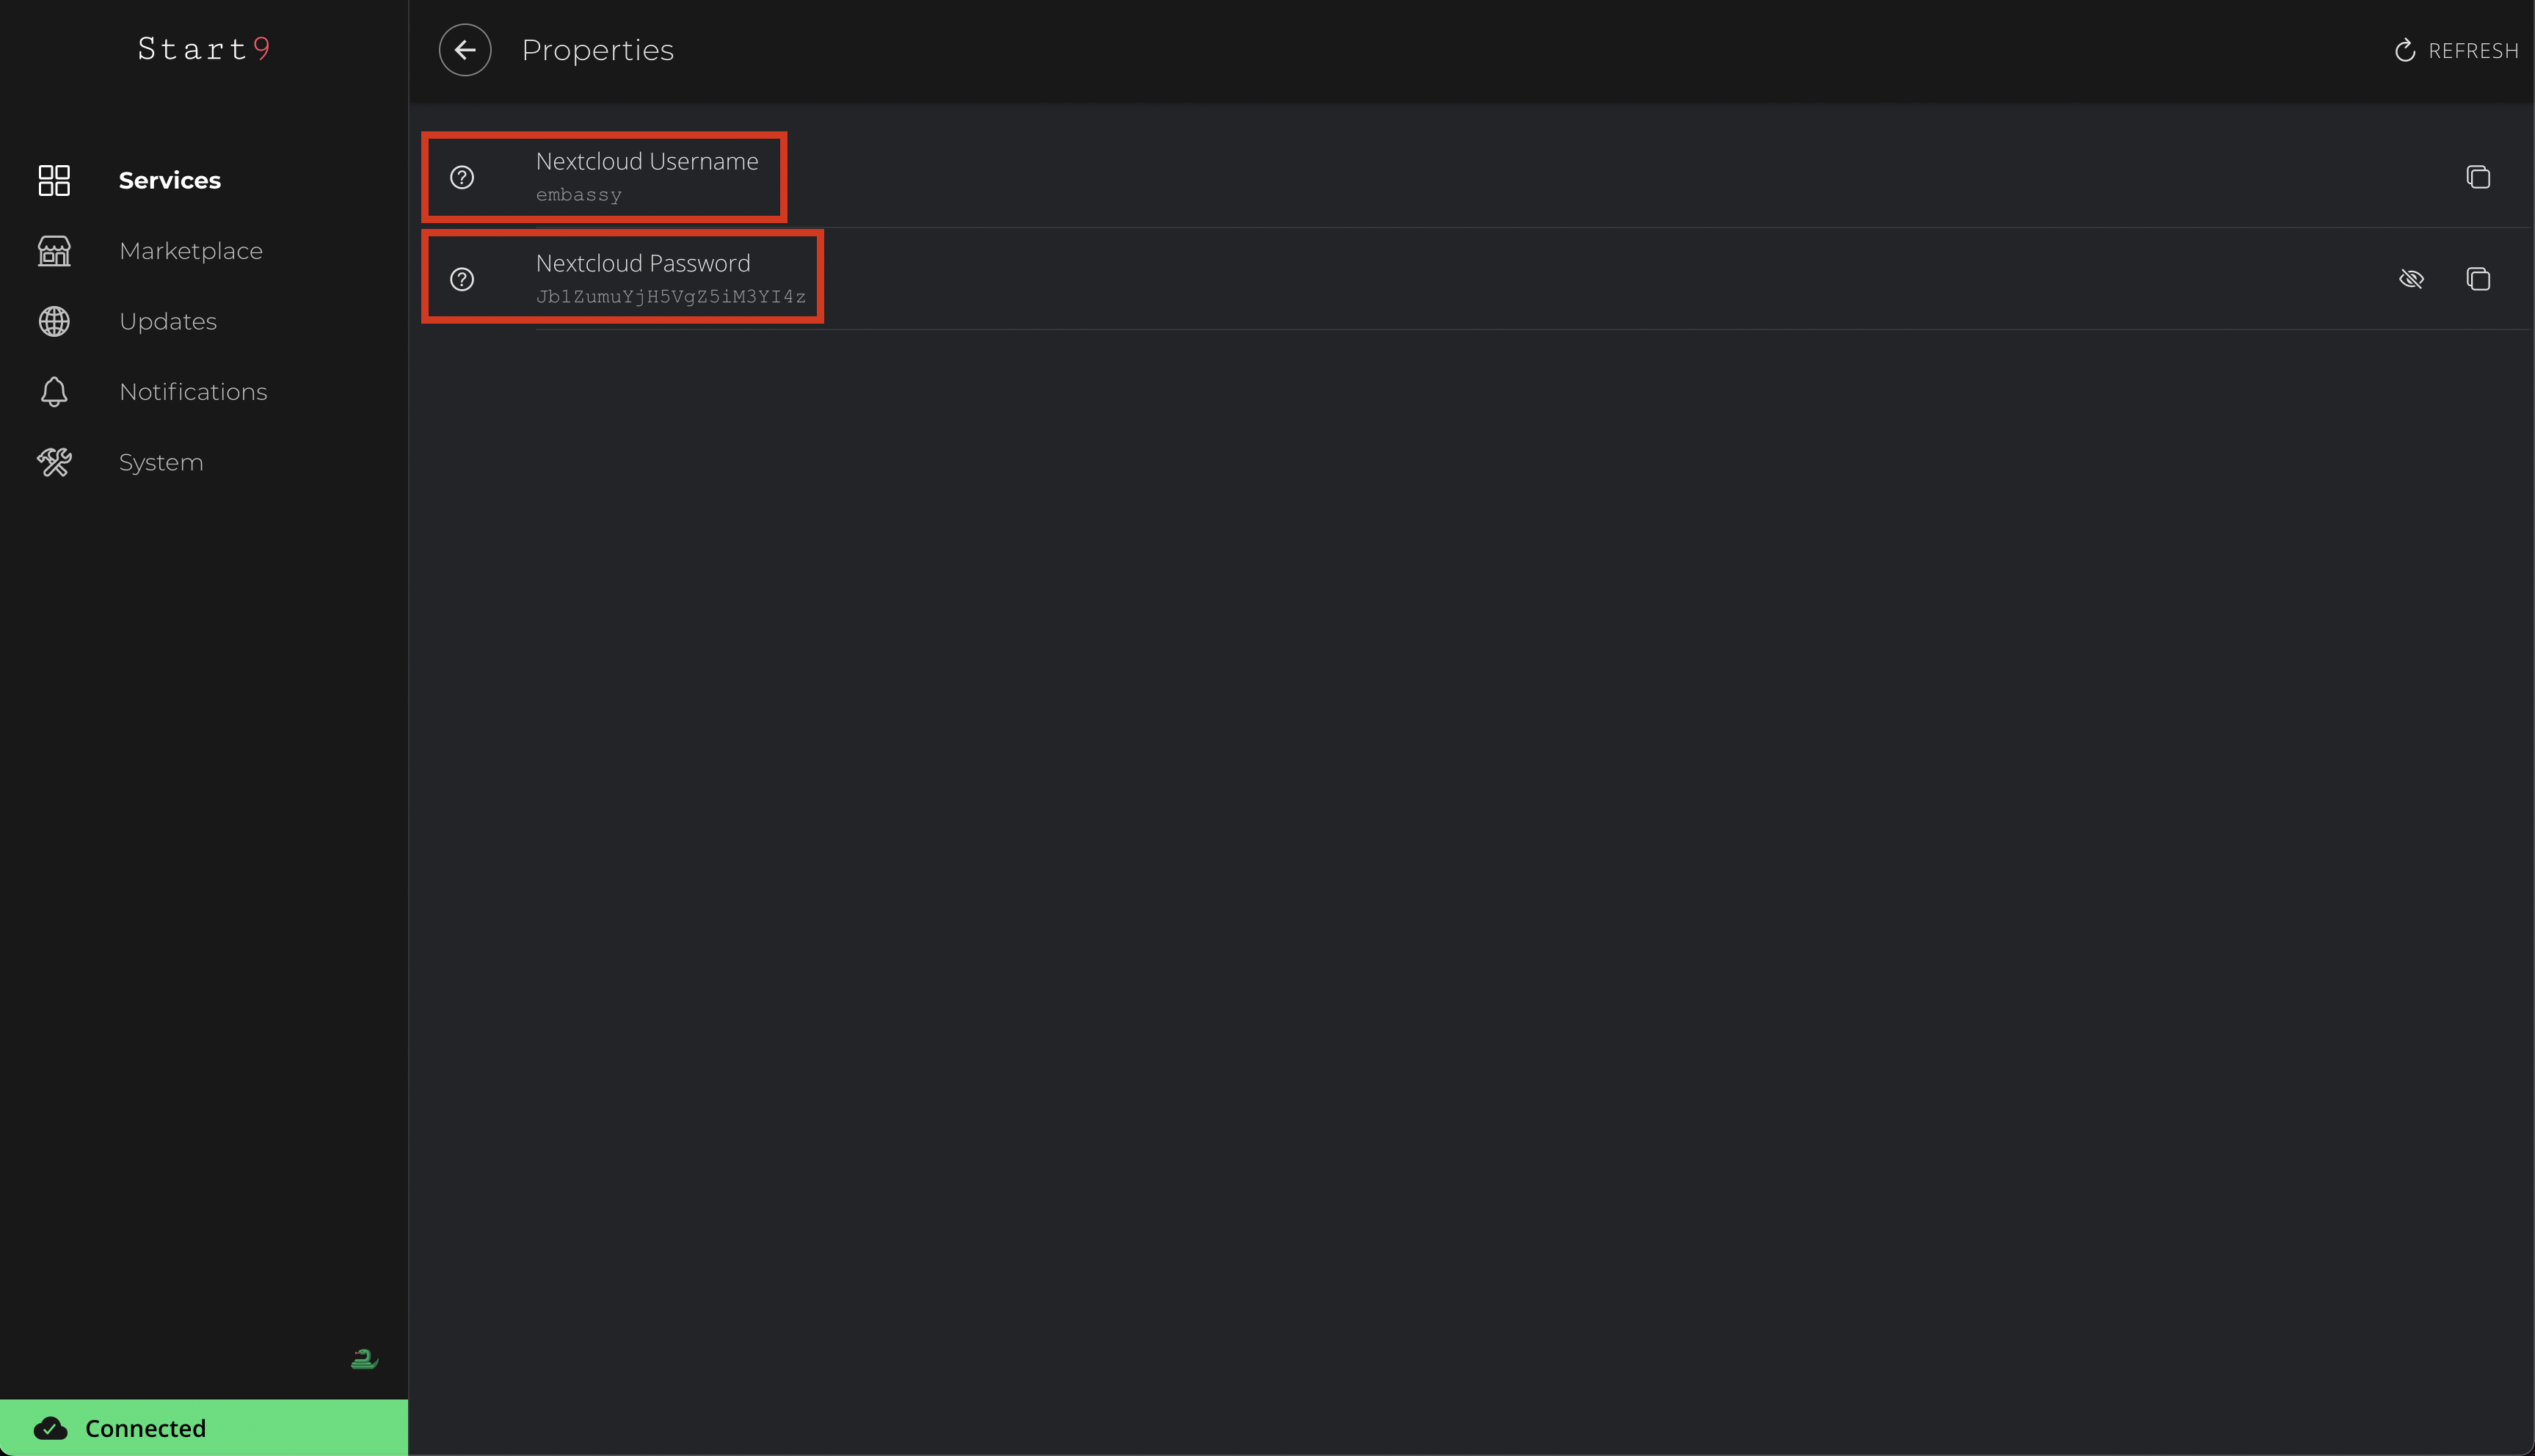
This guide assumes your Nextcloud username is “embassy,” replace with your username if different.
You will need your device set up to connect via LAN first.
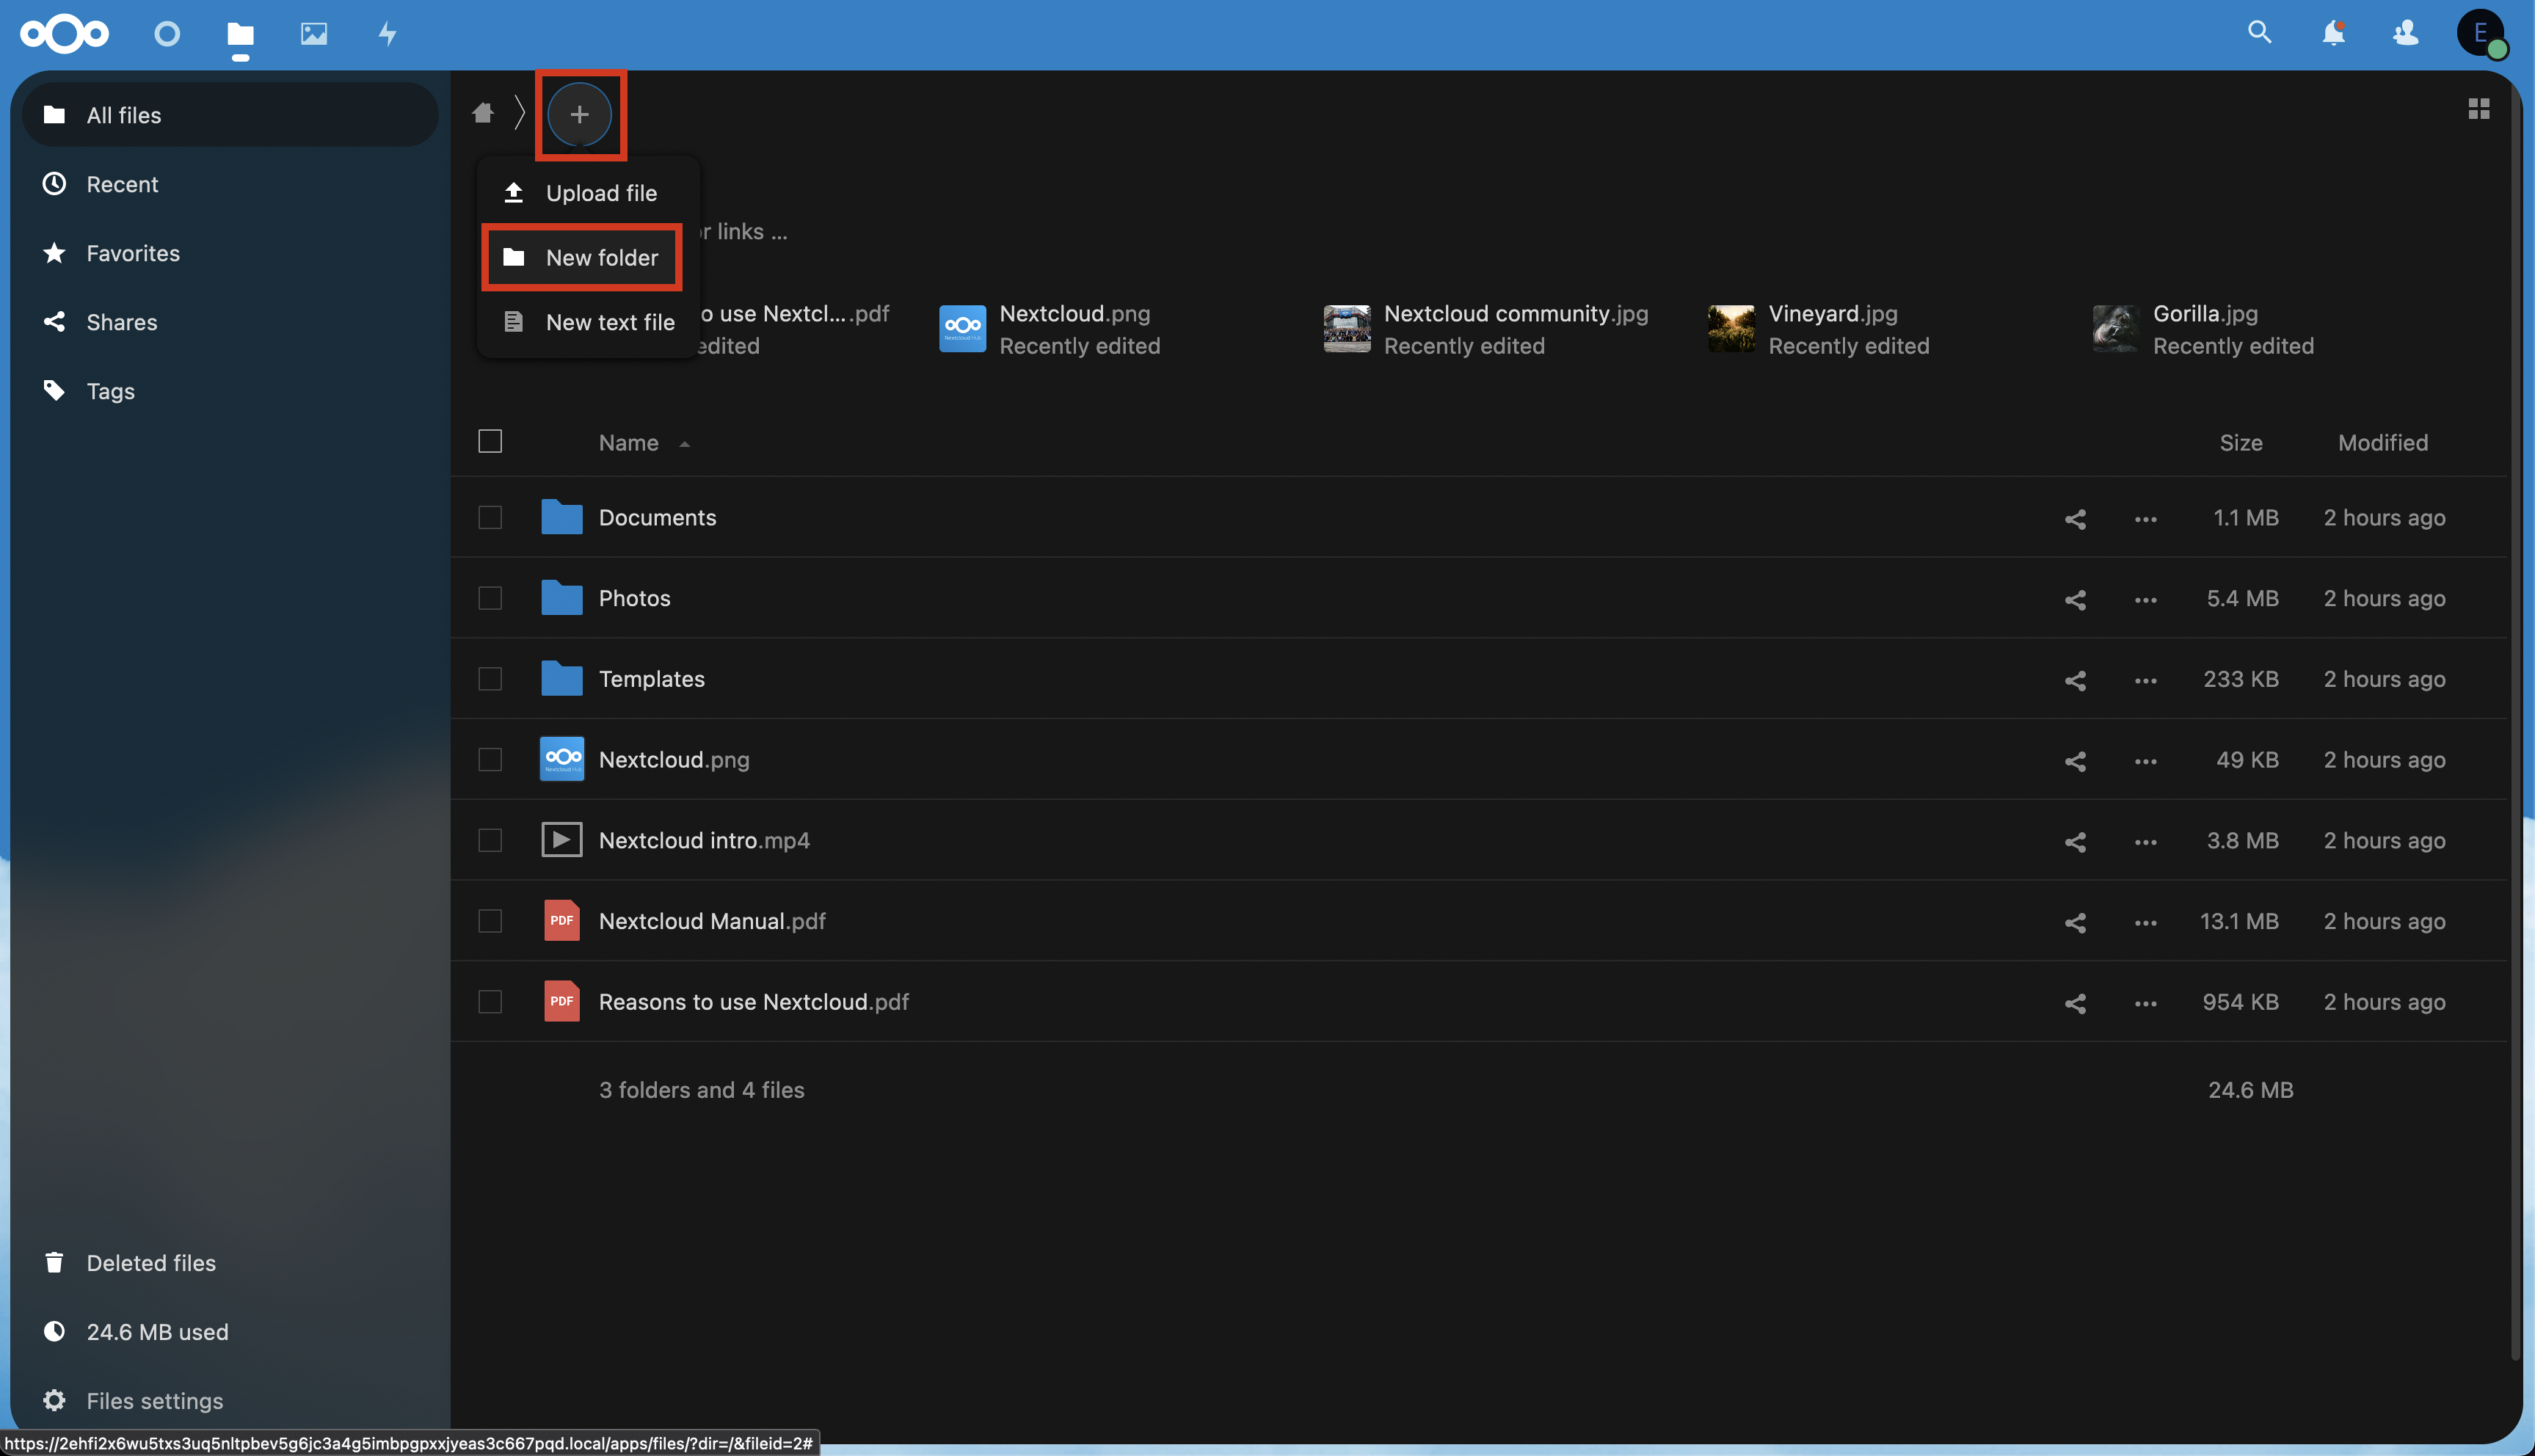
First go into Nextcloud on your server and click on the “Files” app icon.
Click on the + icon, then “New folder”.
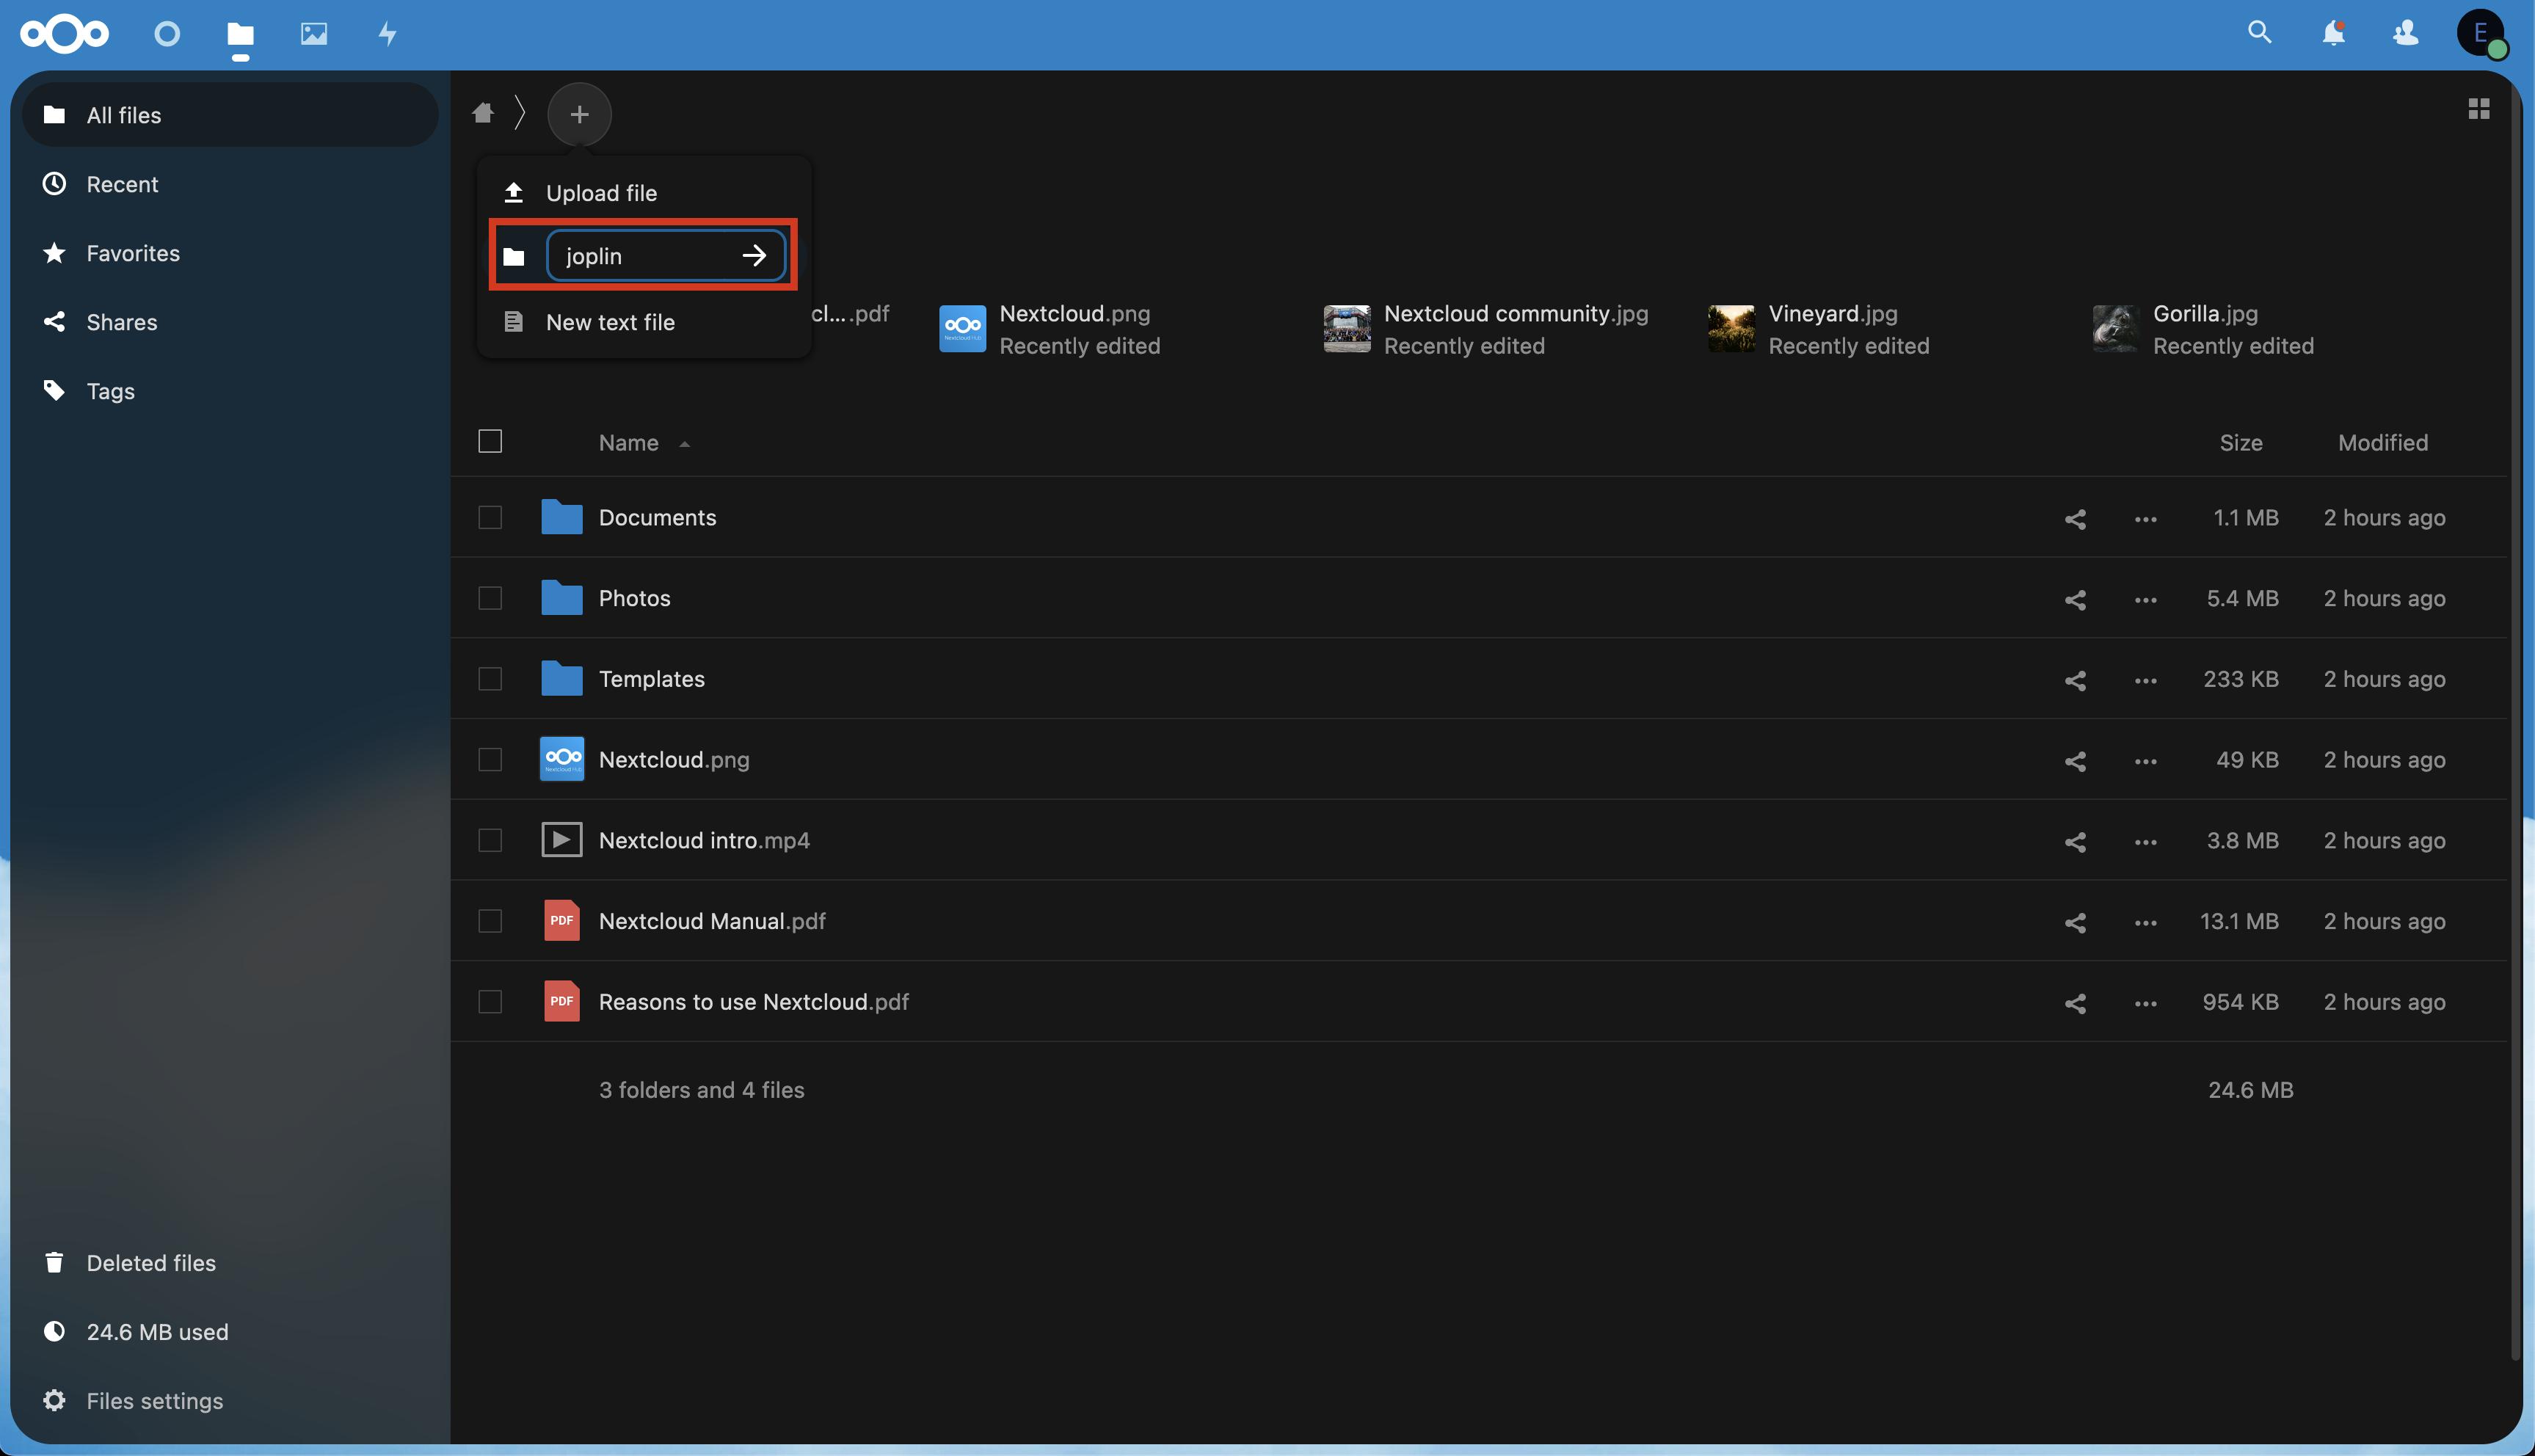
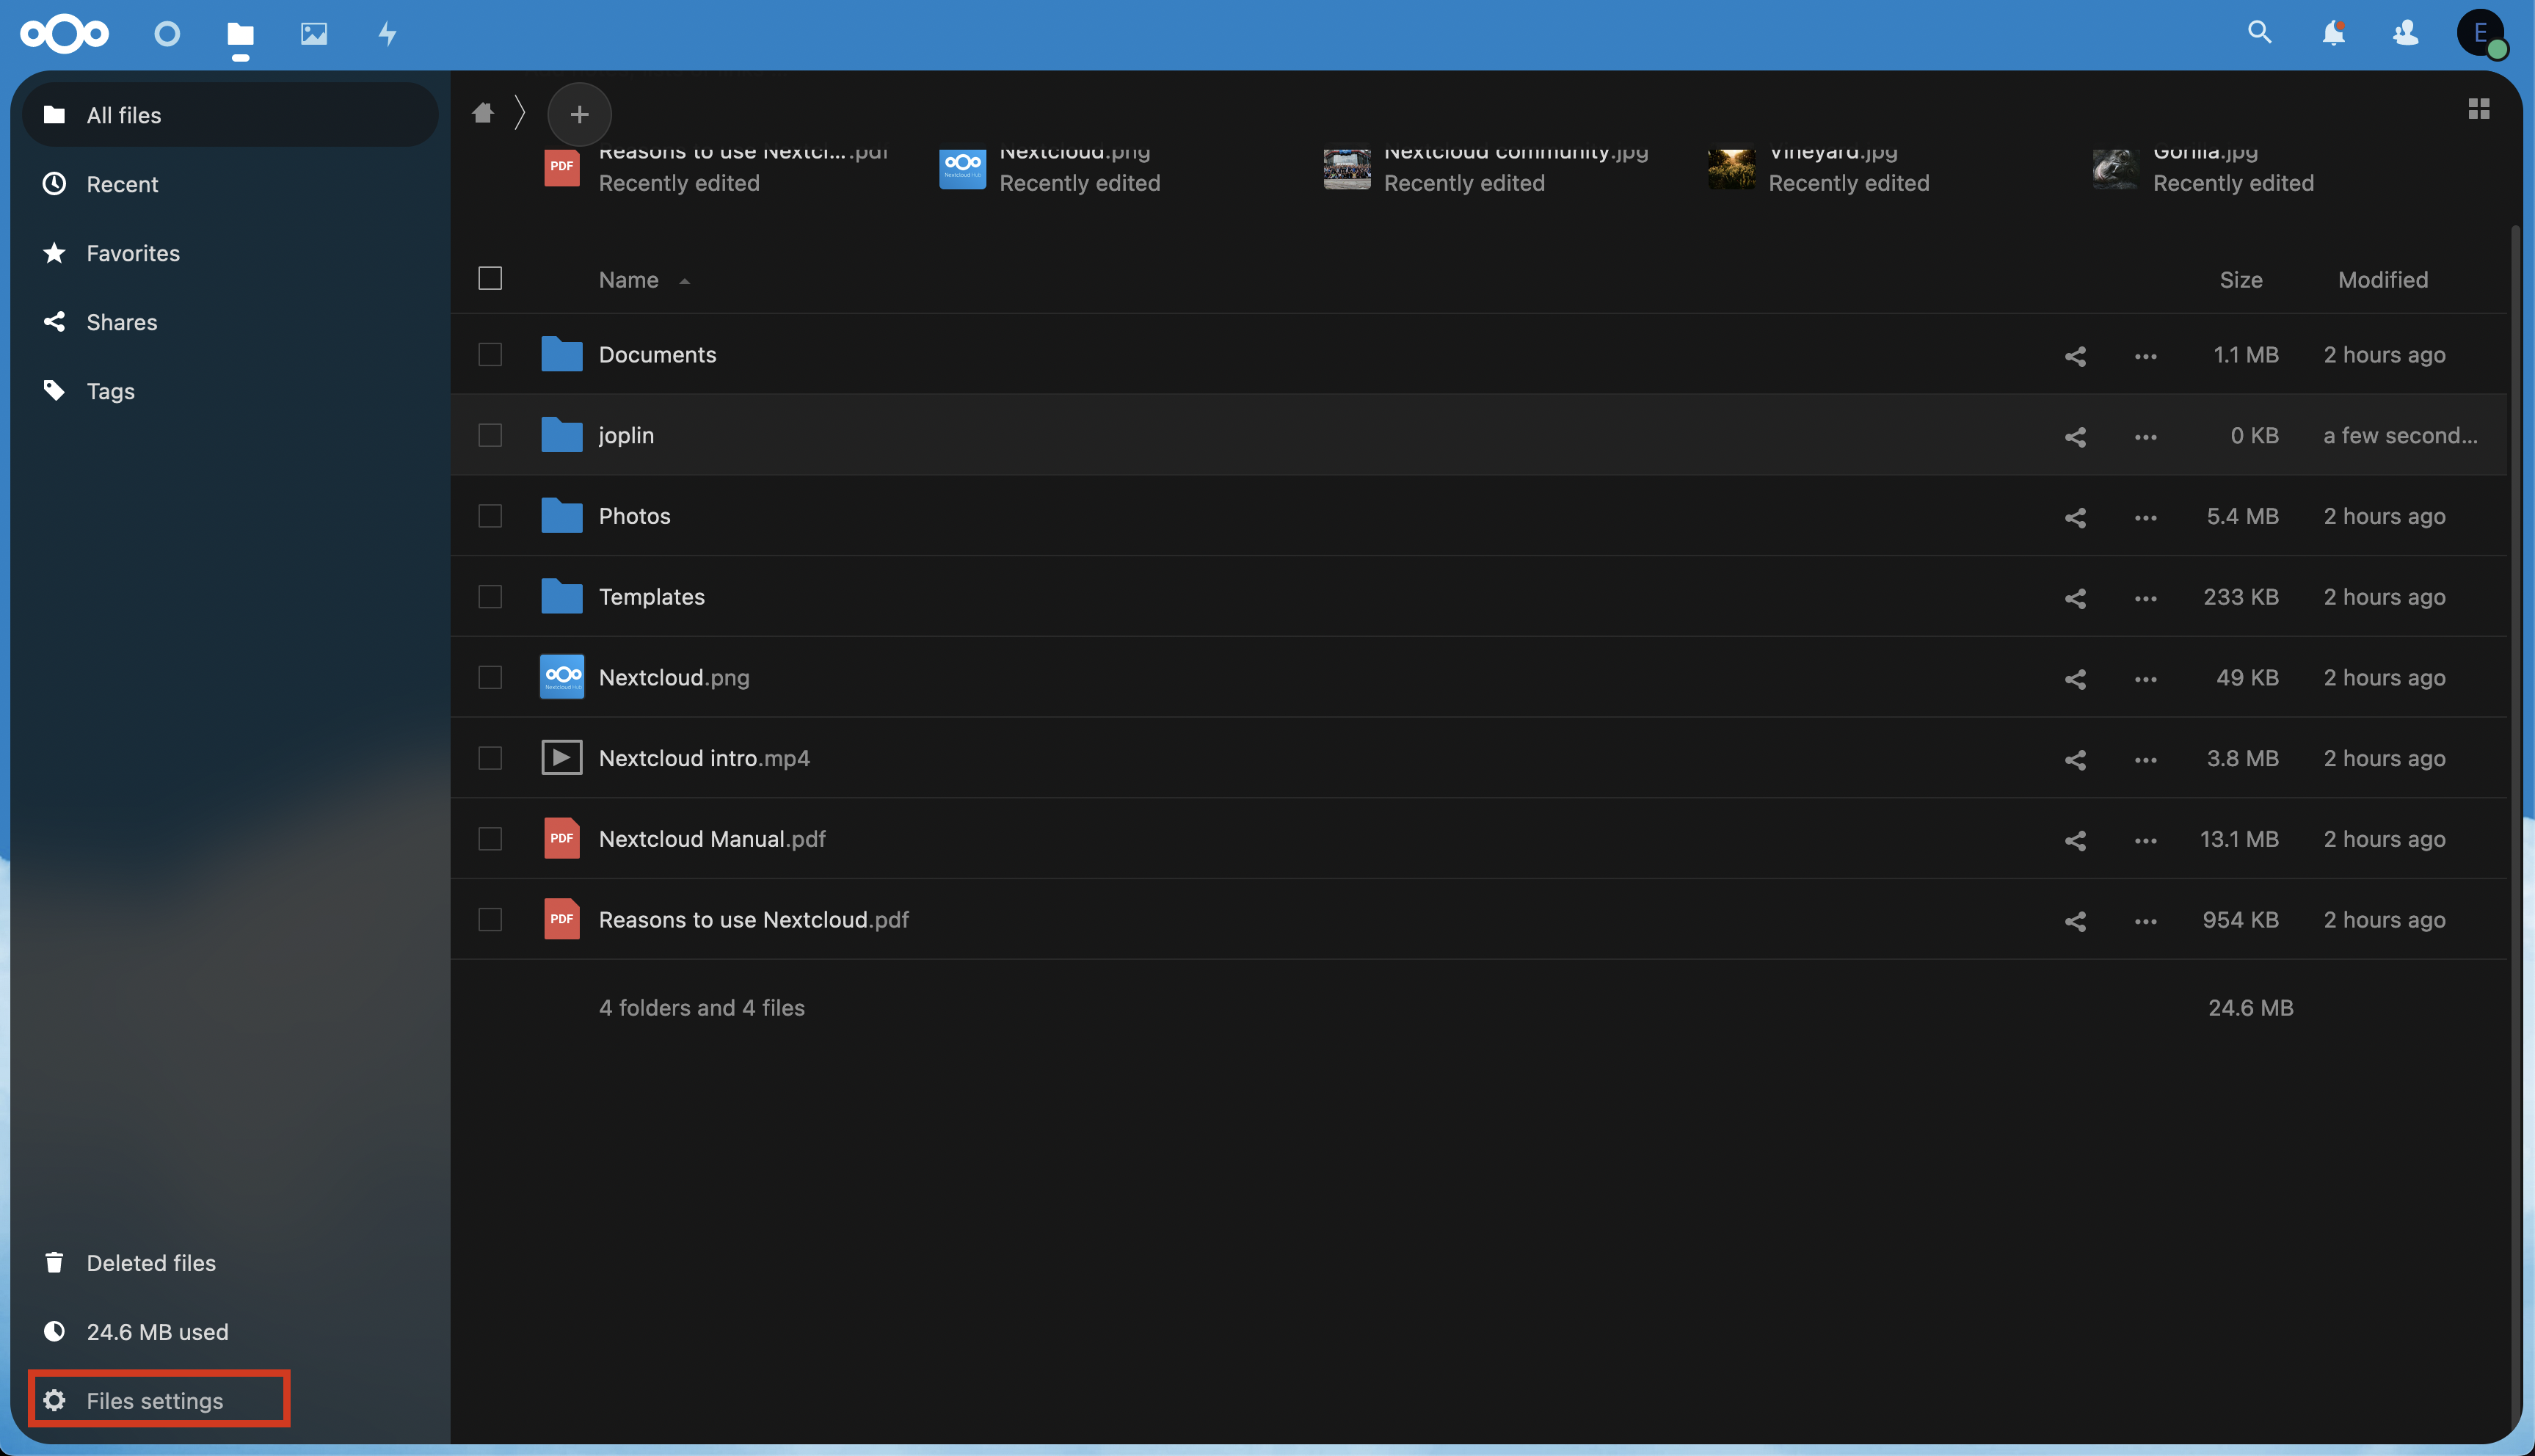
Create a new folder called “joplin” and click the arrow to the right.
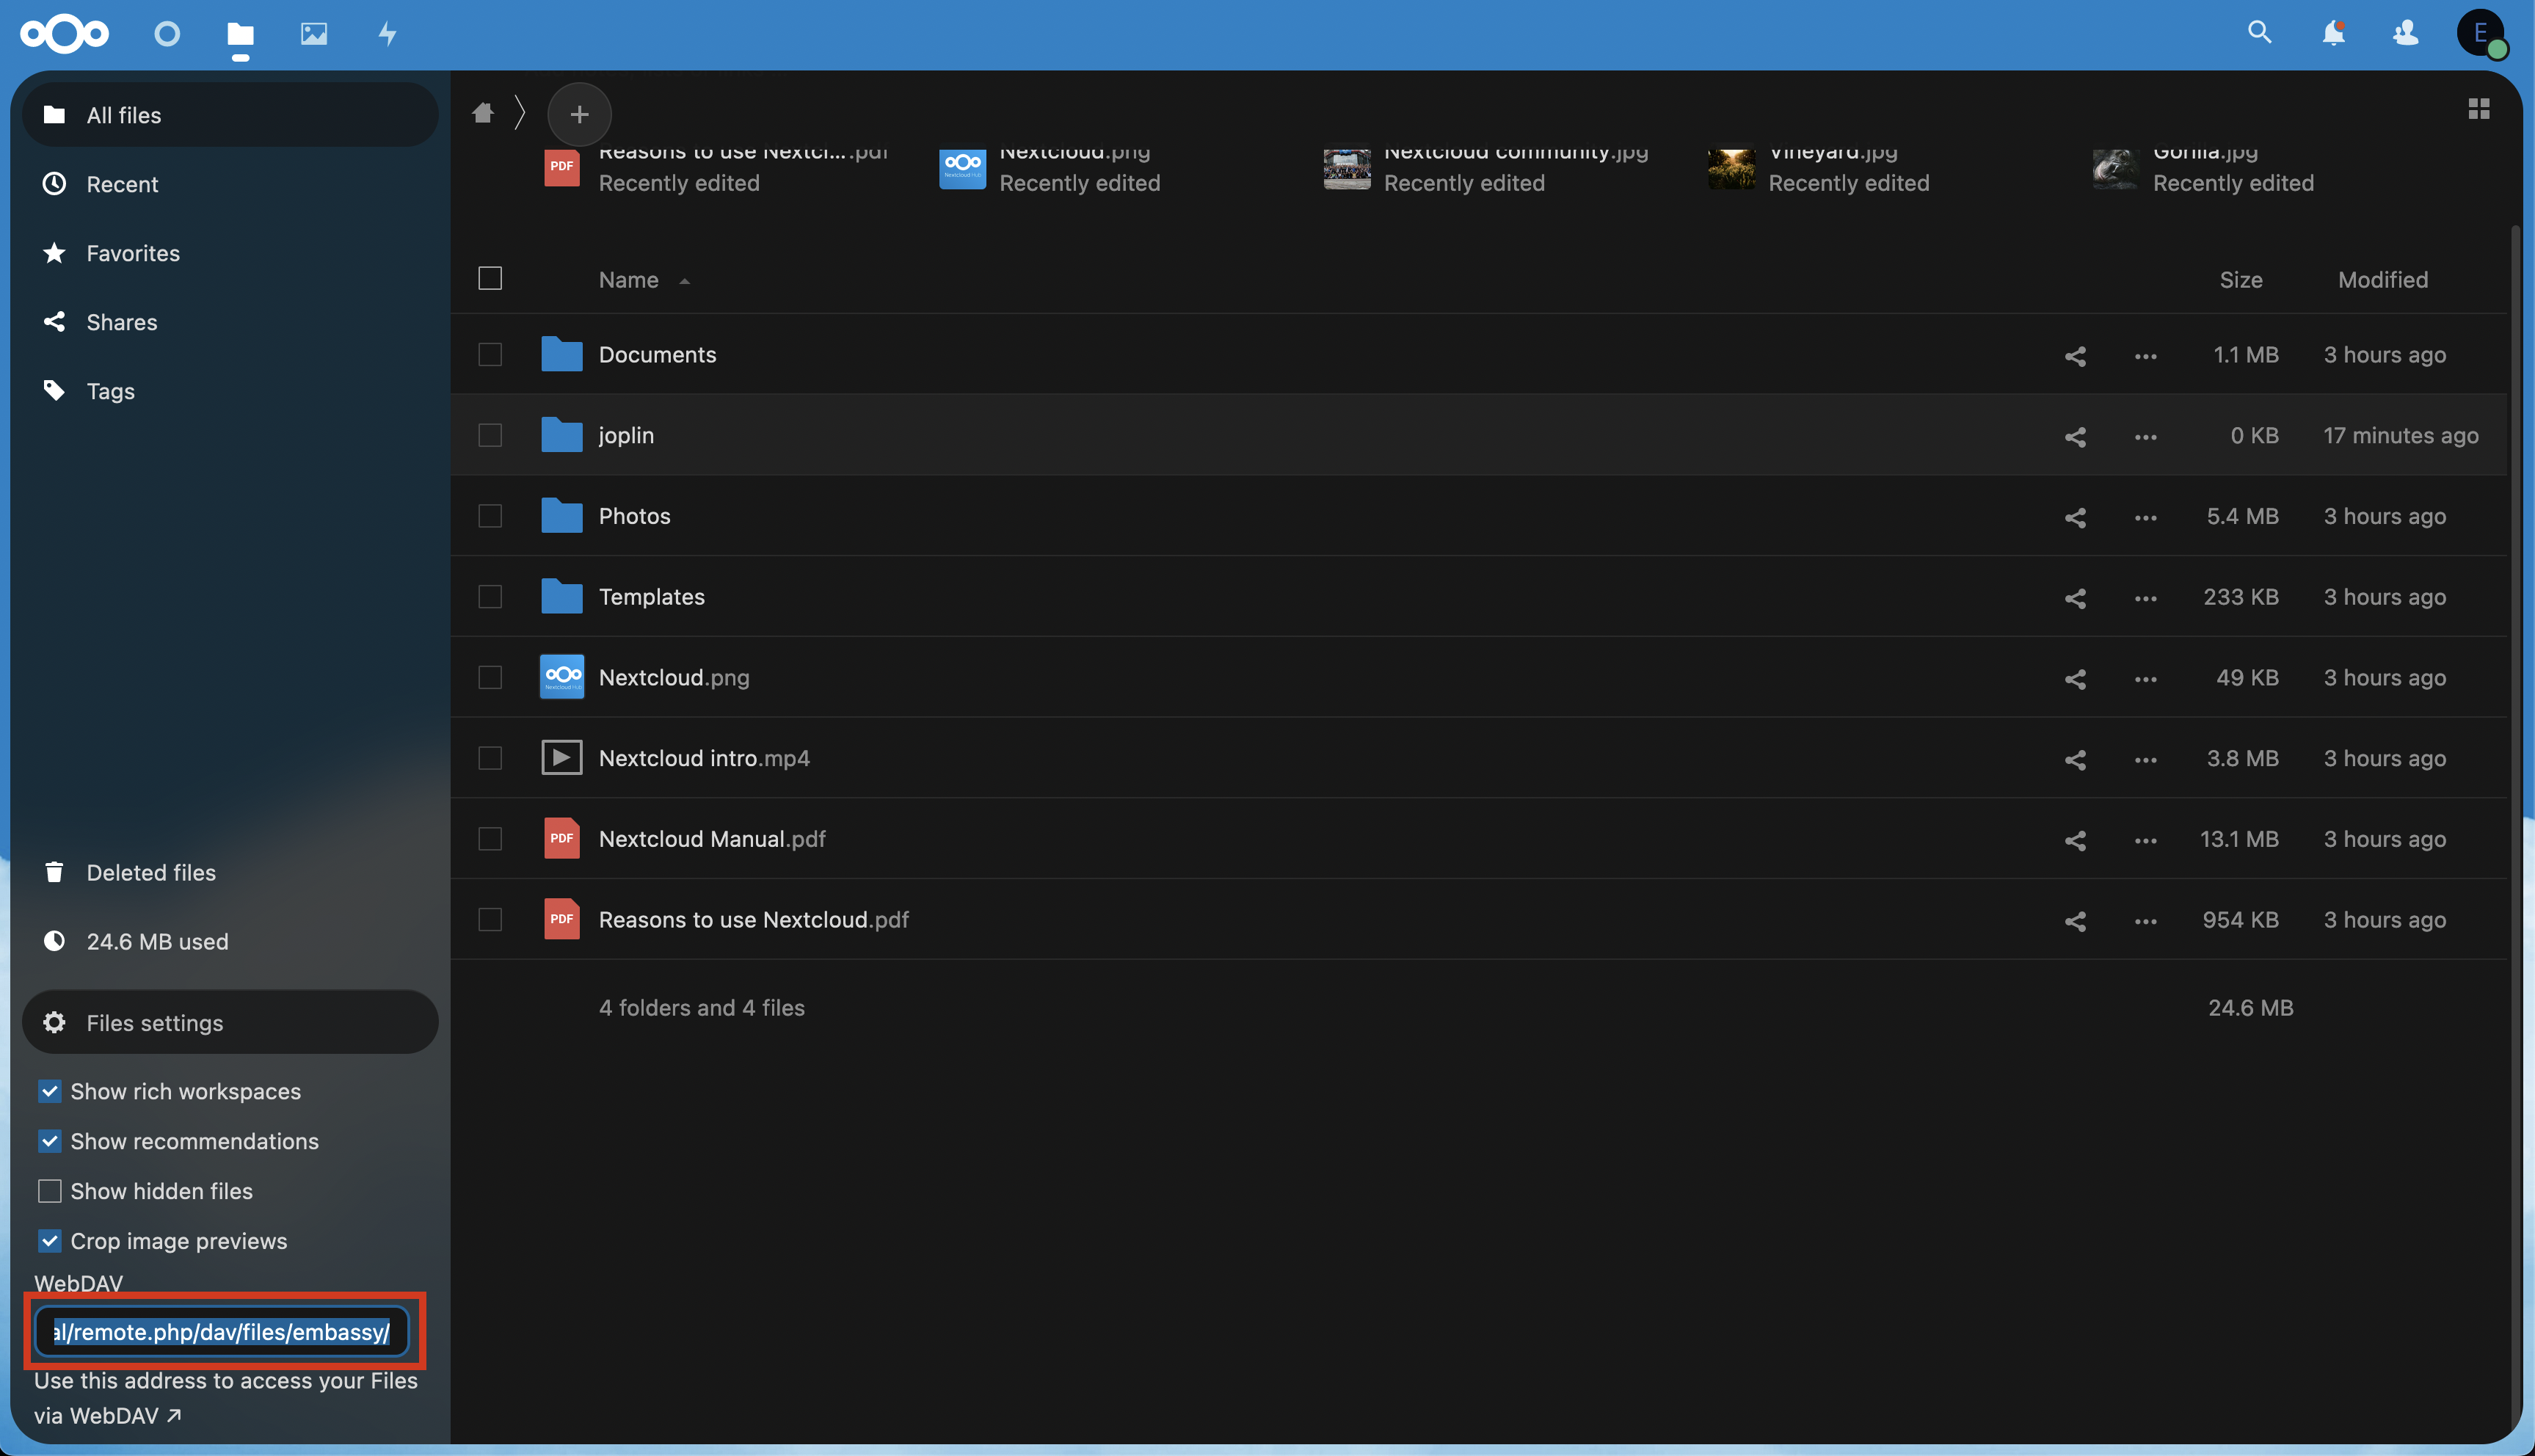
Click on “Files settings” in the bottom left and copy the WebDAV link.
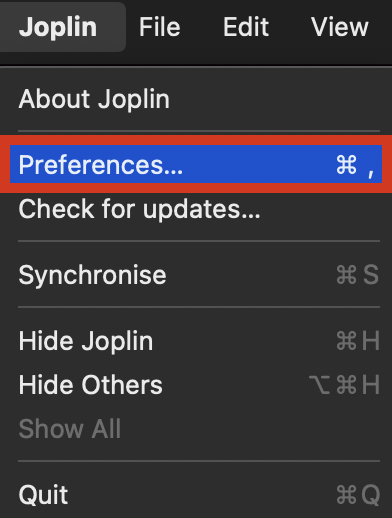
Open up Joplin, click on “Joplin” in the top left and click “Preferences” (on Mac).
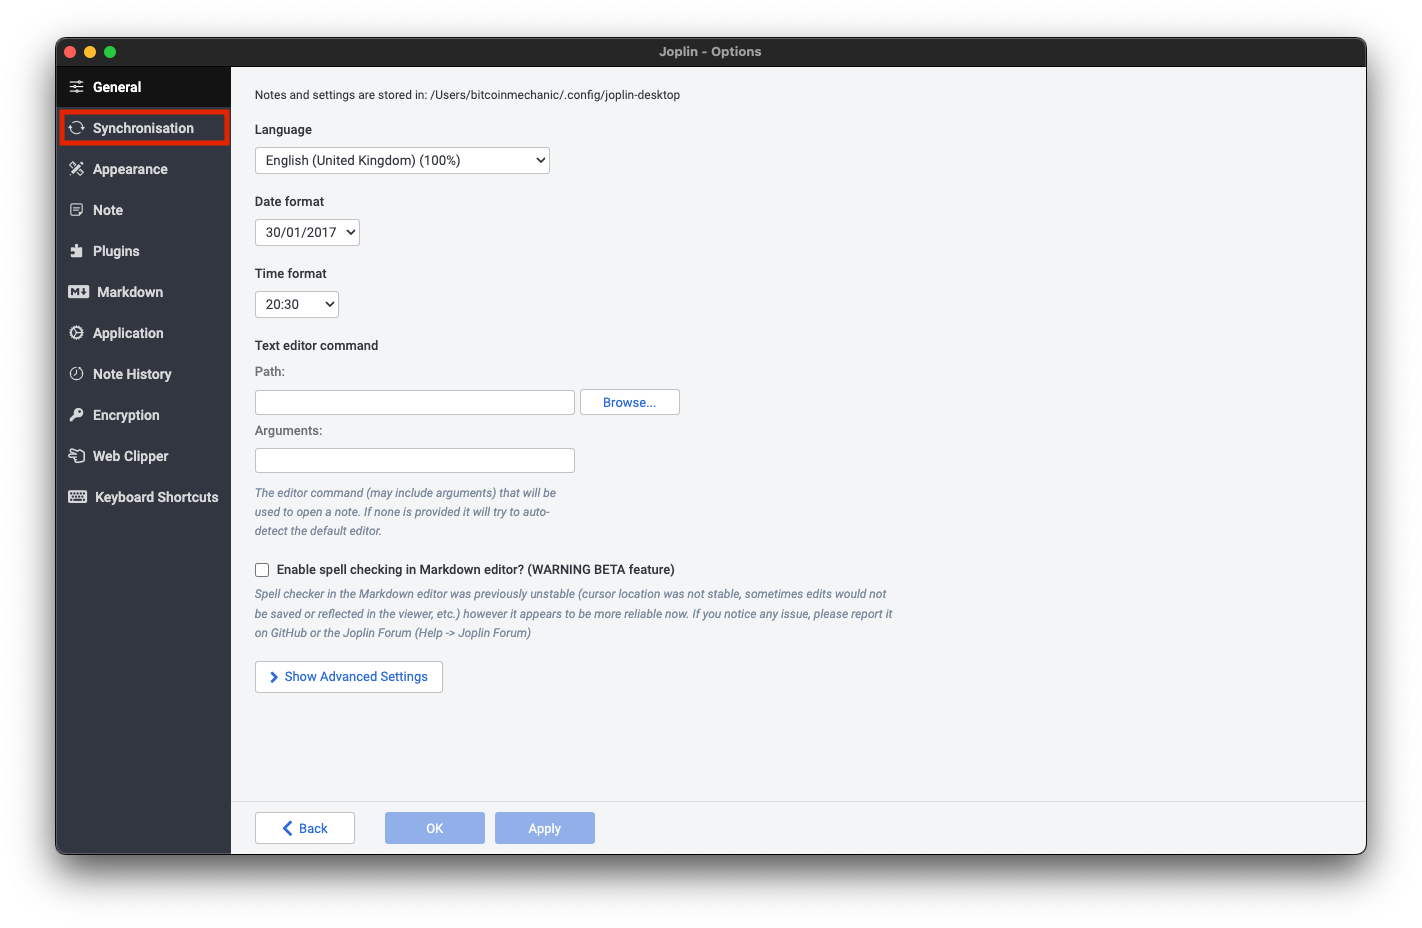
Click on “Synchronisation”.
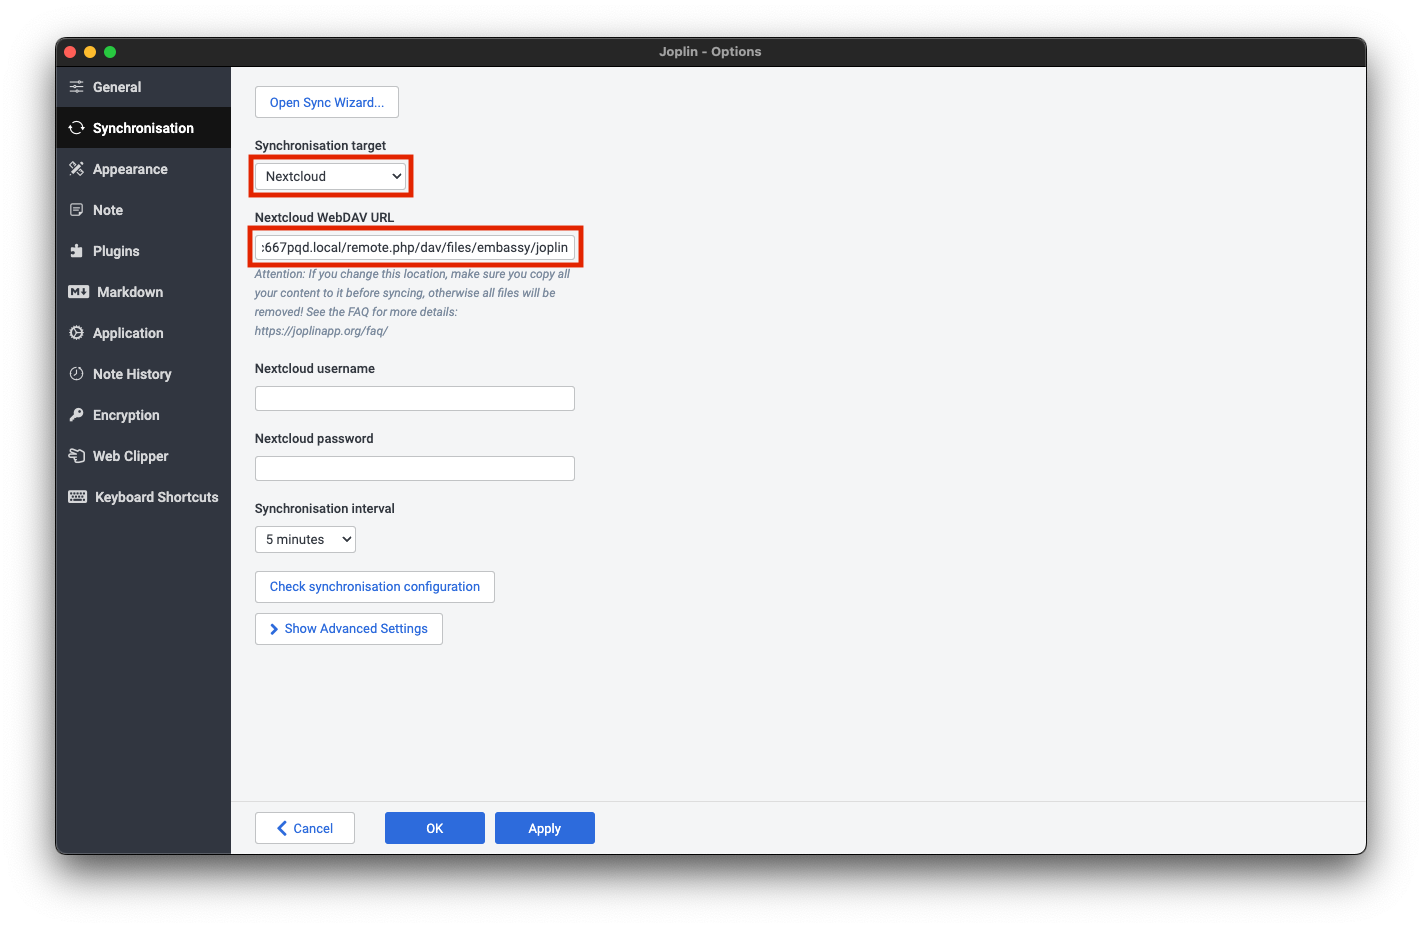
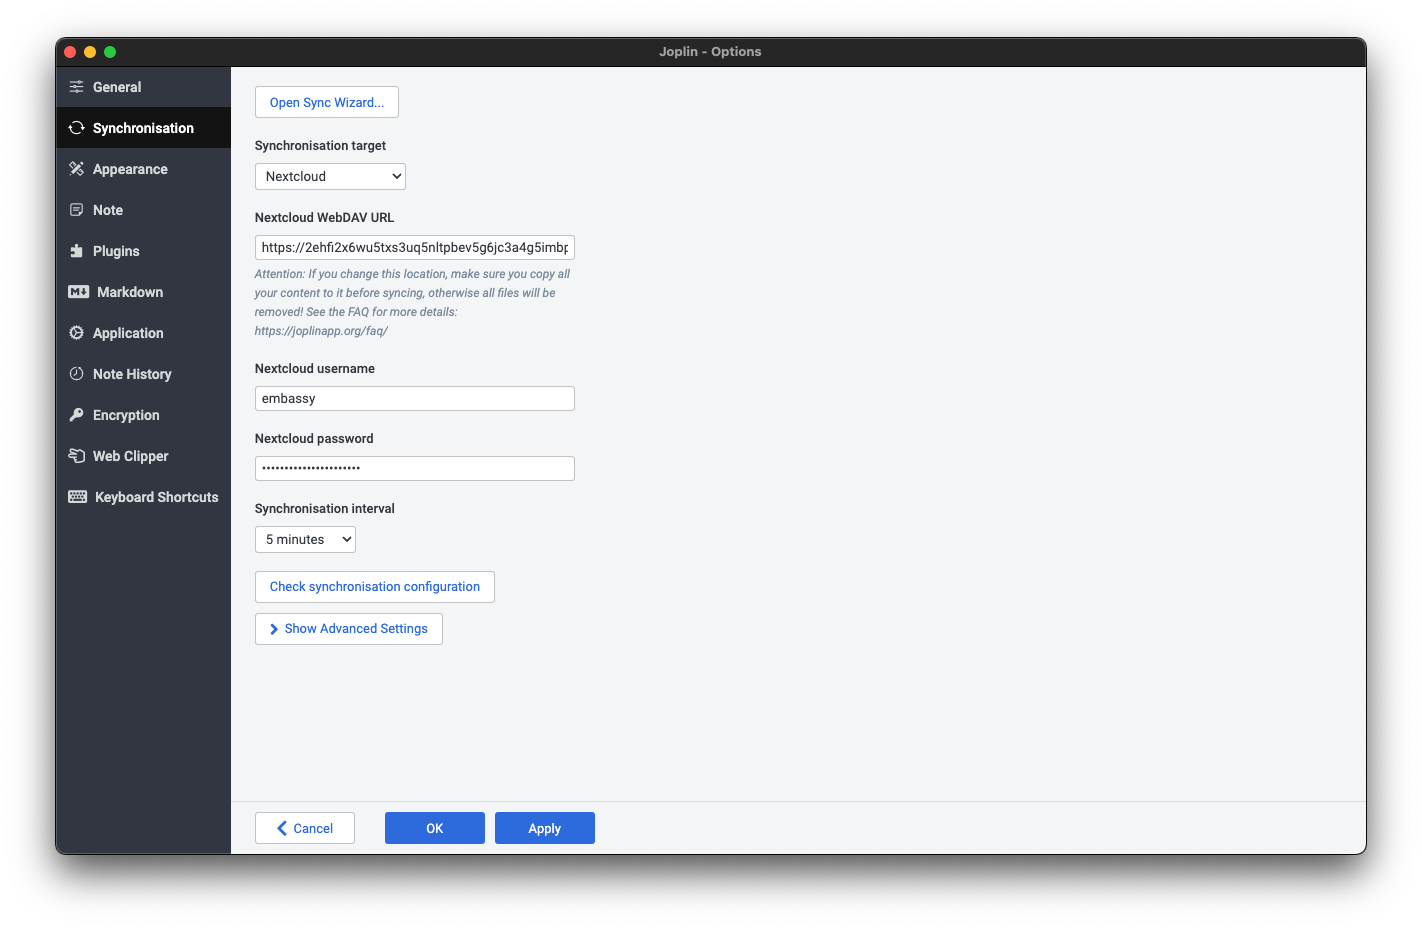
Under “Synchronisation target” select “Nextcloud”, paste the WebDAV and append onto the end of it “joplin” so the entire URL should look like this (replace xxxx with your unique Nextcloud LAN address): https://xxxx.local/remote.php/dav/files/embassy/joplin.
Under “Nextcloud username” enter “embassy” (or your username).
Under “Nextcloud password” enter your password.
The username and password for your Nextcloud can be found in your server’s UI by clicking on the Nextcloud service then clicking on “Properties”.
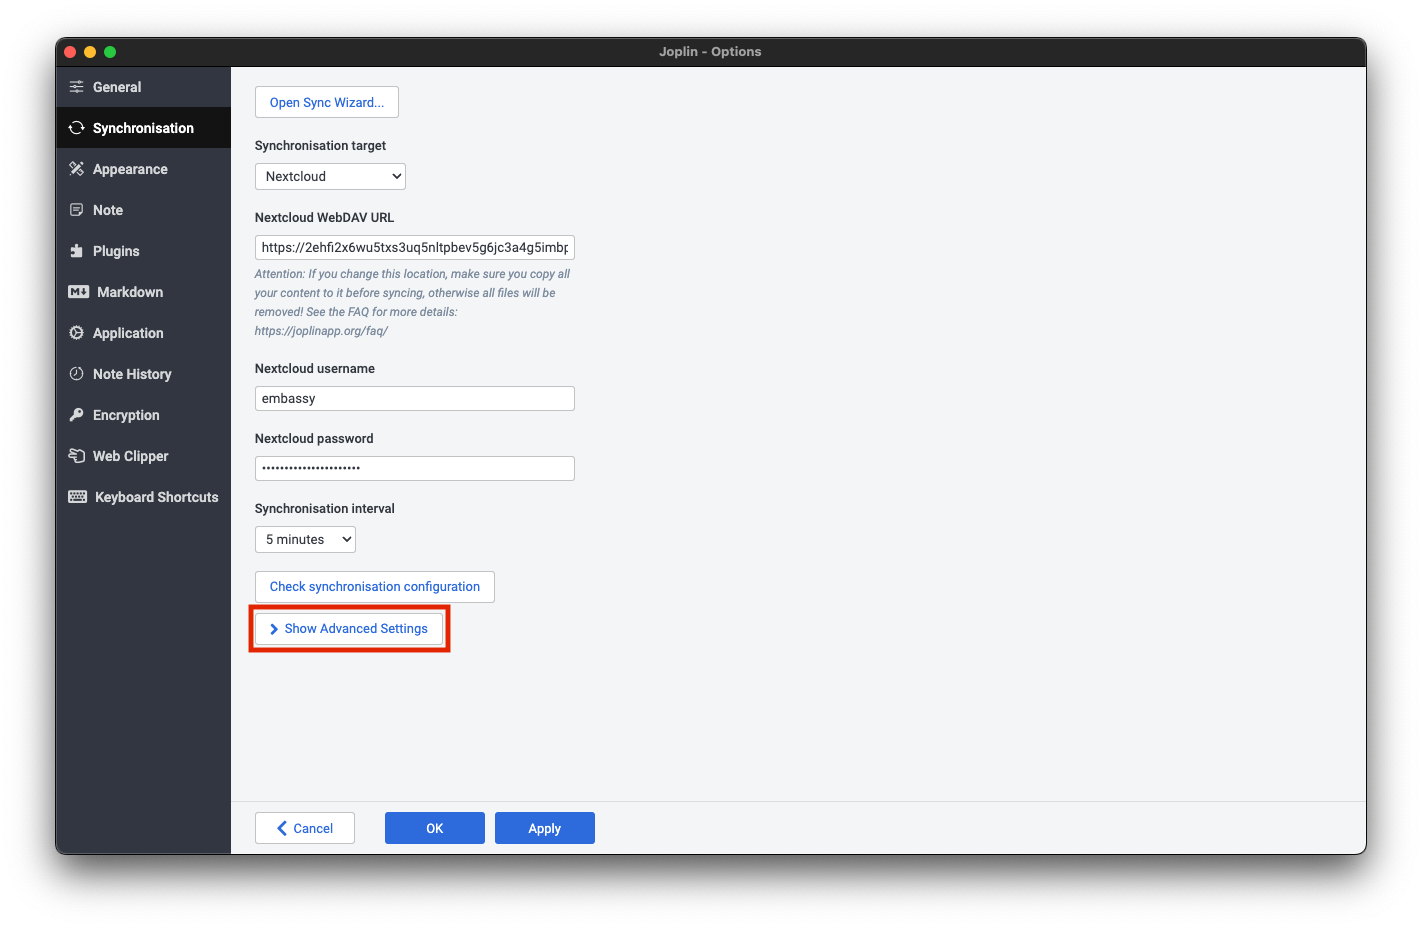
Now click “Show advanced settings”.
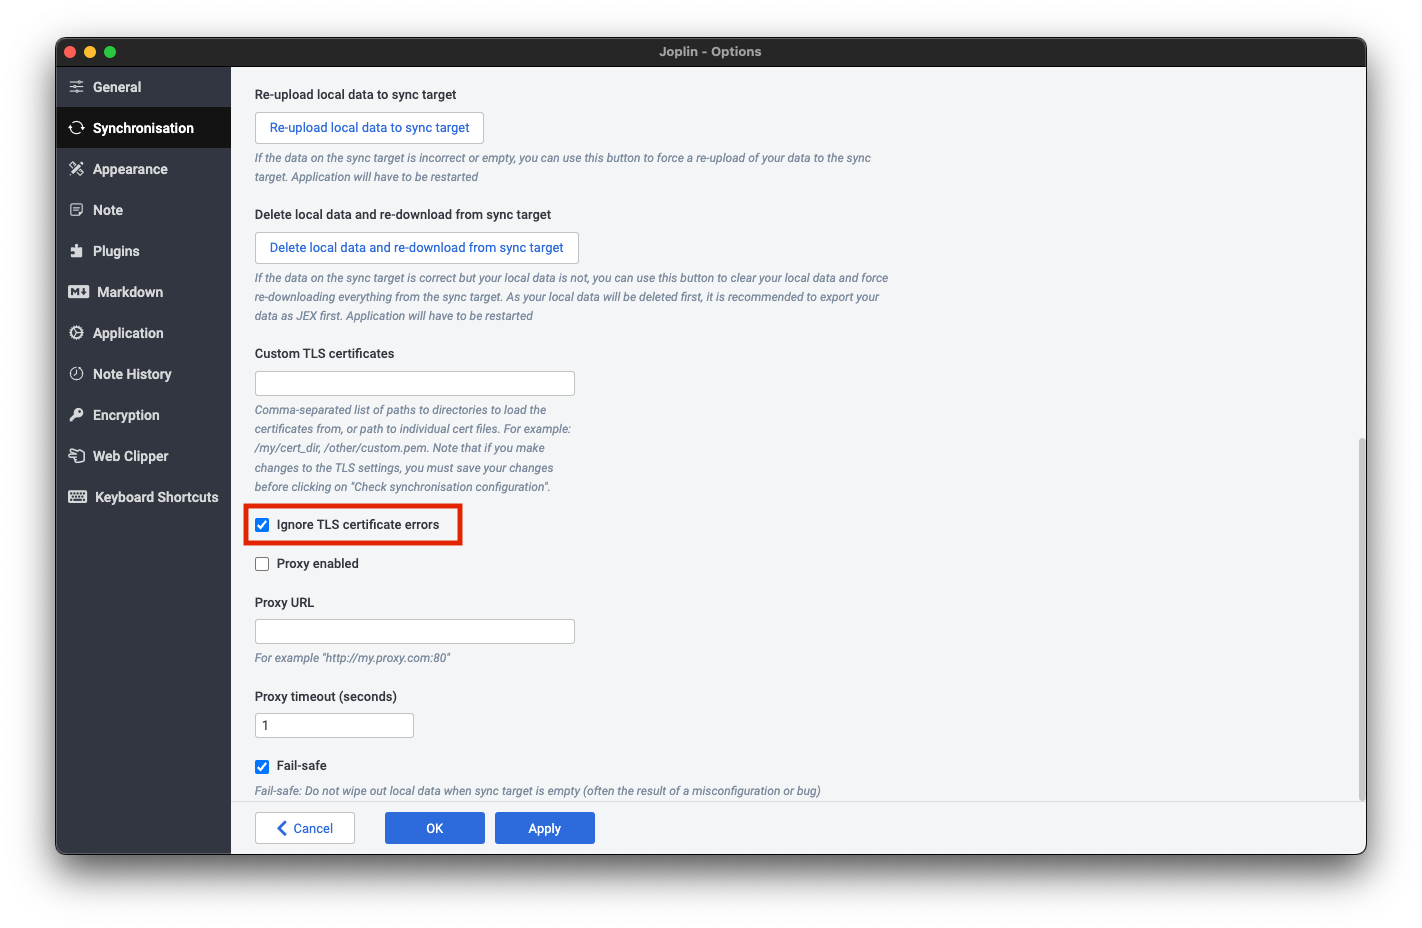
Scroll down then check the box that says “Ignore TLS certificate errors”.
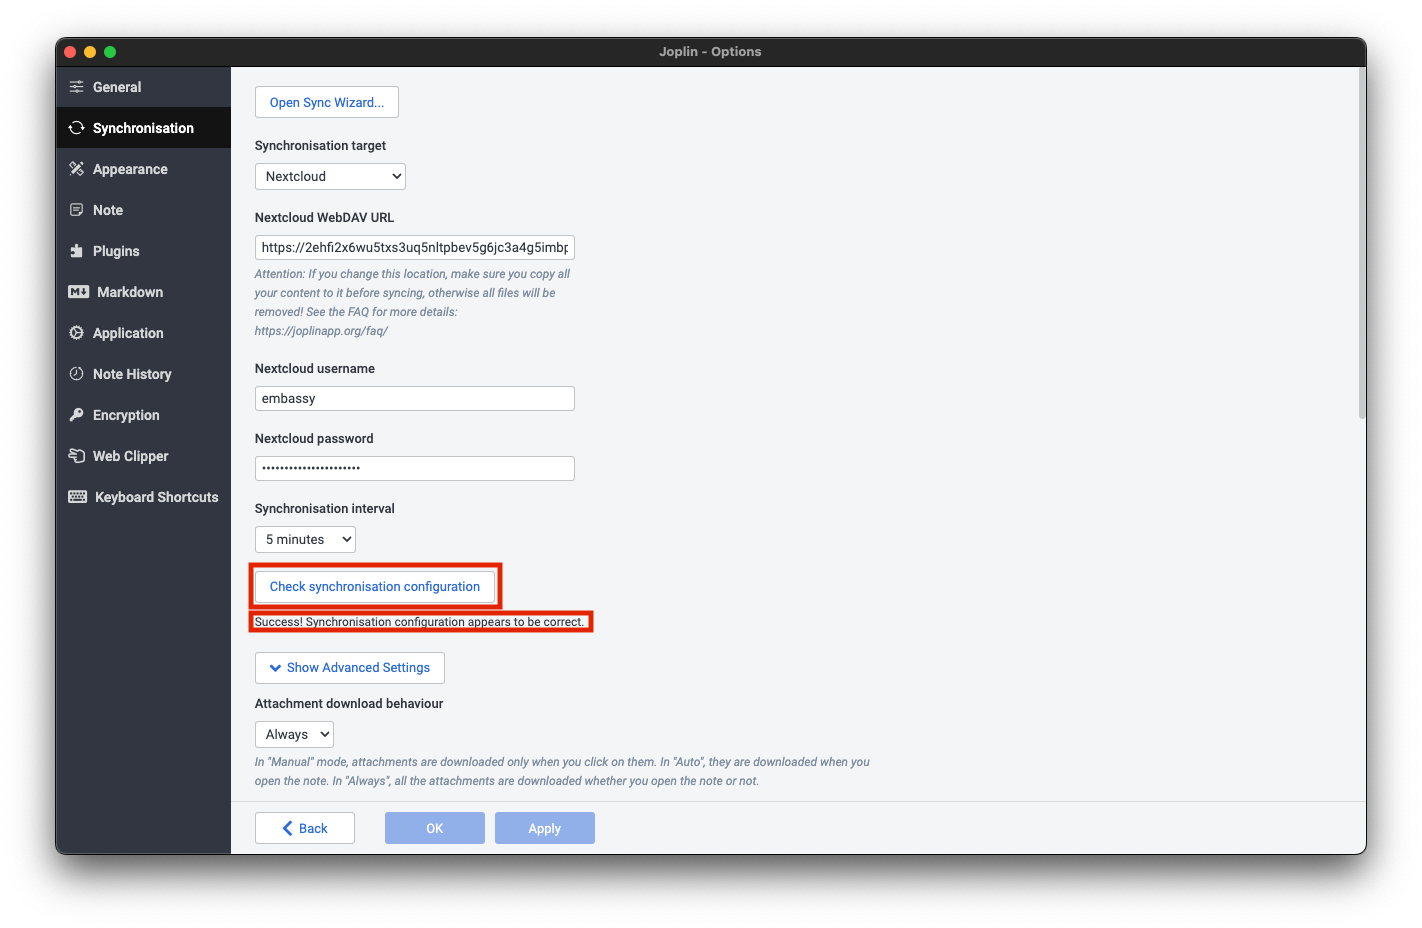
Now scroll back up and select “Check sychronisation configuration” and you should see the following success message:
You have now connected your Joplin client to your Start9 server’s Nextcloud and your notes will sync automatically!