StartOS Documentation
StartOS is a sovereign computing platform that makes it easy to run a personal server. It handles service installation, networking, backups, and system administration — all from a simple browser-based interface.
Getting Started
Services
- Marketplace
- Default Registries
- Alternative Registries
- Installing
- Updating
- Sideloading
- Flavors
- Interfaces
- Actions
- Health Checks
- Tasks
- Dependencies
- Accessing Service Containers
Connecting
Networking
Backups
System
- Server Name
- SSH
- SMTP
- WiFi
- Internationalization
- Kiosk Mode
- Updating StartOS
- Change Password
- Forgot Password
Reference
Firmware
Installing StartOS
This guide is for flashing StartOS to a USB drive, then installing it onto a desktop, laptop, or mini PC. For an up-to-date list of known-good hardware, please check out this forum post.
Watch The Video
Download
-
Visit the Github release page to find the latest version of StartOS.
-
Under “ISO Downloads”, select the ISO for your architecture. StartOS is available in x86_64 (AMD64), aarch64 (ARM64), and RISC-V (RVA23). For x86_64 and aarch64, two variants are available:
-
Standard: Includes proprietary firmware and drivers for broader hardware compatibility, including display and wireless. Recommended for most users.
-
Slim (FOSS-only): 100% open source, containing no proprietary firmware or drivers. Only compatible with certain hardware, such as the Start9 Server Pure.
-
-
Verify the SHA256 checksum against the one listed on GitHub (optional but recommended).
-
Mac. Open a terminal and run:
openssl dgst -sha256 <filename>.iso -
Linux. Open a terminal and run:
sha256sum <filename>.iso -
Windows. Open PowerShell and run:
Get-FileHash <filename>.iso
-
Flash
-
Download and install balenaEtcher onto your Linux, Mac, or Windows computer.
-
Insert your USB drive into your computer.
-
Open balenaEtcher.
-
Click “Select Image” and select the
.isoimage you just downloaded. -
Click “Select Target” and select your microSD card.
Warning
BE ABSOLUTELY CERTAIN you have selected the correct target USB flash drive. Whatever target you select will be COMPLETELY ERASED!!
-
Click “Flash!”. You may be asked to approve the unusually large disk target and/or enter your password. Both are normal.
Install
-
Remove the newly-flashed USB drive from your computer and plug it into your server. Choose the fastest available USB 3.0+ port - typically this is blue or labeled “SS” (SuperSpeed).
-
Plug your server into a surge protector — never directly into the wall.
Important
A surge protector is required to safely operate your server. Power surges can permanently damage hardware and corrupt your data drive. An uninterruptible power supply (UPS) is strongly recommended for added protection.
-
Power on your server, booting from USB.
Tip
Some devices do not automatically boot from USB. In these cases, you will need to access your device’s BIOS settings and change the boot order to prioritize the USB drive. This is known to be required on the Nvidia DGX Spark, among others. You may also need to turn off Secure Boot or explicitly allow USB boot. See the Community Hub for device-specific guides or to get help.
-
The StartOS install wizard will now be available at
http://start.local. You can also use a monitor, keyboard, and mouse. This is known as “Kiosk Mode”. -
Select your language and press Continue.
-
At the Select Drives dialog, select the disk(s) you want to use as your OS and data drives.
-
If a previous StartOS install is detected, it will ask whether you want to Overwrite or Preserve the existing StartOS data. Select Overwrite to start fresh, or Preserve to flash the OS on the booted USB thumb drive over the old installation, while preserving your data. After install is complete, you will be prompted to Continue to Setup.
Update to StartOS 0.4.0
StartOS 0.4.0 is a completely new operating system. It will eventually be available as a normal over-the-air update, but for early access it requires a USB flash install. This guide walks you through the process step by step.
Warning
This is early-access software. Bugs are still possible. Follow every step carefully — skipping the service update or backup steps can result in permanent data loss.
Backups from StartOS 0.3.5.1 cannot be restored onto 0.4.0, and vice versa. The 0.3.5.1 backup you create before migrating can only be used to roll back to 0.3.5.1.
Before You Begin
StartOS 0.4.0 is currently in beta. The latest beta release is available on the GitHub releases page.
Services with special handling
The following services cannot be migrated automatically. Review these before starting the update:
-
Embassy Pages — Retired and replaced by Start9 Pages. Embassy Pages will survive the update but will no longer receive updates. Uninstall it, install Start9 Pages from the marketplace, and re-add your content.
-
Ghost — Completely redesigned for StartOS 0.4.0 and incompatible with the old version. Before updating, open your old Ghost admin UI and use Ghost’s built-in Export tool to download your content. After updating, install the new Ghost from the marketplace and use Ghost’s built-in Import tool to restore your content.
-
Synapse — The old Synapse was Tor-only. The new Synapse is clearnet-only. These are different services now with no migration path.
-
Jam — Jam’s backend, JoinMarket, is being replaced by a separate reimplementation (JoinMarket NG) for technical and security reasons, making Jam defunct on StartOS v0.3.5.1 and unavailable on v0.4.0 until that backend matures and a new version of Jam is built for it. You should back up your seed, move out any spendable funds (fidelity-bond funds stay locked until expiry), and uninstall Jam prior to updating to v0.4.0.
LAN addresses are changing
In StartOS 0.3.x, each service had its own .local address (e.g. longexamplepublickey.local). In 0.4.0, services are accessed on unique ports of your server’s main .local address (e.g. adjective-noun.local:4545). Your old per-service .local addresses will no longer exist after the update.
If you use a password manager, before updating, make sure your saved passwords have clear names/labels (not just the current .local URLs) so that you can identify them later and save the new URLs.
Tip
This change is a big improvement for Windows users — per-service
.localaddresses required Bonjour and other workarounds that are no longer needed.
Step 1: Flash the USB Drive
Download the 0.4.0-beta ISO for your platform from the GitHub releases page. Under “ISO Downloads” at the top of the release notes, select the ISO for your hardware:
- Server One (2023) or other x86_64 hardware — download the x86_64 (AMD64) ISO
- Server Pure — download the x86_64 (AMD64) Slim (FOSS-only) ISO
- Raspberry Pi — not yet available for 0.4.0, but support is coming soon
Flash the ISO to a USB drive following the Download and Flash sections of the install guide.
Step 2: Update to StartOS 0.3.5.1
You must be running StartOS 0.3.5.1 before updating to 0.4.0. If you are on an older version, update to 0.3.5.1 first using the normal update mechanism.
Step 3: Update All Services
On StartOS 0.3.5.1, update all installed services to their latest available versions. Start with services at the base of the dependency tree and work upward — for example, update Bitcoin before LND, and LND before RTL.
Warning
This step is required. If you do not update services before migrating, they may fail to migrate on 0.4.0, potentially requiring you to roll back to 0.3.5.1 or lose data entirely.
The one exception is Bitcoin, which can safely remain at version 28.x or 29.x. All other services must be on their latest version.
Step 4 (Optional): Add an SSH Key
If you haven’t already, add an SSH key to your server. If something goes wrong during the migration, SSH access makes it much easier to debug.
Step 5: Uninstall Unneeded Services
Every installed service must be migrated, and each one adds to the total migration time. If there are services you don’t actually use, it is much faster to uninstall them now and install fresh on 0.4.0 afterward.
Step 6: Stop All Services
Stop all remaining services and wait for each one to fully stop before proceeding. This ensures no new data is written before the backup.
Step 7: Create a Full System Backup
With all services stopped, create a full system backup. Back up every service.
Warning
Do not skip this step. Migration failures are a real possibility during beta, and without a backup your data could be lost permanently.
Step 8: Shut Down the Server
Shut down the server through the StartOS UI.
Step 9: Boot from USB
-
Insert the flashed USB drive into your server.
-
Power on the server.
-
The installer should boot from the USB drive and become available at
http://start.local.
Tip
If the installer fails to boot and instead your normal StartOS boots, it means you will need to attach a monitor and keyboard (Kiosk mode) in order to enter the BIOS settings to change the boot priorities. The Server Pure should always boot from USB if present. For the Server One, this is done by hitting the ESC key repeatedly at boot time until the BIOS appears. Arrow over to the boot tab, and change Boot Option #1 to your inserted USB thumb drive, then restart.
Step 10: Run the Installer
-
Select your language.
-
Select the OS drive and the data drive. These can be the same drive if your server only has one. Double-check that you have selected the correct drive for each.
-
When prompted, select Preserve to keep your existing data.
Warning
If you do not select “Preserve”, all data on the drive will be erased.
-
Optionally set a new password, or skip to keep your current password.
Step 11: Wait
The migration process can take hours, depending on how much data you have. Be patient and do not power off or unplug your server.
Tip
Expect progress to sit at 85% for a long time — potentially hours. This is when your installed packages are being migrated to the 0.4.0 format, and the time scales with how many packages you have and how much data each one contains. The installer is not stuck.
Step 12: Reboot
When the update is complete, follow the on-screen instructions to remove the USB drive and reboot.
Step 13: Update All Services
Every installed service will have an update available for the 0.4.0 marketplace. Update all of them — including Bitcoin — before doing anything else. The 0.4.0 versions are repackaged for the new system, even if the underlying software version is the same.
Step 14: Start All Services
Once all services are updated, you can start them. Wait for all services to fully start and confirm they are running correctly.
Step 15: Create a Backup!
Create a full system backup. Ideally this is to a separate drive (or network folder) than 0.3.5.
Warning
0.3.5 backups and 0.4.0 backups are ENTIRELY INCOMPATIBLE. 0.3.5 backups cannot be restored onto 0.4.0. and 0.4.0 backups cannot be restored on 0.3.5.1.
If backing up to the same drive as 0.3.5, a new subfolder will be created automatically. Just be sure the drive has enough space to hold both complete backups.
Remember, regenerable indexes, such as the Bitcoin block chain and Electrs/Fulcrum indexes, are not backed up. This is a good thing.
Depending on the speed of your drive, plan on 3-5 minutes per GB of backup data. So 100 GB of data could take over 8 hours. 0.4.0 backups are differential in nature, so future backups will only include new or deleted files and therefore should be much faster.
Post-Migration Notes
Tor Cleanup
During migration, the Tor service is automatically installed with all your existing onion addresses intact. However, Tor is rarely needed in StartOS 0.4.0 — most users will be better served by other networking options.
You are encouraged to review your service interfaces and delete any Tor addresses you do not intend to use.
Explore the New System
Take time to explore the new UI and read the documentation. StartOS 0.4.0 is a fundamentally different system from 0.3.x.
Surge Protector and UPS
Protecting your server from power events is essential. A surge protector is the minimum requirement for safely operating a server, and an uninterruptible power supply (UPS) is strongly recommended on top of that. This page explains why both matter, what to look for, and how to set them up.
Why a UPS matters
Servers are always-on devices, so they are exposed to every power event on your circuit: lightning surges, utility brownouts, accidental unplugging, breaker trips, appliances cycling on the same line. Any one of these can:
- Damage hardware — voltage spikes can destroy power supplies, drives, and mainboards.
- Corrupt data — an abrupt power loss while the OS is writing to disk can corrupt the data drive, sometimes irrecoverably. Lightning node databases, in particular, are sensitive to unclean shutdowns.
- Cause unexplained reboots — brownouts (sustained low voltage) can cause silent restarts that are difficult to diagnose.
A surge protector only handles the surge case. A UPS additionally bridges short outages, smooths out brownouts, and gives you time to shut the server down cleanly during an extended outage.
Types of UPS
There are three common topologies. For a home server, line-interactive is the right choice in nearly all cases.
- Standby (offline) — Cheapest. Runs the load directly from wall power and switches to battery only during an outage. Acceptable for non-critical electronics but lacks voltage regulation for brownouts.
- Line-interactive — Recommended. Includes automatic voltage regulation (AVR) for brownouts and overvoltage, with fast switchover to battery during outages. The right balance of cost, protection, and efficiency for a home server.
- Online (double-conversion) — Most expensive. Continuously rebuilds the power waveform from battery. Best protection, but overkill and noticeably less efficient for a typical home server.
What to look for
Pure sine wave output. Modern power supplies with active power factor correction (active PFC) — which most mini PCs and servers use — can malfunction or shut down on the “simulated sine wave” (stepped square wave) output that cheap UPSes produce. Pay extra for a pure sine wave model. This is the single most common UPS mistake.
Sufficient VA / wattage rating. A typical StartOS server idles at ~10–25 W and peaks around 40–60 W under load. A UPS rated for roughly 300 VA / 180 W comfortably covers it with several minutes of battery runtime. Larger UPSes give you more runtime (and headroom for a router or switch on the same unit), at the cost of price and size.
User-replaceable battery. UPS batteries wear out after 3–5 years. A model with a user-replaceable battery is much cheaper to maintain than one that has to be replaced outright.
Audible alarm and status display. You want to know when the unit is running on battery, when the battery is low, and when the battery itself needs replacing.
How to set it up
-
Place the UPS on a hard, ventilated surface near your server. Do not enclose it — UPSes generate heat under load.
-
Plug the UPS directly into a wall outlet. Do not chain it through a power strip or surge protector.
-
Charge the UPS as instructed by the manufacturer before plugging in your server. Most need several hours on first charge.
-
Plug your server into one of the battery-backed outlets. UPSes typically have two groups of outlets: battery-backed and surge-only. Use battery-backed for the server and any networking equipment (router, modem, switch) that you want to stay up during an outage.
-
Test the UPS by briefly unplugging it from the wall while the server is running. The server should continue running on battery. Plug it back in within a minute — the goal is just to confirm it works.
Automatic shutdown on low battery
StartOS does not currently include built-in support for UPS monitoring (USB or network), so it cannot automatically shut down when the battery is low during an extended outage. The server will run until battery exhaustion and then power off uncleanly. This still carries some risk of data corruption, but it is dramatically less risky than facing the original surge, brownout, or sudden outage with no UPS at all.
If your area has frequent or long outages, size your UPS to give yourself time to shut down manually from the StartOS UI before the battery runs out.
Initial Setup
After installing StartOS, follow these steps to initialize your server, set a master password, and download your Root CA.
Watch The Video
-
Connect your server to power and Ethernet.
Important
Always plug your server into a surge protector — never directly into the wall. Power surges from lightning, utility events, or appliances on the same circuit can permanently damage your server’s hardware and corrupt your data drive. A standard surge protector is the minimum; an uninterruptible power supply (UPS) is strongly recommended for added protection against brownouts and unexpected power loss.
-
From a computer connected to the same Local Area Network (LAN) as your server, open a browser and visit http://start.local.
-
Select a setup option:
-
Start fresh: Select this option if you are setting up a new server.
-
Restore from Backup: Select this option only if your existing StartOS data drive has been lost or corrupted. This is for disaster recovery only.
-
Transfer: Select this option if you are transferring your existing data from one drive to another.
-
-
Set a strong master password. Make it good. Write it down. Resetting your password is non-trivial, but your data will be preserved.
-
Set your server name. Your server’s mDNS address is derived from this name.
-
Once initialization completes, open your server’s permanent local address, then follow the instructions for Trusting your Root CA to establish a secure connection with your server.
Trusting Your Root CA
In order to establish a secure (HTTPS) connection with your server on the local network, it is necessary to download and trust your server’s Root Certificate Authority (Root CA).
Note
You must repeat this guide for each device you want to connect to the server locally or using a VPN. This guide is not necessary for devices that will connect using Tor or clearnet.
Watch the video
Step 1 - Download
There are multiple ways to download your server’s Root CA.
-
Option 1: HTTP LAN
Visit your server’s HTTP (not HTTPS) .local address (
http://your-server-name.local) or LAN IP address (http://192.168...). -
Option 2: StartOS Dashboard
If you are logged into your server, click the “System” tab or the “Start Menu” (upper right corner), then click “About this Server”.
-
Option 3: Yourself
If you already have the Root CA on one device, you can send it to yourself using email or other messaging channel.
Step 2 - Trust
Select your platform:
-
Locate your Root CA and double click it. Keychain Access will launch. You will be prompted for your Mac credentials. Select “Modify Keychain”.
-
Press Command + Spacebar to launch a program, type in Keychain Access and select the resulting Keychain Access program to open it.
-
Your server’s CA certificate will be displayed among the imported certificates in Keychain Access. Right-click on the imported CA cert and select Get Info:
-
The details of your CA certificate will be displayed in a new dialog window. Click the “Trust” heading, then select “Always Trust” on Secure Sockets Layer (SSL) and X.509 Basic Policy.
Click the red (x) button at the top left of the Local Root CA dialog window.
-
You will then be prompted again for your Mac credentials. Click Update Settings:
-
You will see your server’s CA certificate as trusted now, signified by a blue (+) sign and the CA cert information will now say “This certificate is marked as trusted for all users” in Keychain Access:
-
If using Firefox, Thunderbird, or Librewolf, complete this final step.
3. Mozilla Apps (Firefox, Thunderbird, Librewolf)
Mozilla apps use their own certificate store and need extra configuration to trust your Root CA. Complete the steps above for your OS first, then follow the steps below.
For more background, see Mozilla’s blog post on why they maintain their own root certificate store.
-
Open the app and enter
about:configin the URL bar. Accept any warnings that appear. -
Search for
security.enterprise_roots.enabledand set the value to “true”. -
Restart the app.
Marketplace
The Marketplace is where you discover services to install on your StartOS server. It is a collection of independent registries, like stores in a mall, each offering its own curated list of services.
Registry System and Navigation
Each registry in the Marketplace is maintained independently. When you open the Marketplace, you browse one registry at a time. To switch between registries, click the arrows underneath the current registry title.
StartOS ships with two default registries: the Start9 Registry and the Community Registry. You can also add alternative registries or sideload packages directly.
Open Ecosystem
Anyone, anywhere can establish their own registry. This open model means no single entity controls which services are available, and no service can be effectively censored. Users choose which registries to trust, and services can be distributed through multiple independent registries, direct file transfer, or built from source.
Default Registries
StartOS ships with two registries preloaded in the Marketplace.
Start9 Registry
The Start9 Registry is the primary registry. Services listed here are:
- Maintained by Start9 — kept up to date and tested against the latest version of StartOS
- Recommended by Start9 — vetted for quality and usefulness
- Supported by Start9 — covered by Start9’s technical support
This is the registry most users will use most of the time.
Community Registry
The Community Registry is available when you switch registries in the Marketplace. Services listed here have passed Start9’s objective technical criteria for listing, but they are not maintained, recommended, or supported by Start9.
Listing on the Community Registry does not imply endorsement or disapproval by Start9. It does not imply anything about the quality of the service. It simply means the service meets the technical requirements for listing and Start9 has chosen not to maintain it.
Start9 does not announce, promote, or provide dedicated resources for Community Registry services.
Alternative Registries
Beyond the default registries, you can add alternative registries to your Marketplace. Custom registries are useful for organizations packaging services for their own users, developers distributing services outside the default registries, or communities curating specialized collections. To switch between registries or add new ones, click “Switch” beneath the current registry title in the sidebar.
Note
Start9 does not vet, endorse, or support services from custom registries. Exercise caution and only add registries you trust.
Hosting an Alternative Registry
Install the “StartOS Registry” service from the Marketplace and follow instructions.
Installing
There are several ways to install and manage services on StartOS.
From the Marketplace
Open the Marketplace, select a service, and click Install. The Marketplace ships with the Start9 Registry and the Community Registry, and you can add custom registries.
Sideloading
You can install services directly from .s9pk files without using a registry. See Sideloading.
Updating
When newer versions of installed services are available, you can update them from the Updates tab or directly from the Marketplace. See Updating.
Downgrading
If a service listing shows an older version than what you have installed, the Marketplace will display a Downgrade button instead of Install or Update.
Switching Flavors
If multiple flavors of a service exist, the Marketplace will display a Switch button when viewing a different flavor than the one currently installed.
Updating
StartOS makes it easy to keep your services up to date. When updates are available, a badge appears on the Updates tab in the top navigation bar showing the number of pending updates.
Using the Updates Tab
- Click the Updates tab in the top navigation bar.
- Updates are organized by registry. Click a registry to accordion-open its available updates and reveal release notes for each service.
- Review the release notes, then click Update to begin the update.
Switching Registries
It is possible to update a service from a different registry than the one it was originally installed from. If you do this, StartOS will warn you about the registry switch before proceeding.
Updating from the Marketplace
You can also update a service directly from the Marketplace. Navigate to the service’s page and click Update.
Sideloading
Sideloading lets you install a service from a .s9pk file without using any registry. This is useful when testing a service in development, installing a service that is not listed on any registry, or if you prefer to eliminate the Marketplace as a point of trust.
How to Sideload
-
Click Sideload in the top navigation bar.
-
Click the drop area to select a
.s9pkfile from your file system, or simply drag and drop the file into the drop area.
Obtaining .s9pk Files
A .s9pk file can be obtained in several ways:
- From a developer — A service developer may share
.s9pkfiles directly via chat, email, or a download link. - From a GitHub release — Many open source services publish
.s9pkfiles as release assets on GitHub. - Build from source — If the service is open source, you can clone its repository and build the
.s9pkyourself. See the Makefile Build System guide for instructions.
Flavors
Flavors are different services that share the same package ID. They are different implementations of the same protocol and data schema — for example, Bitcoin Core and Bitcoin Knots. Because they share the same data schema, flavors tend to satisfy the same dependent services, such as a lightning node or an Electrum server.
Version Format
Flavor versions are designated by their exver prefix: #flavor:upstream-semver:downstream-semver. For more details on version formatting, see Versions.
Limitations
It is not supported to install multiple flavors of the same service simultaneously. However, you can switch between them.
Switching Flavors
To switch from one flavor to another:
- Go to the Marketplace.
- Find and view the listing for the flavor you want to switch to.
- Instead of an Install, Update, or Downgrade button, you will see a Switch button. Click it to switch.
Interfaces
A service interface is a network endpoint exposed by a service running on your server. Every installed service exposes one or more interfaces, each serving a different purpose. The service interfaces for a given service are listed under the Interfaces tab in the sidebar of its service details page.
Interface Types
-
UI — A web-based user interface for interacting with the service in a browser. Examples: Vaultwarden web vault, Nextcloud dashboard, StartOS admin UI.
-
API — A programmatic endpoint for apps and tools to communicate with the service. Examples: Bitcoin RPC, LND gRPC, Nextcloud WebDAV.
-
P2P — A peer-to-peer endpoint for the service to communicate with other nodes on its network. Examples: Bitcoin P2P, Lightning P2P.
Viewing Interface Addresses
Open the Interfaces tab to see every interface the service exposes. Each interface expands to reveal its addresses — all the ways that interface can be reached, organized by gateway. When a service exposes only one interface, it is expanded by default.
Gateway Tables
Each inbound gateway on your server has its own table. The rows in each table are the addresses available through that gateway. Addresses can be individually enabled or disabled.
Each table has the following columns:
| Column | Description |
|---|---|
| Toggle | Enable or disable the address. This directly affects iptables and firewall rules — disabling an address blocks traffic to it. Public IPv4 addresses are off by default. All other addresses are on by default. |
| Access | Public or Private. Public addresses are reachable from the Internet. Private addresses are only reachable on the LAN or via VPN. For an IPv6 global-unicast (GUA) address this column is an editable Local / Public dropdown — see the note below. |
| Type | The address type: IPv4, IPv6, Domain, or mDNS (mDNS is only available on router gateways). |
| Certificate Authority | Who signs the SSL certificate for this address: Root CA (your server’s own CA), Let’s Encrypt (publicly trusted), or None (non-SSL, e.g. plain HTTP). |
| URL | The fully composed URL for reaching the interface at this address. |
| Actions | Context-dependent buttons: Settings (view required DNS records, DNS configuration, and/or port forwarding rules, with the ability to test each), Delete (remove domains that were manually added), Open (open the URL in a new tab), Copy (copy the URL to clipboard), QR (display a QR code for the URL). |
Note
The Settings button appears for addresses that require external configuration: public domains (DNS + port forwarding), private domains (DNS), and public IP addresses (port forwarding).
Note
Unlike a private LAN address, an IPv6 global-unicast address (GUA) is a single globally-routable address, so how far it reaches is a choice. A GUA row keeps the usual on/off toggle, and its Access column becomes a Local / Public dropdown:
- Local (default) — reachable on the local network only; traffic from outside your subnet is rejected.
- Public — also reachable from the Internet. StartOS attempts to open the matching pinhole on your gateway automatically (via PCP); if your gateway doesn’t support it you may need to allow inbound traffic to that address and port manually.
This only applies to IPv6 GUAs. IPv6 ULAs (private) are always local, and IPv4 keeps its separate LAN and WAN address rows.
Adding Domains
You can add domains to a gateway table by clicking “Add Domain” on the gateway and choosing either:
- Public Domain — A clearnet domain (e.g.
mysite.com) accessible from the Internet. Requires DNS configuration and port forwarding. - Private Domain — A custom domain (e.g.
nextcloud.private) that works on LAN and VPN. Requires your gateway to use StartOS for DNS. Only available on Ethernet and Wireless gateways — not WireGuard (StartTunnel) gateways.
Tor Onion Addresses
If the Tor service is installed and running, a Tor table also appears among the interface’s addresses. Tor functions like a gateway but is managed as a marketplace service rather than a system gateway.
The Tor table is empty by default. To add onion addresses:
-
Open the Tor service and go to Actions > Manage Onion Services.
-
Select the service interface you want to create an onion address for.
-
Each onion address produces both an
HTTPandHTTPSURL. TheHTTPaddress is perfectly safe to use because Tor is a secure protocol. TheHTTPSaddress uses a certificate signed by your server’s Root CA. -
Optionally, you can upload a private key to use a vanity
.onionaddress. -
To view your onion addresses, go to Actions > View Onion Addresses. They will also appear in the Tor table for each service interface.
Instructions
Every service installed on StartOS ships with an Instructions page, accessible from the Instructions tab in the service details page sidebar. Instructions are written by the package’s developer for you, the person actually running the service — they explain what the service is, walk you through getting it set up on StartOS, and tell you how to use it once it’s running.
When to Read Them
The first time you install a service is the most useful moment to open Instructions. Many services have a small number of setup steps that need to happen before they’re truly usable — creating an admin password, importing a config, installing a dependency, registering a domain, and so on. Instructions are where the developer documents that path, in the order you should follow it.
After initial setup, Instructions remain a quick reference for day-to-day use: which interfaces the service exposes, which actions in the sidebar do what, and any limitations you should know about.
What’s In Them
A well-written Instructions page typically covers:
- What the service is — a short description of what it does.
- What you get on StartOS — how this packaged version looks and behaves on your server.
- Getting set up — numbered steps to take the service from a fresh install to a usable state.
- Using the service — the interfaces, actions, and tasks you’ll work with.
- Limitations — anything that behaves differently from the upstream version of the software.
- External links — the project’s home page, upstream documentation, and support channels for when you need to go deeper.
Instructions vs. README
A package’s GitHub README is a technical document for developers and contributors — how the package is built, how it differs internally from the upstream service. Instructions, by contrast, are written for you: practical, step-by-step, focused on what to click and what to expect. If you ever want both perspectives, the README lives in the package’s repository, linked from the About tab.
Missing or Empty Instructions
If a service was installed before its developer added an Instructions page (or hasn’t published instructions yet), the tab will display a notice that no instructions are provided. In that case, check the service’s About tab for links to the package repository and upstream docs, or wait for an update that includes instructions.
Actions
Actions are GUI representations of commands, API calls, or scripts that a system administrator would ordinarily run on the command line — complex, often dangerous operations that require time and expertise. In StartOS, service developers wrap these tasks into simple buttons with optional validated form input, making them accessible to anyone. They appear in the sidebar of the service details page.
Examples
Actions vary by service. Common examples include:
- Retrieve credentials — Display an auto-generated admin username and password. Sensitive values are masked by default and can be copied or revealed.
- Toggle a setting — Enable or disable a feature, such as public registrations.
- Configure an integration — Fill out a form to connect the service with an external system, such as an SMTP server for sending email.
- Reset a password — Generate a new password and display it.
Using Actions
Click an action in the sidebar to run it. Some actions execute immediately and display a result. Others present a form for you to fill out before submitting.
When Actions Are Available
Not all actions are available at all times. Some actions only appear — or can only be run — when a service is running, stopped, or in a particular state. If an action is unavailable, it will be grayed out or hidden.
Warnings
Some actions display a warning before execution, alerting you to potential consequences. Read these carefully before proceeding.
Health Checks
Health checks monitor whether a service is ready and functioning. They appear on the dashboard alongside each running service. Health checks can be conditional — appearing or disappearing depending on what features are enabled or the current state of the service.
Statuses
Each health check displays one of the following statuses:
- Waiting — The health check is waiting for another health check to complete before it begins.
- Starting — The health check is actively running but has not yet passed. Each health check has a grace period defined by the service developer. If the check does not pass within this period, it transitions to an error state.
- Loading — The health check is long-running and intentional. Rather than a pass/fail gate, it serves as a status monitor — a window into some ongoing activity in the service. For example, a Bitcoin node might display sync progress as a percentage. Loading checks can display arbitrary information to the user.
- Success — The health check has passed. The service is ready and operational.
- Error — The health check has failed. The message will describe the problem.
What Gets Checked
Health checks are defined by each service and vary depending on what the service does. Common checks include whether a web interface is reachable, whether a database is accepting connections, or whether an API is responding.
A service may have multiple health checks. For example, a service with both a web UI and a background sync process might show separate status indicators for each.
Internal Checks
Some health checks run behind the scenes and are not displayed in the UI. These monitor internal components, such as a database sidecar, that must be ready before the main service can start.
Tasks
Tasks are notifications that prompt you to take action on a service. They appear on the dashboard and guide you through setup, configuration, and ongoing maintenance.
Task Severity Levels
Tasks have three levels:
- Required — The service cannot be started while a required task exists. If a required task is created while the service is running, the service will be forcibly stopped. This means the service cannot safely run until the task is completed. For example, retrieving an auto-generated admin password after installation.
- Important — The service will still run, but there might be issues. For example, configuring email settings for a service that uses notifications.
- Recommended — The service will run fine without this, but it is something you should consider doing. For example, an optional integration that improves functionality.
Common Task Types
Setup Tasks
After installing a service, you will often see tasks guiding you through initial setup — such as retrieving credentials, configuring integrations, or running a required action.
Dependency Tasks
Some tasks prompt you to configure a different service so it can work with the one you just installed. For example, installing a chat service might create a task asking you to register it with your Matrix homeserver. These tasks link directly to the relevant action on the dependency, sometimes with form fields pre-filled.
Completing Tasks
Click a task to view its details. Most tasks direct you to run a specific action on either the service itself or one of its dependencies. Once the required action is completed, the task clears automatically.
Some tasks will reappear if the underlying condition is no longer met — for example, if a required configuration is changed or removed.
Dependencies
Dependencies are other services that a service requires or can optionally integrate with. They are listed on the service details page.
Required vs Optional
- Required — The service cannot function without this dependency. It must be installed and running. For example, a Lightning node requires a Bitcoin node.
- Optional — The service works without this dependency but gains additional features when it is installed. For example, installing Tor service means Bitcoin can connect to peers over Tor.
What Happens Automatically
When you install a service, StartOS checks its dependencies. If a required dependency is not installed, you will be prompted to install it. StartOS also monitors version compatibility — if a dependency is installed but running an incompatible version, you will be notified.
Configuring Dependencies
Some dependencies need to be configured to work with the services that depend on them. When this is the case, a task will appear on the dashboard guiding you through the necessary steps. These tasks often link directly to an action on the dependency, with form fields pre-filled to simplify configuration.
Service Communication
Once dependencies are installed and configured, services communicate with each other automatically over the local network. No manual networking setup is required.
Accessing Service Containers
Every service on StartOS runs inside its own isolated LXC container. Within each LXC container, the service runs in one or more subcontainers. StartOS provides start-cli package attach to open a shell inside a service’s subcontainer — this is the supported way to access containers. StartOS does not use Docker or Podman; standard container tooling will not work. See the CLI Reference for the full list of start-cli options.
Warning
Accessing a service container is an advanced operation. Modifying files, stopping processes, or changing configuration inside the container can break the service or cause data loss. Proceed with caution.
Why Access a Service Container?
There are several reasons you might want a shell inside a running service container:
- Running CLI tools — Many services ship their own command-line utilities (e.g.,
bitcoin-cli,lncli) that can be invoked directly inside the container. - Debugging — Inspect logs, running processes, or file state when a service is misbehaving.
- Querying a database — Run ad-hoc queries against a service’s database (e.g.,
sqlite3,psql,redis-cli) that aren’t exposed through the UI. - Inspecting configuration — View the generated config files or environment variables a service is actually running with.
- Advanced recovery — In rare cases, manually repair data or state that cannot be fixed through the StartOS UI.
Usage
First, SSH into your StartOS server. Then attach to a running service:
start-cli package attach <PACKAGE>
Replace <PACKAGE> with the package identifier (e.g., bitcoind, lnd). You can find package identifiers with:
start-cli package list
This drops you into a shell inside the service’s subcontainer (not the LXC container itself). If the service has only one subcontainer, you are placed directly into it. If there is more than one subcontainer, you will be prompted to choose one. To skip the prompt, specify the subcontainer ID directly:
start-cli package attach <PACKAGE> <SUBCONTAINER>
Type exit or press Ctrl+D to return to the host.
Accessing the LXC Container
In rare cases, you may need to access the LXC container itself rather than a subcontainer. For example, subcontainers are only accessible while the service is running, but the LXC container remains accessible even when the service is stopped — useful for inspecting or repairing state that prevents a service from starting.
First, obtain the container ID:
start-cli package stats <PACKAGE>
Then attach directly to the LXC container:
lxc-attach <CONTAINER-ID>
Warning
This bypasses StartOS’s managed access layer. Only use this if you have a specific reason that
start-cli package attachcannot fulfill.
Local Access
Connect to your server over your local network using its mDNS address, direct IP address, or private domain. This is the fastest connection method, as traffic stays entirely on your LAN and never reaches the Internet. You must be connected to the same Local Area Network (LAN) as your server, and you must trust your Root CA. The StartOS dashboard is available at the base address (e.g. my-cool-server.local), while installed services are available on different ports of that same address.
Watch the Video
mDNS, IP Address, and Private Domains
-
mDNS — Your server’s
.localaddress (e.g.my-cool-server.local) is derived from your server name and resolves to your server’s LAN IP address automatically. -
IP address — Connect using your server’s LAN IP directly. The address can be found in your StartOS dashboard at
System -> StartOS UI, in your router dashboard, or by pinging your server’s mDNS address from a computer on the same network. -
Private Domains — Assign custom domain names to service interfaces. Private domains work like the mDNS address but also work over VPN and can be anything you choose.
Important
We highly recommend setting a static IP address for your server on the LAN. This becomes necessary if you also intend to set up VPN or clearnet. All routers support this. Refer to AI or your router’s user manual for detailed instructions.
Tunnels Do Not Work Locally
VPN tunnels will not work when your device is on the same LAN as your server due to loopback. To test a tunnel-based connection, disconnect your device from WiFi and use mobile data instead.
Remote Access
Remote connections let you reach your server from outside your local network — when traveling, at work, or on any other network. StartOS supports several strategies for remote access, each with different tradeoffs for speed, privacy, and setup complexity. These strategies will not work from the same LAN as your server; for that, see Local Access.
VPN, Tor, and Clearnet
-
VPN — Extends your local network to anywhere in the world. Your device gets a secure tunnel to your server as if it were on the same LAN. Requires either a router with VPN server capability or a StartTunnel gateway, and trusting your Root CA.
-
Tor — Access your server via
.onionaddresses from anywhere. No router configuration, DNS, or Root CA trust required. Connections are slower and occasionally unreliable. Requires installing the Tor service from the marketplace. -
Clearnet — Standard domain-based access on the public Internet. Requires a gateway, a domain name, and DNS configuration. Typically used for public hosting, but can be combined with authentication for private use.
Private Access
Private connections keep your services accessible only to you and your authorized devices — nothing is exposed to the public Internet. Most people will use private connections for most of their services most of the time. Unless you are intentionally hosting something for others (a website, a blog, a Lightning node), your services should be privately accessible only to you and your trusted devices.
LAN, VPN, and Tor
-
LAN — The fastest option. Traffic stays on your local network and never reaches the Internet. Requires being connected to the same network as your server and trusting your Root CA.
-
VPN — Extends your local network to anywhere in the world. Authorized devices get a secure tunnel to your server as if they were on the same LAN. Requires either a router with VPN server capability or StartTunnel, and trusting your Root CA.
-
Tor — Anonymous, censorship-resistant access using
.onionaddresses. Works from anywhere without any router configuration or Root CA trust. Connections are slower and occasionally unreliable. Requires installing the Tor service from the marketplace.
Common Combinations
These are not mutually exclusive. A common setup is:
- LAN for daily use at home
- VPN for remote access from your own devices
- Tor for access from untrusted networks or when anonymity matters
Public Access
Public connections make your services reachable by anyone on the Internet, not just your own devices. This is for services you intentionally want to share — a personal website, a Nostr relay, a Lightning node, or a Nextcloud instance for your family. If only you and your own devices need access, use private connections instead.
Warning
If your ISP uses CGNAT, your router cannot accept inbound connections. Clearnet hosting and public IP access require a StartTunnel gateway. Tor works regardless of CGNAT.
Clearnet, Tor, and Public IP
-
Clearnet — Host services on the public Internet using standard domains (
.com,.net, etc.). Requires gateway selection, a domain name, DNS configuration, and port forwarding. Anyone can access your service using a normal browser. -
Tor — Host services as
.onionaddresses on the Tor network. No domain, DNS, or port forwarding required. Anyone with a Tor-enabled browser can reach your service. Tor hosting is censorship-resistant and can be anonymous if you don’t associate the address with your identity. Requires installing the Tor service from the marketplace. -
Public IP — Expose a service interface directly using a gateway’s IP address and port, without a domain name. Useful for peer-to-peer protocols like Bitcoin P2P and Lightning that communicate using raw addresses. Not suitable for browser-based access, since Let’s Encrypt does not sign certificates for IP addresses.
Tip
Tor is listed under both private and public access because the difference is simply whether you share the
.onionaddress. Keep it secret and it’s a private tunnel to your service. Publish it and it becomes a public endpoint — no configuration change needed.
Clearnet and Tor Together
You can host the same service on both clearnet and Tor simultaneously. This is useful when you want a standard domain for everyday access but also want a censorship-resistant fallback that doesn’t depend on DNS or your gateway.
Networking Strategy
StartOS supports multiple networking strategies that can be used alone or in combination. Choosing the right one depends on your goals — but first, it helps to separate three concepts that are often conflated: security, privacy, and censorship resistance. These are independent properties, and each networking strategy offers a different mix of them.
Security, Privacy, and Censorship Resistance
Security means your data is encrypted in transit and only accessible to authorized parties. Every networking strategy on StartOS uses encryption (TLS, WireGuard, or Tor circuits). A service hosted on the clearnet with HTTPS is just as encrypted in transit as one accessed over Tor. Every major password manager, bank, and email provider operates on the clearnet — because transport encryption and strong authentication (passwords, 2FA) are what make a connection secure, not the network layer.
Privacy means observers cannot easily determine who is hosting or accessing a service. This is where the strategies diverge. Clearnet hosting reveals the gateway’s IP address, which maps to an approximate geographic location. Tor hides that information. VPN access is private because only authorized devices can reach the service at all.
Censorship resistance means a service cannot be taken offline by third parties — domain registrars, DNS providers, ISPs, or governments. Tor onion services are the strongest option here, since they rely on no centralized infrastructure. Clearnet services depend on DNS and domain registration, which can be seized or blocked. VPN is resistant to censorship but is primarily designed for private access rather than public hosting.
| Security | Privacy | Censorship Resistance | |
|---|---|---|---|
| Clearnet | Strong (HTTPS/TLS) | Low (router) / Medium (StartTunnel) — gateway IP is public, but StartTunnel hides your home IP behind a VPS | Low — depends on DNS and domain registrar |
| Tor | Strong (onion routing) | High — hides both server and client | High — no DNS, no domain, no port forwarding |
| VPN | Strong (WireGuard/OpenVPN) | High — service not publicly visible | N/A — private access only |
Common Misconceptions
“Clearnet is insecure”
This is the most common mistake. Hosting Vaultwarden, Nextcloud, or any other service on the clearnet with HTTPS is not insecure. The connection is encrypted with the same TLS that protects every bank and password manager on the Internet. What matters is:
- Strong, unique passwords for every account
- Two-factor authentication (2FA) wherever supported
- Keeping software updated to patch known vulnerabilities
What clearnet does trade away is a degree of privacy (your gateway’s IP is visible) and censorship resistance (your domain can theoretically be seized). Using a StartTunnel gateway significantly mitigates the privacy concern — visitors see the VPS IP, not your home IP. For most personal hosting scenarios, these are acceptable tradeoffs.
“Tor is more secure than clearnet”
Tor adds privacy and censorship resistance, not additional transport security. An HTTPS connection over clearnet and an HTTP connection over Tor are both encrypted end-to-end. In fact, Tor’s .onion connections are inherently encrypted, which is why SSL is optional for onion services. Tor is the right choice when anonymity or censorship resistance matters — not because clearnet is insecure.
Choosing a Strategy
Who needs access?
- Only you and your devices → This is private access. Use LAN at home, and VPN or Tor remotely.
- Other people too → This is public access. Use clearnet, Tor, or both.
For private access: VPN, Tor, or Clearnet?
| Speed | Setup | Works behind CGNAT | Requires Root CA trust | Client software required | |
|---|---|---|---|---|---|
| VPN | Fast | Medium (router or StartTunnel) | Only with StartTunnel | Yes | Yes |
| Tor | Slow | Low | Yes | No | Yes (Tor browser) |
| Clearnet | Fast | High (domain, DNS, gateway) | Only with StartTunnel | No | No |
- VPN gives you seamless access — every service is reachable at its LAN IP as if you were home. Setup involves configuring a VPN server (on your router or via StartTunnel), trusting your Root CA, and installing a client on every device.
- Tor is the right choice when you need access from an untrusted device or network where you don’t want to install a VPN client, when you’re behind CGNAT and don’t want to set up StartTunnel, or when anonymity matters.
- Clearnet can also work well for private access. Many people use clearnet URLs with strong passwords and 2FA to access their own services — exactly the way you’d use any cloud-hosted app. The StartOS dashboard also offers rate limiting for additional protection. This trades some privacy (gateway IP is visible) for maximum convenience — no client software needed, just a browser.
For public access: Clearnet, Tor, or both?
| Audience reach | Setup | Privacy | Censorship resistance | |
|---|---|---|---|---|
| Clearnet | Anyone with a browser | High (domain, DNS, gateway) | Low (gateway IP visible) | Low |
| Tor | Anyone with a Tor browser | Low | High | High |
| Both | Maximum reach | Highest | Mixed | Clearnet can be blocked; Tor cannot |
- Clearnet is the natural choice for services meant to be easily accessible — a family Nextcloud, a personal website, a Nostr relay. Standard browsers work without any special software. Use a StartTunnel gateway if you want to avoid exposing your home IP.
- Tor is the right choice for services where anonymity or censorship resistance is a priority, or when you want a simple way to host publicly without purchasing a domain.
- Both together give you a standard domain for everyday access and a
.onionfallback that cannot be censored.
Example Setups
Personal server (Vaultwarden, Nextcloud, Jellyfin)
- At home: LAN — fastest, no Internet involved
- Away from home: VPN — fast, private, all services reachable
- Sharing with family: Clearnet with a domain — they use it like any other website, with strong passwords and 2FA
Bitcoin and Lightning node
- Bitcoin P2P: Public IP — lets your node participate in the network
- Lightning: Public IP — required for routing and receiving payments
- Personal access to dashboards: VPN or LAN — keep admin interfaces private
Anonymous or censorship-resistant hosting
- Primary access: Tor — publish the
.onionaddress, no domain or DNS needed - Optional clearnet mirror: Clearnet with a StartTunnel gateway — hides your home IP behind the VPS
Simple setup, no network control
- All services: Tor — works from any Tor-enabled browser, no router configuration needed
mDNS
Multicast DNS (mDNS) gives your server a <server-name>.local address on your LAN. The address is derived from your server name by lowercasing it, removing non-alphanumeric characters, and replacing spaces with hyphens. For example, a server named “My Cool Server” gets the mDNS address my-cool-server.local.
Watch The Video
How It Works
mDNS resolves your server’s .local address to its LAN IP address without relying on a DNS server. Any device on the same local network can reach your server using this address.
Tip
The mDNS address is useful because your router may change your server’s IP address on the LAN. If that happens, the mDNS address will continue to work — even if you move or get a new router.
Limitations
mDNS only works on the local network. It does not work over VPN or the Internet. For remote access using a custom domain, see Private Domains.
Inbound VPN
Access your server privately from anywhere in the world using a VPN. Only authorized devices can reach your server and its installed services.
Think of your server’s gateway as a defense perimeter with hundreds of locked doors, each door leading to a unique service interface. One door might say “Vaultwarden UI”, another “Bitcoin RPC”, and another “Bitcoin P2P”. An inbound VPN gives authorized devices a key to the doors they need — without opening them to the public Internet.
WATCH THE VIDEO
LAN IP and Private Domains over VPN
Once connected to your VPN, you can reach your server and its services using your server’s LAN IP address. The StartOS dashboard is available at the base IP, while each service interface is available on a different port of that same IP.
Note
Most VPN clients do not support mDNS, so your server’s
.localaddress will typically not work over VPN. Use the LAN IP address instead, or set up private domains for friendlier names that work reliably over VPN.
Option 1: Router
Most modern routers include a VPN server feature. If so, it is usually the preferred method for private, remote access to your server.
Warning
If your ISP uses CGNAT, your router cannot accept inbound connections, so a router-based VPN will not work. Use Option 2: StartTunnel instead.
-
If you haven’t already, assign a static IP address to your server on the LAN. Refer to your router’s user manual for detailed instructions.
-
Since home IP addresses can change without warning, we highly recommend setting up dynamic DNS. Many routers offer this as a built-in feature. If not, third-party services are available. Without dynamic DNS, a change to your home IP will disconnect all VPN clients until you re-download configuration files for each one.
-
Enable your router’s VPN server. Refer to your router’s user manual for detailed instructions.
Option 2: StartTunnel
By default, StartTunnel exports wireguard config files that are configured for split tunneling, allowing you to use your StartTunnel VPN to access your StartOS server and installed services while also preventing it from being automatically used for all Internet traffic.
There are three reasons to select this option:
- Your router does not offer a VPN server.
- Your router’s VPN server is not automatically configured for split tunneling.
- You are already using StartTunnel for clearnet hosting, so most of the work is already done.
To use StartTunnel for private, remote VPN access, see StartTunnel.
Connecting Clients (WireGuard)
Once you have successfully enabled a VPN server on your router or added a StartTunnel gateway, follow the instructions below.
-
Obtain a WireGuard config file for your device.
- StartTunnel: Follow instructions here
- Router: Follow your router’s instructions.
-
Install WireGuard and import your config file:
-
Install WireGuard from the App Store.
-
Open the WireGuard app, click “Import tunnel(s) from file”, and select the config file.
-
MacOS will inform you that WireGuard wants to set up a VPN connection. Click “Allow”.
-
Your VPN tunnel will have been created and visible in both your Mac’s system settings and in the WireGuard app where you can click to activate it.
Tip
You may need to edit your newly created tunnel and enable “On-demand” for either ethernet, wifi, or both.
Connecting Clients (OpenVPN)
Note
OpenVPN is only available when using a router-based VPN server. StartTunnel uses WireGuard.
-
Download the configuration file from your router’s OpenVPN server.
-
Install OpenVPN and import your config file:
-
Install the OpenVPN Connect client from the official website.
-
If asked to do so, allow the OpenVPN client to run in the background.
-
Import the configuration file and enter the necessary authentication settings you chose or were default on your OpenVPN server on your router.
-
Depending on how you’ve configured your OpenVPN server, you may need to add a username and password before you hit Connect.
-
Once set up, click on the name of the profile to connect and disconnect. You can edit the profile from the icon to its right.
Outbound VPN
Route your server’s outbound Internet traffic through a VPN for privacy. An outbound VPN is like sending your mail through a proxy — the recipient sees the proxy’s return address, not yours. Common reasons to use one:
- Hide your IP address from external services your server connects to.
- Prevent ISP monitoring of your server’s traffic.
- Route sensitive services differently — for example, send Bitcoin traffic through Mullvad while leaving everything else on the default gateway.
Add a VPN Gateway
To add an outbound VPN, add a gateway using a WireGuard configuration file. There are two options:
| Commercial VPN (Mullvad, ProtonVPN, etc.) | StartTunnel | |
|---|---|---|
| Gateway type | Outbound only | Inbound/outbound |
| Also serves as | — | Inbound VPN and clearnet gateway |
| IP anonymity | High — your traffic blends with thousands of other users on shared IPs | Lower — the VPS IP is dedicated to you, so all traffic from it can be correlated |
| Cost | Monthly subscription | VPS hosting cost |
| Setup | Paste provider’s WireGuard config | See StartTunnel |
Both options hide your home IP address, and in both cases the provider knows who you are. The difference is that a commercial VPN shares IPs across thousands of users, making it harder for external observers to correlate traffic to a specific person. With StartTunnel, the VPS IP is yours alone, so all traffic from it can be linked together. The advantage of StartTunnel is that a single gateway handles both inbound and outbound traffic.
Set System-Wide Default Gateway
By default, StartOS dynamically selects which gateway to use for outbound traffic for optimal performance (“Auto” mode). You can override this under System > Gateways > Outbound Traffic by switching from “Auto” to a specific gateway. This forces all outbound traffic for everything on the server through the selected gateway.
IPv6 leak prevention
StartOS treats IPv6 outbound routing the same way as IPv4: the default gateway is chosen by route metric, and you can pin all traffic to a specific gateway under System > Gateways > Outbound Traffic.
If the gateway you select for outbound traffic can’t carry IPv6 — for example a commercial VPN whose WireGuard config has no IPv6 address — StartOS drops the server’s outbound IPv6 rather than letting it fall back to your ISP connection, so your real IPv6 address never leaks around the VPN. (The drop is a blackhole in that gateway’s own routing table.) A gateway that does provide IPv6 (such as a StartTunnel with a delegated prefix) carries IPv6 normally; on a server with no native ISP IPv6, such a tunnel can also become your IPv6 default before you pin it, so select an outbound gateway explicitly if you want to control which one.
Route Individual Services Through VPN
You can override the system default on a per-service basis by navigating to a service and going to Actions > Set Outbound Gateway. This lets you route individual services through different VPNs while leaving others on the default.
For example, you could route your Bitcoin node through Mullvad for privacy while leaving Nextcloud on the default gateway for better performance.
Tor
Access your server over the Tor network using .onion addresses. Tor provides anonymous, censorship-resistant connections. How you use an onion address determines whether it functions as private or public access: keep the address secret and it’s a private tunnel; publish it without associating your identity and you host anonymously; publish it with your identity and you host an identified but censorship-resistant service.
WATCH THE VIDEO
Setting Up Tor
Tor is not included in StartOS by default. To use Tor, you must install the Tor service from the marketplace.
-
Go to the Marketplace and install the Tor service.
-
Start the Tor service and wait for it to become healthy.
Creating and Deleting Onion Services
Once Tor is installed, a Tor addresses table appears for each service interface, under the Interfaces tab.
-
Navigate to the service you want to expose over Tor.
-
Open the Interfaces tab and expand the interface.
-
In the Tor table, click Add Onion Service to create a
.onionaddress for that interface. -
To delete an onion address, click the overflow menu on that row and select Delete.
Tip
When creating an onion service, you can upload a private key to use a vanity address. For instructions on generating a vanity address, see here.
HTTP vs HTTPS (SSL)
When creating an onion service, you can choose whether to enable SSL (HTTPS). Because Tor is already an encrypted protocol, HTTP is perfectly safe and is the recommended default — it means neither you nor anyone you share the address with needs to trust your server’s Root CA. Only enable SSL if the client application naively requires HTTPS (for example, native Bitwarden apps that enforce HTTPS without considering Tor).
Connecting over Tor
Using a Tor Browser
You can connect to your server and installed services from anywhere in the world, privately and anonymously, by visiting their unique http://....onion URLs from any Tor-enabled browser.
Tip
Recommended Browsers
- Mac, Linux, Windows, Android/Graphene: Tor Browser
- iOS: Onion Browser
Running Tor in the Background on your Phone/Laptop
By running Tor in the background on your phone or laptop, certain apps can connect over Tor, even if the apps themselves do not natively support Tor.
For instructions specific to your device’s operating system, use a search engine or AI. This capability is well documented.
Public Hosting
Onion addresses can also serve as a public hosting method. Unlike clearnet domains, onion addresses do not require purchasing a domain, configuring DNS, or opening ports. Anyone with a Tor-enabled browser can reach them.
-
Censorship resistance. Onion services cannot be taken down by domain registrars, DNS providers, or ISPs. As long as your server is running, the address is reachable.
-
Anonymity (if done carefully). If you publish an onion address without associating it with your identity, observers can access your service but cannot determine who operates it. Achieving true anonymity requires careful operational security — for example, never linking the address to your real identity, and not leaking metadata that could be correlated.
-
No infrastructure dependencies. You do not need a static IP, a domain name, or port forwarding. Tor handles routing entirely through its overlay network.
The difference between private and public Tor access is simply in how you use the addresses: keeping them secret vs. sharing them publicly.
Clearnet
Make your services publicly reachable on the Internet using standard domains (.com, .net, etc.). This requires gateway selection, a domain name, DNS configuration, and port forwarding.
WATCH THE VIDEO
Warning
If your ISP uses CGNAT, your router cannot accept inbound connections and port forwarding will not work. You must use a StartTunnel gateway for clearnet hosting.
Home Router vs Virtual Private Router
When hosting services on the clearnet, anyone who connects will know the IP address of the gateway used. Knowing a gateway’s IP address reveals its approximate geographic location:
| Geographic Location | Detection Accuracy |
|---|---|
| Country | 99% |
| State / Region | 95-99% |
| City (large metro) | 60–80% |
| Zip Code / Neighborhood | 30–50% |
| Exact Street Address | Requires ISP subpoena |
If your gateway is your home router, you are revealing the approximate location of your home. If your gateway is a virtual private router (StartTunnel), you are revealing the approximate location of the VPS, not your home.
| Router | StartTunnel | |
|---|---|---|
| Cost | Free | VPS rental (~$5–10/mo) |
| IP stability | Home IP can change without warning, breaking all your domains until DNS is updated. Dynamic DNS is highly recommended, but support varies by router and may cost money. | Static IP from the VPS provider. No dynamic DNS needed. |
| Privacy | Exposes your home’s approximate location | Exposes the VPS location, not your home |
| CGNAT compatible | No. If your ISP uses CGNAT, you cannot use your router as a gateway. | Yes |
| Port forwarding | Configured in router admin panel | Configured in StartTunnel |
Add a Public Domain
-
On the service interface page, locate your preferred gateway and click “Add Domain”, then select “Public Domain”.
-
Enter the fully qualified domain name. For example, if you control
domain.com, you could enterdomain.comorpublic.domain.comornextcloud.public.domain.com, etc. -
Select a Certificate Authority to sign the certificate for this domain.
- Let’s Encrypt: Ideal for public access. All devices trust Let’s Encrypt certificates by default.
- Local Root CA: Ok for personal access. Bad for public access. Only devices that have downloaded and trusted your server’s Root CA will be able to access the domain without issue.
-
Click “Save”.
-
StartOS will automatically test your DNS record and port forwarding. If both pass, the domain is ready to use. If either test fails, a setup modal will appear showing the failing tests with instructions to remedy and the ability to re-test.
Set Up DNS Records
StartOS tests DNS automatically when you add or enable a public domain, and will guide you through the setup if the test fails. For reference, here is what is needed:
-
Access your domain’s DNS settings, usually in the registrar where you originally leased the domain.
-
Create a DNS record that points your domain to your gateway’s public IP address:
- An
Arecord pointing at your gateway’s public IPv4 address. - If your gateway also has an IPv6 global-unicast address (GUA), add an
AAAArecord pointing at that address. StartOS serves a public domain over both IPv4 and IPv6 (DualStack) whenever a GUA is available, so adding both records lets clients reach the domain over either protocol. The exact record values are shown in the DNS setup modal.
If you use subdomains, consider using a wildcard (
*) for that host so that all future subdomains work without needing additional records.Tip
It can take up to a few hours for DNS changes to propagate. You can check propagation using https://dnschecker.org.
- An
Configure Port Forwarding
To expose a public domain to the Internet, the appropriate port must be forwarded in the corresponding gateway. StartOS tests port forwarding automatically when you add or enable a public domain, and will guide you through the setup if the test fails.
When a public address is enabled, StartOS first attempts to open the port automatically on the corresponding gateway, using PCP (preferred), then NAT-PMP, then UPnP. If the gateway supports one of these (and it is enabled), no manual step is required — and when the address is later disabled or deleted, StartOS removes the port forward it created. This is best-effort: if the gateway supports none of them, the automatic test will fail and you create the rule manually as described below.
Note
IPv6 needs no port forwarding. An IPv6 GUA is your server’s own globally-routable address, so there is nothing to translate — StartOS instead opens an inbound firewall pinhole for the domain’s port on the upstream gateway (again via PCP) and serves the domain on the GUA directly. The bare GUA itself stays local-only: only traffic that matches the domain (by TLS SNI) is accepted, so exposing a public domain over IPv6 does not expose the address for anything else.
Tip
Most websites and APIs on the Internet are hosted on port
443. Port443is so common, in fact, that apps and browsers infer its presence. The absence of a port means the port is443. With rare exceptions, domains on StartOS also use port443, and that is why your domains usually do not display a port. The port forwarding rule needed for these standard domains is always the same, which means you only have to do it once!
How you create a port forwarding rule depends on the type of gateway.
-
Routers: Port forwarding is supported by all routers and easy to do. Many routers also support PCP, NAT-PMP, or UPnP, in which case StartOS opens the port for you automatically. If none is available or they are disabled, refer to your router’s manual to add the rule manually.
-
StartTunnel: StartTunnel supports PCP and UPnP over the tunnel, so StartOS opens the required port automatically. To add or manage forwards manually, refer to the StartTunnel Port Forwarding guide.
Public IP
Access a service interface directly using a gateway’s public IP address and port number, without a domain name. Some protocols — such as Bitcoin P2P, Lightning, and other peer-to-peer services — communicate using raw IP addresses and ports rather than domain names. For these services, a public IP address may be all that’s needed.
For hosting websites or APIs that people access in a browser, use a public domain instead. Public IPs accessed in a browser will display certificate warnings because Let’s Encrypt does not sign certificates for IP addresses. Visitors would need to trust your Root CA, which is not reasonable for public access.
Watch The Video
Enable Public IP Access
-
In the Interfaces tab, expand the service interface and locate the gateway you want to use.
-
Find its public IPv4 address and toggle it on.
Warning
If your ISP uses CGNAT, you cannot use your router gateway for public IP access because port forwarding will not work. Use a StartTunnel gateway instead.
Home IP Address Stability
If your gateway is your home router, be aware that your ISP can change your home IP address at any time. When this happens, any peers or services configured to reach you at the old IP will lose connectivity. Unlike clearnet domains, there is no dynamic DNS equivalent for raw IP addresses.
If you need a stable public IP, use a StartTunnel gateway. VPS providers assign static IPs that don’t change.
Configure Port Forwarding
The selected port must be forwarded in the corresponding gateway. StartOS tests port forwarding automatically when you add or enable a public IP address, and will guide you through the setup if the test fails.
-
Routers: Refer to your router’s manual for instructions on port forwarding.
-
StartTunnel: Refer to the StartTunnel Port Forwarding guide.
Gateways
A gateway is a network interface that connects your server to the Internet. Your router is the default gateway — it is always present. You can add additional gateways using WireGuard configuration files. All gateways are managed under System > Gateways.
WATCH THE VIDEO
Gateway Types
Every gateway routes outbound traffic from your server to the Internet. Some gateways also accept inbound connections. StartOS automatically detects the type:
-
Inbound/outbound — routes outbound traffic and accepts inbound connections. Your home router and StartTunnel (a virtual private router running on a VPS) are inbound/outbound gateways. These are used for inbound VPN access and clearnet hosting.
-
Outbound only — routes outbound traffic but does not accept inbound connections. Commercial VPN providers (Mullvad, ProtonVPN, etc.) are outbound-only gateways. These are used as outbound VPNs.
Note
If you are running StartOS on a VPS with a public IP address, there is no router gateway. Your server’s network interface is directly exposed to the Internet.
Warning
If your ISP uses CGNAT, your router cannot accept inbound connections, even with port forwarding configured. This means your router gateway is effectively outbound-only: it cannot be used for clearnet hosting, public IP access, or inbound VPN. Use a StartTunnel gateway instead.
Adding a Gateway
-
Navigate to
System > Gatewaysand click “Add”. -
Upload or paste a WireGuard configuration file from your VPN provider or StartTunnel instance.
StartOS will automatically detect the gateway type:
- StartTunnel config files are recognized and marked as inbound/outbound gateways.
- All other WireGuard configs are marked as outbound-only gateways.
Updating a Gateway’s Config
To re-import a gateway’s WireGuard config — for example, a StartTunnel config re-issued with new settings — open the gateway’s ⋮ menu, choose “Update config”, and paste or upload the new file. The config is replaced in place: the gateway keeps its identity, so its port forwards and private/public domains are preserved. (Re-adding via “Add” would instead create a separate gateway.)
Private Domains
A private domain works like your server’s mDNS address, except it also works over VPN and it can be anything. It can be a real domain you control, a made up domain, or even a domain controlled by someone else.
Private domains can be added to any gateway: wired (Ethernet), wireless (WiFi), or WireGuard (StartTunnel). They can only be accessed when connected to the same network as your server — your LAN, or a VPN / tunnel — and they require trusting your server’s Root CA.
Adding a Private Domain
Note
How a private domain is made to resolve depends on the gateway type. On an Ethernet or WiFi gateway, you point your router’s DNS at this server. On a WireGuard (StartTunnel) gateway, you either enable DNS Injection for this server in StartTunnel or point the tunnel subnet’s DNS at this server. See DNS for Private Domains below.
-
For an Ethernet or WiFi gateway, assign a static IP address to your server on the LAN if you haven’t already (refer to your router’s user manual). A WireGuard gateway already uses a fixed tunnel address, so this step does not apply.
-
On the service interface page, click “Add Domain” on the desired gateway table and select “Private Domain”.
-
Enter a fully qualified domain name. It can be anything. For example:
domain.com,private.domain.internal,nextcloud.private,nextcloud.fake-tld, orfacebook.com. -
Click “Save”.
-
StartOS will automatically test your DNS configuration. If the test passes, the domain is ready to use. If it fails, a setup modal will appear with instructions to configure your DNS server and the ability to re-test.
DNS for Private Domains
A private domain resolves only when the gateway’s DNS serves its record. StartOS tests this automatically when you add a private domain and guides you through the setup if needed. How you configure it depends on the gateway type.
Ethernet & WiFi gateways
Set StartOS as your router’s primary DNS server. All routers support this feature. Refer to your router’s user manual for detailed instructions.
Warning
It is possible that StartOS is already using your router for DNS. In this case, you cannot instruct your router to use StartOS for DNS, as this would be circular. If StartOS detects a potential circular DNS situation, it will warn you. To resolve this, switch to static DNS servers so StartOS no longer relies on your router.
WireGuard (StartTunnel) gateways
StartTunnel runs the DNS resolver for the tunnel, so you have two options:
- DNS Injection (simplest): in StartTunnel, enable the DNS Injection toggle for this server. StartOS then publishes the domain’s record directly to StartTunnel’s resolver — there is nothing else to configure.
- Point the subnet at this server: in StartTunnel, set the DNS for this server’s subnet to this server’s tunnel address. StartTunnel then forwards DNS for the subnet to StartOS.
Tip
If your private domain is a real domain that you control, you can alternatively configure its DNS record at your registrar to resolve to your server’s address on that network — its LAN IP address for an Ethernet or WiFi gateway, or its tunnel address for a WireGuard gateway. In this case, the StartOS DNS server is not needed.
Split DNS: the Same Domain, Public and Private
You can add the same domain as both a clearnet (public) domain on a StartTunnel gateway and a private domain on an Ethernet or WiFi gateway. StartOS serves it as split DNS:
- When you are on your LAN or connected over VPN, StartOS resolves the domain to your server’s local IP address, so traffic stays on your network at full LAN speed.
- When you are away, the same domain resolves through public DNS to your StartTunnel gateway, so the service is reachable over the internet.
It’s the same domain and the same TLS certificate either way, with no hairpin routing (LAN traffic looping out to the gateway and back).
Tip
This is especially useful for services that embed their access URL in generated links, such as Nextcloud or Immich share links. Configure the service with the public domain so the links work for external recipients, and you’ll still get direct LAN-speed access when you’re home.
DNS
This page covers how StartOS resolves domain names and when you might need to change the defaults.
WATCH THE VIDEO
DHCP
By default, StartOS obtains its DNS servers from your router via DHCP. For most users, the default settings require no changes.
Static DNS Servers
To view or change the DNS servers StartOS uses, navigate to System > DNS. To override the defaults, select “Static” and provide up to three DNS servers in order of preference.
Note
If you want to use a specific DNS provider (such as Cloudflare or Quad9), it is generally better to configure it in your router so that all devices on your network benefit, not just your server.
Private Domains
StartOS runs its own DNS server to resolve private domains on your network. For setup details, see DNS for Private Domains.
CGNAT (Carrier-Grade NAT)
CGNAT is a networking technique where your ISP places your home network behind an additional layer of NAT that you do not control. This page explains what CGNAT is, how to tell if you’re behind it, and what it means for self-hosting on StartOS.
Watch The Video
What Is CGNAT?
Normally, your router is assigned a public IP address by your ISP. This allows devices on the Internet to initiate connections to your router, which can then forward them to your server via port forwarding.
With CGNAT, your ISP does not give your router a public IP. Instead, many customers share a single public IP managed by the ISP’s equipment. Your router’s “WAN IP” is actually a private address on the ISP’s internal network. Because you don’t control the ISP’s NAT, you cannot forward ports, and no one on the Internet can initiate a connection to your router.
Who Is Affected?
CGNAT is common with:
- Satellite Internet — Starlink, HughesNet, Viasat
- Cellular/fixed wireless — T-Mobile Home Internet, Verizon Home Internet, and similar 4G/5G home broadband services
- Some fiber and cable ISPs — particularly in regions with IPv4 address shortages
If you’re unsure whether your ISP uses CGNAT, see How to Check below.
Impact on StartOS
CGNAT blocks all inbound connections to your router. This means your router gateway cannot be used for:
- Clearnet hosting — Public domains require port forwarding, which CGNAT prevents.
- Public IP access — Exposing a service by IP address and port requires inbound connections.
- Inbound VPN — A router-based VPN server needs to accept connections from the Internet.
CGNAT does not affect:
- LAN access — Devices on your local network connect directly, bypassing the ISP entirely.
- Tor — Tor routes through its overlay network using only outbound connections.
- Outbound VPN — Outbound connections are not blocked by CGNAT.
The Solution: StartTunnel
StartTunnel is a virtual private router (VPR) — a minimal, self-hosted router that runs on a VPS with a public IP address. Your server connects outbound to the VPS, and the VPS accepts inbound connections on your behalf — just like a home router, but in the cloud. Because the VPS has a real public IP, CGNAT is completely bypassed.
With a StartTunnel gateway, you get full clearnet hosting, public IP access, and inbound VPN — regardless of your ISP’s network configuration.
How to Check
Compare your router’s WAN IP with your actual public IP:
-
Log into your router’s admin panel and find its WAN IP address (sometimes called “Internet IP” or “External IP”).
-
Visit a site like whatismyip.com from a device on the same network.
-
If the two addresses match, you are not behind CGNAT. If they differ, you are likely behind CGNAT.
Tip
Another indicator: if your router’s WAN IP is in the
100.64.0.0/10range (100.64.x.x through 100.127.x.x), that is the CGNAT address block defined by RFC 6598 and confirms you are behind CGNAT.
Note
Some ISPs offer a way to opt out of CGNAT, either through a support request or by purchasing a static IP add-on. Check with your ISP before assuming CGNAT is permanent.
Creating Backups
Back up your server’s data to a physical drive or a network folder.
Important
Creating backups is an essential responsibility of self-hosting. If you do not make backups, you will eventually lose your data.
Watch The Video
Important Info
-
You can create backups to a physical drive plugged directly into your server, or over-the-air to another device on the same LAN (a network folder).
-
Backups are encrypted using your master password. If you change your password prior backups retain the original password.
-
Services may choose to exclude certain files or folders from the backup. For example, Bitcoin excludes the blockchain, since it can be recovered by re-syncing.
-
Backups can take minutes or hours to complete, depending on your hardware and quantity of data.
-
To back up a service, StartOS first stops it (if it was running), performs the backup, then restarts it — but only if it was running beforehand. A service that was already stopped stays stopped. Consequently a service cannot be used while it is backing up, though you may continue to use your server and other services in the meantime.
-
Upon completion, StartOS issues a backup report, indicating which services were backed up, as well as any errors.
-
Backups are differential — each new backup to the same target overwrites the previous one. To maintain multiple backup points, use multiple backup targets.
-
The backup targets list shows the free space available on each drive and network folder, so you can confirm your backup will fit before you start.
-
Backups taken from a specific system architecture (x86, ARM, RISC-V) are backed up for just that architecture. If restored to another architecture, they will likely need to be reinstalled to run efficiently.
-
The backup format changed. New backups are written to a
StartOSBackupsV2folder on the target, replacing the olderStartOSBackups(V1) format. StartOS helps you clean up the obsolete V1 data:- When you select a target that still holds a V1 backup for this server, StartOS warns you before backing up and shows how much free space remains on the target (see below).
- After a backup completes, if the target still contains this server’s V1 backup, StartOS raises a notification reminding you it is no longer needed.
- On the
Create Backuppage, any target holding this server’s V1 backup shows a Delete old backup button — whether or not a new (V2) backup exists yet. After you confirm, StartOS removes this server’s old V1 backup to reclaim space; your currentStartOSBackupsV2backup — and any backups belonging to other servers that share the target — are untouched. If this server has no current (V2) backup on that target, StartOS asks for an extra confirmation first, since deleting the old backup would leave this server with no backup there.
Warning
Before backing up, check the free space remaining on the target and make sure your selected services will fit. If space is tight, use the Delete old backup button to reclaim the space this server’s old backup occupies, or choose another drive.
Best Practices
Even with proper backups the risk of data corruption is always non-zero. Therefore it is recommended to take additional care when backing up highly valuable or irreplaceable data like a lightning node:
- High quality SSDs should be favored over HDDs as a backup target.
- Backup to multiple targets.
- If backing up to multiple targets make sure all backups are up to date.
Physical Drive
EXT4 is the recommended format of your backup drive. fat32 and exFAT are not recommended and may not work.
Warning
Backing up to USB thumb drives or SD card media is not recommended unless you are using high-endurance, high-quality storage. Low-quality flash memory is prone to corruption and failure over time.
If you are using a Raspberry Pi, backup drive must be self-powered, or be connected via a powered USB hub, to prevent possible data corruption.
Network Folder
A network folder backup sends your encrypted backup over the LAN to a shared folder on another device. First, create a shared folder on the target device, then connect to it from StartOS.
Step 1. Create a Shared Folder
-
Identify or create a folder to store your server backups.
Tip
This folder can be located on an external drive connected to your Mac.
-
Go to
System Settings > General > Sharingand click the “info” icon. -
Click the toggle to enable file sharing, then click the “plus” icon and select your backups folder.
-
Click “Options” and ensure “Share files and folders using SMB” is checked.
-
Check the box next to the user who owns the folder, then click “Done”.
Tip
You can find the hostname at the top of the sharing window. The hostname will be an address beginning with
smb://. To use as hostname, disregard thesmb://and simply enter the IP address that follows it. Alternatively, you can use the computer hostname (open Terminal and typehostname). Either method will work.
Step 2. Connect from StartOS
-
In StartOS, go to
System > Create Backup. -
Click “Open New”.
-
Complete the form:
- Hostname: The hostname or IP address of your Mac (see the tip in the section above).
- Path: The name of your shared folder, not the full directory path.
- Username: Your Mac user who owns the shared folder.
- Password: Your password for the above user.
Warning
If you receive
Filesystem I/O Error mount error(13): Permission denied, ensure you have entered the correct values. The hostname can be particularly tricky.
Restoring Backups
Restore previously created backups to recover individual services or your entire server. This is for disaster recovery when a service is accidentally uninstalled or when your data drive is lost or corrupted.
Restoring Individual Services
This option should only be necessary if you accidentally uninstall a service.
- Go to
System -> Restore from Backup - Select your backup drive.
- Decrypt the backup drive by entering the password that was used to create it.
- Select the service(s) you want to restore and click “Restore Selected”.
Tip
If you’re restoring a backup taken from a different system architecture (x86, ARM, RISC-V) to the one you’re restoring to, you may need to reinstall services (not uninstall, since you will lose your data) from the marketplace after the restore completes to avoid running them more slowly in emulation.
Restoring an Entire Server
If your StartOS data drive is lost or corrupted and you need to restore your entire server, follow instructions here.
Server Name
Your server name is a custom label you choose during initial setup. It is displayed in the browser tab title and is used to derive your server’s mDNS address.
You can change your server name at any time under System > General Settings > Server Name. After saving a new name, your mDNS address will update accordingly.
Warning
If you are currently connected via your mDNS address, changing the server name will require you to switch to the new address. You will be prompted with the new address after saving.
SSH
Like other Linux distributions, StartOS allows you to go “under-the-hood” via Secure Shell Protocol (SSH).
Warning
Accessing your server via SSH is considered advanced. Please use caution, you can cause permanent damage to your server, potentially resulting in loss of data.
Watch The Video
User and privileges
The SSH user is start9, not root. Root login is disabled. The start9 user has sudo privileges, so commands requiring root should use sudo. There is no need to run sudo -i or sudo su.
Using your StartOS Master Password
-
Open a terminal on your client device and enter:
ssh start9@SERVER-HOSTNAMEReplace
SERVER-HOSTNAMEwith your server’syour-server-name.localaddress. -
The first time you connect, you will see something like this:
The authenticity of host 'your-server-name.local (192.168.1.175)' can't be established.
ED25519 key fingerprint is SHA256:BgYhzyIDbshm3annI1cfySd8C4/lh6Gfk2Oi3FdIVAa.
This key is not known by any other names.
Are you sure you want to continue connecting (yes/no/[fingerprint])?
Type
yesand hit Enter to start trusting the server’s SSH public key. -
Enter your StartOS master password.
Using SSH Keys
Create an SSH key
If you don’t already have an SSH key pair on your laptop or desktop, open a terminal and run:
ssh-keygen -t ed25519
Press Enter to accept the default file location, and optionally set a passphrase. Your public key will be at ~/.ssh/id_ed25519.pub.
Add your key to StartOS
-
Copy your public key to clipboard:
cat ~/.ssh/id_ed25519.pub -
In the StartOS UI, go to
System > SSH -
Click
Add Key, paste in your key and clickSave -
Open a terminal on your client device and enter:
ssh start9@SERVER-HOSTNAMEReplace
SERVER-HOSTNAMEwith your server’syour-server-name.localaddress. -
Enter your key’s passphrase (if any)
SMTP
Configure StartOS with third-party SMTP credentials so that services like NextCloud, Vaultwarden, and Gitea can send email notifications. SMTP is configured under System > SMTP.
Warning
This guide is not for using StartOS as an email server. It is for granting StartOS the simple ability to send emails through a 3rd party SMTP server.
Getting SMTP Credentials
The guides below are for using Gmail, Amazon SES, or Proton Mail for SMTP, but you may also use another third party provider of your choice.
-
Access your Google 2-step verification settings: https://myaccount.google.com/signinoptions/two-step-verification.
-
Enable 2-Step verification if not already.
-
Go to the App Passwords page: https://myaccount.google.com/apppasswords. Google no longer links to it from the 2-Step Verification page, so navigate there directly.
-
Choose a name for the new App Password. You may call it anything, such as “SMTP”, then click “Create”.
-
A random 16-character password will be created and shown to you. This is your app password. Save it somewhere secure, such as your Vaultwarden password manager, then click “Done”.
-
In StartOS, go to System > SMTP, select Gmail as the provider, and enter the values below. Choosing Gmail pre-fills the host and defaults to TLS on port 465.
Parameter Value Host smtp.gmail.com Connection Security TLS Port 465 From Address your-username@gmail.com Username your-username@gmail.com Password your App Password (from above) Note
Selecting Gmail pre-fills and locks the Host, and choosing TLS locks the Port at 465. To use STARTTLS instead, set Connection Security to STARTTLS and the Port becomes 587. The From Address may optionally include a display name, e.g.
Your Name <your-username@gmail.com>.
Configuring StartOS
-
Navigate to
System > SMTP -
Enter your SMTP credentials and hit “Save”.
-
On the same page, send yourself a test email. Remember to check your spam folder. If the email goes to spam, mark it as not spam.
-
For each service you want to use the credentials to send emails, go to the dashboard of that service, click “Actions”, and locate the relevant action.
WiFi
StartOS supports connecting your server to a wireless network when a wired Ethernet connection is not available. WiFi is managed from System > WiFi.
Warning
A wired Ethernet connection provides significantly better reliability, throughput, and latency. WiFi is prone to intermittent drops that can interrupt backups, corrupt data transfers, and degrade service performance. Only use WiFi if Ethernet is truly not an option.
Requirements
Your server must have a compatible wireless interface. If no wireless hardware is detected, the WiFi page will display “No wireless interface detected” and no controls will be available.
Note
Servers sold by Start9 do not come with wireless networking cards, but a wireless card can be added to any of the servers we sell.
Enabling WiFi
WiFi is managed from System > WiFi. Use the toggle at the top of the page to enable or disable the wireless radio. When disabled, no networks will be scanned or connected.
Connecting to a network
Once WiFi is enabled, two lists are displayed:
- Known Networks - Networks you have previously saved. Tap one to reconnect. Use the trash icon to forget a saved network.
- Other Networks - Available networks detected nearby. Tap one to connect. If the network is secured, you will be prompted for the password.
Signal strength is indicated by the WiFi icon color: green (strong), yellow (moderate), or red (weak). A lock icon means the network requires a password.
Adding a hidden network
To connect to a network that does not broadcast its SSID, tap the Add button. Enter the network SSID and password, then choose:
- Save for later - Saves the credentials without connecting immediately.
- Save and connect - Saves the credentials and connects right away.
Fix WiFi Connection Issues
If a connection attempt fails, you will see a “Failed to connect” warning. Double-check the password and try again. The system retries several times before reporting failure, so the process may take a moment.
Internationalization
StartOS supports multiple languages and keyboard layouts.
Language
Change the display language of the StartOS interface under System > General Settings > Language. Select a language from the dropdown to apply it immediately.
Supported languages:
- English
- French
- German
- Polish
- Spanish
Keyboard Layout
A keyboard layout is required for Kiosk Mode. You can change it under System > General Settings > Kiosk Mode by clicking the edit icon next to the current layout.
Kiosk Mode
Kiosk Mode runs a full Firefox browser on your server and displays the StartOS dashboard on a directly connected monitor. It is intended for debugging and initial setup when no other client device is available.
Warning
StartOS servers are designed to run headless. Kiosk Mode consumes at least 1 GB of RAM running Firefox. Unless you specifically need it for troubleshooting, leave it disabled.
Enabling Kiosk Mode
Navigate to System > General Settings > Kiosk Mode and click Enable. If no keyboard layout has been set, you will be prompted to select one first. A restart is required to apply the change.
Disabling Kiosk Mode
Click Disable, then restart when prompted.
Changing Keyboard Layout
When Kiosk Mode is enabled, your current keyboard layout is displayed. Click the edit icon to select a different layout.
Note
Kiosk Mode may be unavailable on certain hardware.
Updating StartOS
Note
There are no automatic updates in StartOS. Updating the operating system and service always requires explicit action. That said, we highly recommended keeping StartOS up to date for the latest security and performance patches, as well as to take advantage of new features.
Update through the UI
-
When a new version of StartOS is available, a rocket badge will appear on the “System” tab.
-
Go to
System -> General -> Software Update. -
Read the release notes and click “Begin Update”.
Warning
Ensure you have a stable Internet connection before beginning an OS update, and do not unplug your server while StartOS is downloading.
-
While the new version of StartOS is downloading, you may continue to use your device as usual.
-
Once the download is complete, you will be prompted to restart your server to complete the update.
Warning
Updates can take up to an hour to complete. During this time, there is no indication of progress and your StartOS UI will be unreachable. DO NOT UNPLUG YOUR SERVER DURING THIS TIME!
Update by Re-flashing
If you are updating to an unreleased version of StartOS, or something went wrong with a UI update (very rare), it may be necessary to update StartOS by re-flashing. Follow the guide for Installing StartOS.
Changing Your Password
To change your StartOS master password, go to System > Change Password in the main UI.
Forgot Password
If you have lost or forgotten your StartOS master password, you can reset it by reinstalling StartOS while preserving your data.
- Download and flash the latest version of StartOS, using the appropriate installation guide for your hardware.
- Visit http://start.local.
- When selecting your data drive, select Keep my data.
- Create a new password and complete setup. All your previous addresses and data will be preserved.
start-cli Reference
The primary CLI for managing a StartOS server. Connect via SSH to run commands locally, or use --host to manage a server remotely. Pass -h at any level to see subcommands and options.
Service developers will find the S9PK Packaging and Registry sections especially useful. The tunnel subcommand group is documented separately in the StartTunnel CLI Reference.
Global Options
These apply to all subcommands.
-c, --config <PATH>— Configuration file path-H, --host <URL>— StartOS server URL-r, --registry <URL>— Registry URL--registry-hostname <HOST>— Registry server hostname--s9pk-s3base <URL>— Base URL for publishing s9pks--s9pk-s3bucket <BUCKET>— S3 bucket for publishing-t, --tunnel <URL>— Tunnel server address-p, --proxy <URL>— HTTP/SOCKS proxy--cookie-path <PATH>— Cookie file path--developer-key-path <PATH>— Developer signing key path
Authentication
Log in, log out, manage sessions, and reset the master password.
start-cli auth login
Log in and create an authenticated session. Required before running any commands against a remote server.
start-cli auth logout <SESSION>
End a specific authentication session.
start-cli auth reset-password
Reset the master password. Must be run locally (via SSH or physical access).
start-cli auth get-pubkey
Retrieve the server’s public key.
start-cli auth session list
List all active sessions.
--format— Output format
start-cli auth session kill [IDS...]
Terminate one or more sessions.
Server
Restart, shut down, update, and configure the server.
start-cli server restart
Restart the server.
start-cli server shutdown
Shut down the server.
start-cli server update
Check the configured registry for OS updates and apply if available.
start-cli server update-firmware
Update the server firmware.
start-cli server logs
Display StartOS system logs.
-l, --limit <N>— Max entries-f, --follow— Stream in real-time-c, --cursor <POS>— Start from cursor-B, --before— Show logs before cursor-b, --boot <ID>— Filter by boot ID
start-cli server kernel-logs
Display kernel logs. Same options as server logs.
start-cli server metrics
Display server metrics (CPU, RAM, disk, temperature).
--format— Output format
start-cli server time
Display server time and uptime.
--format— Output format
start-cli server device-info
Display hardware and device information.
--format— Output format
start-cli server rebuild
Tear down and rebuild all service containers.
start-cli server set-hostname [NAME] [HOSTNAME]
Set the server’s name and hostname.
start-cli server set-smtp
Configure SMTP for email notifications.
--host <HOST>— SMTP server hostname (required)--port <PORT>— SMTP port (required)--from <EMAIL>— Sender address (required)--username <USER>— Auth username (required)--password <PASS>— Auth password--security <MODE>—starttlsortls(required)
start-cli server test-smtp
Send a test email to verify SMTP configuration.
--host <HOST>— SMTP server hostname (required)--port <PORT>— SMTP port (required)--from <EMAIL>— Sender address (required)--to <EMAIL>— Recipient address (required)--username <USER>— Auth username (required)--password <PASS>— Auth password (required)--security <MODE>—starttlsortls(required)
start-cli server clear-smtp
Remove SMTP configuration and credentials.
start-cli server set-language <LANGUAGE>
Set the system display language.
start-cli server set-keyboard <KEYBOARD>
Set the keyboard layout.
start-cli server set-echoip-urls [URLS...]
Set the Echo IP service URLs used for external IP detection.
start-cli server experimental governor [SET]
View or set the CPU governor (e.g., performance, powersave).
--format— Output format
start-cli server experimental zram
Enable or disable ZRAM compressed swap.
--enable— Enable zram
Server Host Management
Manage network addresses and bindings for the server UI host.
start-cli server host address list
List all addresses assigned to the server host.
--format— Output format
start-cli server host address domain private add <FQDN> <GATEWAY>
Add a private domain to the server host.
start-cli server host address domain private remove <FQDN>
Remove a private domain from the server host.
start-cli server host address domain public add <FQDN> <GATEWAY> <INTERNAL_PORT>
Add a public domain to the server host.
--acme <PROVIDER>— ACME provider for certificate
start-cli server host address domain public remove <FQDN>
Remove a public domain from the server host.
start-cli server host binding list
List network bindings for the server host.
--format— Output format
start-cli server host binding set-address-enabled <INTERNAL_PORT>
Enable or disable a specific address binding.
--address <ADDRESS>— Address to modify (required)--enabled <true|false>— Enable or disable
Services
Install, start, stop, and manage service packages.
start-cli package list
List all installed packages.
--format— Output format
start-cli package install [ID] [VERSION]
Install a package from the registry or sideload a local .s9pk file.
-s, --sideload— Install from local file
start-cli package start <ID>
Start a service. Blocked if the service has an unresolved critical task, unless --force is passed.
--force— Start even if the service has an unresolved critical task
start-cli package stop <ID>
Stop a running service.
start-cli package restart <ID>
Restart a running service.
start-cli package uninstall <ID>
Remove a package and its data.
start-cli package logs <ID>
Display logs from a service.
-l, --limit <N>— Max entries-f, --follow— Stream in real-time-c, --cursor <POS>— Start from cursor-B, --before— Show logs before cursor-b, --boot <ID>— Filter by boot ID
start-cli package attach <ID> [COMMAND]
Open a shell inside a service’s subcontainer (within the LXC container), or run a one-off command. If the service has only one subcontainer, you are placed directly into it; if there are multiple, you will be prompted to choose. See Accessing Service Containers for details.
-s, --subcontainer <NAME>— Target a specific subcontainer-n, --name <NAME>— Container name-u, --user <USER>— Run as a specific user-i, --image-id <ID>— Image identifier--force-tty— Force TTY mode
start-cli package stats <ID>
Display LXC container resource usage.
--format— Output format
start-cli package rebuild <ID>
Rebuild a service’s container.
start-cli package installed-version <ID>
Show the installed version of a package.
--format— Output format
start-cli package cancel-install <ID>
Cancel a pending install or download.
start-cli package set-outbound-gateway <PACKAGE> [GATEWAY]
Override the outbound gateway for a specific service.
start-cli package action run <PACKAGE_ID> <ACTION_ID> <INPUT>
Run a service action (e.g., show credentials, configure settings).
-p, --package-id <ID>— Package identifier--format— Output format
start-cli package action get-input <ACTION_ID>
Retrieve the input spec for a service action.
-p, --package-id <ID>— Package identifier--format— Output format
start-cli package action clear-task <PACKAGE_ID> <REPLAY_ID>
Clear a pending service task.
--force— Force clear even if running
start-cli package backup restore <TARGET_ID> <PASSWORD> [IDS...]
Restore one or more packages from a backup.
Service Host Management
Manage network addresses and bindings for a service host.
start-cli package host address list
List all addresses for a service host.
--format— Output format
start-cli package host address domain private add <FQDN> <GATEWAY>
Add a private domain to a service host.
start-cli package host address domain private remove <FQDN>
Remove a private domain from a service host.
start-cli package host address domain public add <FQDN> <GATEWAY> <INTERNAL_PORT>
Add a public domain to a service host.
--acme <PROVIDER>— ACME provider for certificate
start-cli package host address domain public remove <FQDN>
Remove a public domain from a service host.
start-cli package host binding list
List network bindings for a service host.
--format— Output format
start-cli package host binding set-address-enabled <INTERNAL_PORT>
Enable or disable a specific address binding for a service.
--address <ADDRESS>— Address to modify (required)--enabled <true|false>— Enable or disable
Backups
Create backups and manage backup targets (network shares).
start-cli backup create <TARGET_ID> <PASSWORD>
Create a backup of all or selected packages.
--old-password <PASS>— Previous backup password (for re-encryption)--package-ids <IDS>— Limit to specific packages
start-cli backup target list
List configured backup targets.
--format— Output format
start-cli backup target info <TARGET_ID> <SERVER_ID> <PASSWORD>
Display backup information for a target.
--format— Output format
start-cli backup target mount <TARGET_ID> <PASSWORD>
Mount a backup target.
--server-id <ID>— Server identifier--allow-partial— Leave media mounted even if backupfs fails
start-cli backup target umount [TARGET_ID]
Unmount a backup target.
start-cli backup target cifs add <HOSTNAME> <PATH> <USERNAME> [PASSWORD]
Add a new CIFS/SMB network share as a backup target.
start-cli backup target cifs update <ID> <HOSTNAME> <PATH> <USERNAME> [PASSWORD]
Update an existing CIFS backup target.
start-cli backup target cifs remove <ID>
Remove a CIFS backup target.
Networking
Manage gateways, DNS, ACME certificates, tunnels, port forwards, and SSL vhosts.
start-cli net gateway list
List all gateways.
--format— Output format
start-cli net gateway set-name <GATEWAY> <NAME>
Rename a gateway.
start-cli net gateway set-default-outbound <GATEWAY>
Set the default outbound gateway for all services.
start-cli net gateway check-dns <GATEWAY>
Test DNS resolution through a gateway.
--format— Output format
start-cli net gateway check-port <GATEWAY>
Test port connectivity through a gateway.
--format— Output format
start-cli net gateway forget <GATEWAY>
Remove a gateway from the system.
start-cli net dns set-static [SERVERS...]
Set static DNS server addresses.
start-cli net dns query <FQDN>
Test DNS resolution for a domain.
--format— Output format
start-cli net dns dump-table
Display the full DNS routing table.
--format— Output format
start-cli net ssl generate-certificate <HOSTNAMES>...
Generate an SSL certificate signed by the system Root CA. The command outputs the private key and full certificate chain in PEM format.
HOSTNAMES— One or more hostnames or IP addresses to include in the certificate (required)--ed25519— Use Ed25519 instead of the default NIST P-256
start-cli net acme init
Initialize ACME (Let’s Encrypt) certificate provisioning.
--provider <PROVIDER>— ACME provider identifier or URL (required)--contact <EMAIL>— Contact email for the certificate authority
start-cli net acme remove
Remove ACME certificate configuration.
--provider <PROVIDER>— ACME provider to remove (required)
start-cli net tunnel add <NAME> <CONFIG> [GATEWAY_TYPE]
Add a WireGuard tunnel gateway.
--set-as-default-outbound— Use this tunnel as the default outbound gatewayGATEWAY_TYPE—inbound-outboundoroutbound-only
start-cli net tunnel remove <ID>
Remove a tunnel gateway.
start-cli net forward dump-table
Display the port forwarding table.
--format— Output format
start-cli net vhost add-passthrough
Add an SSL passthrough vhost.
--hostname <HOST>— Hostname (required)--listen-port <PORT>— Listen port (required)--backend <ADDR>— Backend address (required)--public-gateway <ID>— Public gateway--private-ip <IP>— Private IP
start-cli net vhost remove-passthrough
Remove an SSL passthrough vhost.
--hostname <HOST>— Hostname (required)--listen-port <PORT>— Listen port (required)
start-cli net vhost list-passthrough
List SSL passthrough vhosts.
--format— Output format
start-cli net vhost dump-table
Display the full vhost routing table.
--format— Output format
SSH Keys
Manage authorized SSH keys for server access.
start-cli ssh add <KEY>
Add an SSH public key.
start-cli ssh list
List authorized SSH keys.
--format— Output format
start-cli ssh remove <KEY>
Remove an SSH key.
WiFi
Connect to and manage wireless networks.
start-cli wifi add <SSID> <PASSWORD>
Save a WiFi network and its credentials.
start-cli wifi connect <SSID>
Connect to a saved WiFi network.
start-cli wifi remove <SSID>
Remove a saved WiFi network.
start-cli wifi get
Display the current WiFi connection.
--format— Output format
start-cli wifi available
List available WiFi networks.
--format— Output format
start-cli wifi available get <SSID>
Get details of a specific available network.
--format— Output format
start-cli wifi country
Display the current WiFi country code.
--format— Output format
start-cli wifi country set <COUNTRY>
Set the WiFi country code (ISO 3166-1 alpha-2).
start-cli wifi set-enabled
Enable or disable WiFi.
--enabled— Enable WiFi
Notifications
View and manage system notifications.
start-cli notification list [BEFORE] [LIMIT]
List notifications.
--format— Output format
start-cli notification create <LEVEL> <TITLE> <MESSAGE>
Create a notification.
-p, --package <ID>— Associate with a package
start-cli notification mark-seen [IDS...]
Mark notifications as read.
start-cli notification mark-seen-before <BEFORE>
Mark all notifications before an ID as read.
start-cli notification mark-unseen [IDS...]
Mark notifications as unread.
start-cli notification remove [IDS...]
Delete notifications.
start-cli notification remove-before <BEFORE>
Delete all notifications before an ID.
Kiosk Mode
Control the local display.
start-cli kiosk enable
Enable kiosk mode on the connected display.
start-cli kiosk disable
Disable kiosk mode.
Disks
List and repair storage devices.
start-cli disk list
List all disks and partitions.
--format— Output format
start-cli disk repair
Repair filesystem issues on the data partition.
Diagnostics
Troubleshoot issues when the system is in diagnostic mode.
start-cli diagnostic logs
Display diagnostic logs. Same log options as server logs.
start-cli diagnostic kernel-logs
Display diagnostic kernel logs. Same log options as server logs.
start-cli diagnostic error
Display the current diagnostic error.
--format— Output format
start-cli diagnostic restart
Restart the server from diagnostic mode.
start-cli diagnostic rebuild
Rebuild all containers from diagnostic mode.
start-cli diagnostic disk forget <GUID>
Forget a disk so the system no longer expects it.
start-cli diagnostic disk repair
Repair a disk from diagnostic mode.
Database
Low-level access to the system database.
start-cli db dump [-p <POINTER>] [PATH]
Dump database contents, optionally filtered by JSON pointer.
-p, --pointer <PTR>— JSON pointer to a specific value--format— Output format
start-cli db apply <EXPR> [PATH]
Apply a patch expression to the database.
start-cli db put [PATH] [VALUE]
Set a value in the database.
start-cli db put-ui [PATH] [VALUE]
Set a value in the UI database.
S9PK Packaging
Build, inspect, edit, and publish service packages.
start-cli s9pk init-workspace [PATH]
Initialize a StartOS packaging workspace in PATH (default: the current directory). Clones the packaging guide, writes the agent-context files (AGENTS.md, AGENTS.local.md, CLAUDE.md), and creates a .startos/ directory holding the workspace signing key and host/registry config. Nesting is allowed; it refuses to run inside a package repo. See Set Up Your Packaging Workspace.
start-cli s9pk init-package <NAME>
Scaffold a new package from the current workspace’s template, using NAME (e.g. "Hello World") as the human-readable package name, then run npm install. Must be run inside a workspace.
start-cli s9pk pack [PATH]
Build an s9pk package from source files.
-o, --output <PATH>— Output file path--javascript <PATH>— JavaScript bundle path--icon <PATH>— Service icon path--license <PATH>— License file path--assets <PATH>— Assets directory path--no-assets— Build without assets--arch <ARCH>— Filter by CPU architecture
start-cli s9pk publish <S9PK>
Publish an s9pk to the configured S3 bucket and index it on the registry.
start-cli s9pk convert <S9PK>
Convert an s9pk from v1 to v2 format.
start-cli s9pk select [S9PKS...]
Select the best compatible s9pk for the target device from a list.
start-cli s9pk list-ingredients [PATH]
List all file paths that would be included in a pack. Same options as s9pk pack.
start-cli s9pk inspect manifest
Display the package manifest.
--format— Output format
start-cli s9pk inspect file-tree
Display the file tree inside the s9pk.
--format— Output format
start-cli s9pk inspect cat <FILE_PATH>
Extract and display a file from the s9pk.
start-cli s9pk inspect commitment
Display the root sighash and max size.
--format— Output format
start-cli s9pk edit manifest <EXPRESSION>
Apply a patch expression to the manifest.
--format— Output format
start-cli s9pk edit add-image <ID>
Add a container image to the s9pk.
--docker-build— Build from Dockerfile--dockerfile <PATH>— Dockerfile path--workdir <PATH>— Build context directory--docker-tag <TAG>— Docker image tag--arch <ARCH>— CPU architecture filter--emulate-missing-as <ARCH>— Emulate missing arch--nvidia-container— Enable NVIDIA support
Registry
Manage a StartOS package registry — the server that hosts, indexes, and distributes s9pk packages and OS updates. These commands can be run remotely via start-cli registry, or locally on the registry server using the standalone start-registry binary (same subcommands, different entry point).
start-cli registry index
List registry metadata and all packages.
--format— Output format
start-cli registry info
Display the registry name and icon.
--format— Output format
start-cli registry info set-name <NAME>
Set the registry’s display name.
start-cli registry info set-icon <ICON>
Set the registry’s icon from a file path.
Registry Admin Management
Manage registry administrators and their signing keys.
start-cli registry admin add <SIGNER> [DATABASE]
Add a signer as an administrator.
start-cli registry admin remove <SIGNER>
Remove an administrator.
start-cli registry admin list
List all administrators.
--format— Output format
start-cli registry admin signer add [DATABASE]
Register a new signer identity.
-n, --name <NAME>— Signer display name (required)-c, --contact <INFO>— Contact information--key <KEY>— Public key
start-cli registry admin signer edit <ID>
Edit a signer’s metadata.
-n, --set-name <NAME>— Update name-c, --add-contact <INFO>— Add contact-k, --add-key <KEY>— Add public key-C, --remove-contact <INFO>— Remove contact-K, --remove-key <KEY>— Remove public key
start-cli registry admin signer list
List all registered signers.
--format— Output format
Registry Package Management
Add, remove, index, and distribute service packages.
start-cli registry package index
List all packages and categories.
--format— Output format
start-cli registry package add <FILE>
Add a package to the registry from a local s9pk file.
--url <URL>— URL of the package--no-verify— Skip signature verification
start-cli registry package remove <ID> <VERSION>
Remove a package version from the registry.
--sighash <HASH>— Hash for signature verification
start-cli registry package get [ID] [OTHER_VERSIONS]
List installation candidates for a package.
-v, --target-version <RANGE>— Version range constraint--source-version <VERSION>— Source version for upgrade path--format— Output formatOTHER_VERSIONS— Detail level:none,short, orfull
start-cli registry package download <ID>
Download an s9pk package file.
-v, --target-version <RANGE>— Version constraint-d, --dest <PATH>— Destination path
start-cli registry package add-mirror <FILE> <URL>
Add a download mirror for a package.
--no-verify— Skip signature verification
start-cli registry package remove-mirror <ID> <VERSION>
Remove a package mirror.
--url <URL>— Mirror URL to remove (required)
Registry Package Categories
Organize packages into browseable categories.
start-cli registry package category add <ID> <NAME>
Create a new category.
start-cli registry package category remove <ID>
Delete a category.
start-cli registry package category list
List all categories.
--format— Output format
start-cli registry package category add-package <ID> <PACKAGE>
Add a package to a category.
start-cli registry package category remove-package <ID> <PACKAGE>
Remove a package from a category.
Registry Package Signers
Manage cryptographic signers authorized for packages.
start-cli registry package signer add <ID> <SIGNER>
Authorize a signer for a package.
--versions <RANGE>— Version range to authorize--merge— Merge with existing range instead of replacing
start-cli registry package signer remove <ID> <SIGNER>
Revoke a signer for a package.
start-cli registry package signer list <ID>
List authorized signers for a package.
--format— Output format
Registry OS Versions
Manage StartOS version records in the registry.
start-cli registry os index
List all OS versions.
--format— Output format
start-cli registry os version add <VERSION> <HEADLINE> <RELEASE_NOTES> <SOURCE_VERSION>
Register a new OS version.
start-cli registry os version get
Get OS version information with filters.
--src <VERSION>— Source version to upgrade from--target-version <VERSION>— Target version constraint--id <SERVER_ID>— Server identifier--platform <PLATFORM>— Target platform--format— Output format
start-cli registry os version remove <VERSION>
Remove an OS version.
start-cli registry os version signer add <VERSION> <SIGNER>
Add a signer for an OS version.
start-cli registry os version signer remove <VERSION> <SIGNER>
Remove a signer from an OS version.
start-cli registry os version signer list <VERSION>
List signers for an OS version.
--format— Output format
Registry OS Assets
Upload and manage OS installation images (IMG, ISO, squashfs).
start-cli registry os asset add <FILE> <URL>
Upload an OS asset to the registry.
-p, --platform <PLATFORM>— Target platform (required)-v, --version <VERSION>— OS version (required)
start-cli registry os asset sign <FILE>
Sign an OS asset and register the signature.
-p, --platform <PLATFORM>— Target platform (required)-v, --version <VERSION>— OS version (required)
start-cli registry os asset remove
Remove an OS asset.
start-cli registry os asset get img <VERSION> <PLATFORM>
Download an IMG file.
-d, --download <DIR>— Download directory-r, --reverify— Verify hash after download
start-cli registry os asset get iso <VERSION> <PLATFORM>
Download an ISO file. Same options as get img.
start-cli registry os asset get squashfs <VERSION> <PLATFORM>
Download a squashfs file. Same options as get img.
Registry Database
Low-level access to the registry database.
start-cli registry db dump [-p <POINTER>] [PATH]
Dump database contents, optionally filtered by JSON pointer.
-p, --pointer <PTR>— JSON pointer--format— Output format
start-cli registry db apply <EXPR> [PATH]
Apply a patch expression to the database.
Initial Setup
Commands for the first-boot setup process.
start-cli setup disk
Configure the data disk during initial setup.
start-cli setup cifs
Configure a CIFS/SMB network share during initial setup.
start-cli setup logs
Display setup logs. Same log options as server logs.
start-cli init subscribe
Stream initialization progress events.
start-cli init logs
Display initialization logs. Same log options as server logs.
start-cli init kernel-logs
Display initialization kernel logs. Same log options as server logs.
start-cli init-key
Create a new developer signing key.
Utilities
start-cli echo <MESSAGE>
Echo a message back from the server. Useful for testing connectivity.
start-cli flash-os <SQUASHFS> <DISK>
Flash a StartOS image to a drive.
--efi <true|false>— Use EFI boot mode
start-cli git-info
Display the git hash of this build.
start-cli pubkey
Display the developer public key.
start-cli state
Display the current API specification.
start-cli util b3sum <FILE>
Calculate the BLAKE3 hash of a file.
--no-mmap— Disable memory-mapped I/O
Architecture
StartOS is a Linux distribution purpose-built for running a personal server. Unlike general-purpose operating systems designed for desktops and laptops, StartOS provides a graphical interface for discovering, installing, configuring, and managing self-hosted services — no command line required.
This page describes how StartOS is designed and how its components fit together. For implementation details, see the start-os repository.
Components
StartOS is composed of four major components:
- Core — A Rust backend that manages system state, service lifecycles, networking, storage, and the API. It compiles into a single binary (
startbox) that is symlinked to serve as the system daemon (startd), the CLI (start-cli), and other utilities. - Web UI — An Angular frontend that provides the admin interface, setup wizard, and marketplace. It communicates with the backend over JSON-RPC and WebSocket.
- Container Runtime — A Node.js process that runs inside each service’s LXC container, loading the package’s JavaScript and managing subcontainers, health checks, and effects callbacks.
- SDK — A TypeScript library that package developers use to define service metadata, daemons, actions, interfaces, and other behaviors. The SDK compiles into the JavaScript bundle shipped inside each package.
Service Model
Every service on StartOS runs inside its own isolated LXC container. This provides process isolation, filesystem isolation, and network namespacing without the overhead of full virtual machines.
S9PK Package Format
Services are distributed as .s9pk files — a custom archive format built on a merkle tree. An S9PK contains:
- manifest.json — Package metadata: ID, title, version, license, descriptions, dependency declarations, and image definitions.
- icon — The package icon displayed in the marketplace and UI.
- LICENSE.md — The applicable license.
- javascript.squashfs — The compiled SDK code that defines the service’s behavior on StartOS (daemons, actions, health checks, interfaces, etc.).
- images/ — Container root filesystem images (squashfs), organized by CPU architecture (x86_64, aarch64, riscv64).
- assets.squashfs — Optional static assets mounted read-only into the container.
The merkle archive format enables partial downloads, integrity verification of subsets, efficient updates (only changed portions need re-downloading), and size limit enforcement before completing a download.
S9PK files are cryptographically signed (Ed25519) so that users and registries can verify package authenticity.
Service Lifecycle
A service moves through several lifecycle stages, each of which can trigger package-defined code:
- Install — The S9PK is unpacked, container images are extracted, volumes are created, and the package’s
setupOnInitfunction runs withkind: 'install'. This is where packages generate initial secrets, create default configuration, and prompt the user for required setup via tasks. - Actions — Actions are operations defined by the package that appear as buttons in the UI. They can display information (e.g., show admin credentials), accept user input (e.g., configure SMTP), or modify the service’s state. Actions can run whether the service is started, stopped, or both.
- Tasks — Tasks are notifications that prompt the user to run a specific action. Packages create tasks during initialization or at runtime to guide the user through required setup steps. Tasks have a severity level: critical tasks block the service from starting until completed, while lower-severity tasks are informational.
- Start — The package’s
setupMainfunction runs, which defines daemons (long-running processes), oneshots (startup tasks like migrations), and health checks. Daemons run inside subcontainers created from the package’s images. - Update — When a new version is installed, the package’s version migration code runs, transforming stored data as needed. The
setupOnInitfunction runs again withkind: 'install'. - Backup — StartOS creates an encrypted backup of the service’s designated volumes. Services can exclude data that is recoverable by other means (e.g., Bitcoin excludes the blockchain).
- Restore — A backup is decrypted and restored. The
setupOnInitfunction runs withkind: 'restore', allowing the package to re-register triggers or re-prompt the user. - Uninstall — The container and its volumes are removed.
Container Architecture
When a service starts, the container runtime loads the package’s JavaScript and uses it to create subcontainers from the package’s images. The relationship looks like this:
LXC Container (managed by StartOS)
└── Container Runtime (Node.js)
    └── Package JavaScript (from s9pk)
        ├── SubContainer A (e.g., the main application)
        ├── SubContainer B (e.g., a database)
        └── Health Checks
The container runtime communicates with the StartOS host via JSON-RPC over a Unix socket. This is how packages invoke “effects” — host-level operations like reading configuration, resolving hostnames, accessing the network, or creating user-facing tasks.
Volumes
Each service has one or more named volumes for persistent data. Volumes survive container restarts, updates, and restores. They are id-mapped to the container’s user namespace for security. Packages declare which volumes to include in backups.
Networking
StartOS provides multiple ways to access services, all managed through the UI.
LAN Access
Services are accessible over the local network using mDNS hostnames (your-server-name.local). StartOS runs its own DNS resolver and issues TLS certificates from a local Certificate Authority (CA). Users trust this CA on their client devices to get HTTPS connections over LAN without browser warnings.
Tor
Tor is available as a marketplace service. Once installed, users can enable onion addresses for any service through the Tor service’s actions. Tor provides access from anywhere without port forwarding or exposing your IP address.
Clearnet
Services can be exposed to the public internet using a domain name. This requires a clearnet gateway — a virtual private router running on a VPS with a public IP. StartTunnel is a purpose-built VPR for this, but any WireGuard configuration can be used for outbound traffic.
Gateways
A gateway is a WireGuard tunnel that routes traffic between a StartOS server and the outside world. Gateways can be:
- Inbound + Outbound — Routes both incoming and outgoing traffic (e.g., StartTunnel). This enables clearnet access to services.
- Outbound only — Routes only outgoing traffic through the tunnel (e.g., a commercial VPN). This masks your server’s IP for outbound connections.
StartOS auto-detects the gateway type from the WireGuard configuration file. A system-wide default gateway can be set, and individual services can override it.
State Management
StartOS uses Patch-DB, a custom diff-based database, to manage system state. The key property of Patch-DB is reactive synchronization: when the backend mutates state, the frontend receives only the diff (patch) over a WebSocket connection. This means the UI always reflects the current system state without polling.
The database has two layers:
- Public model — Synced to the frontend. Contains everything the UI needs: service status, installed packages, system settings, network configuration, notifications.
- Private model — Backend-only. Contains internal state like cryptographic keys, session tokens, and operational data that should never leave the server.
Security
Container Isolation
Each service runs in its own LXC container with:
- Separate filesystem (id-mapped volumes)
- Network namespace isolation
- Resource limits
- No direct access to host resources except through the effects API
Encrypted Backups
All backups are encrypted using the user’s master password. Backups can be stored on physical drives or network shares (SMB/CIFS). Each service’s backup retains the password that was active when the backup was created.
Authentication
The web UI is protected by password authentication with session cookies. The API uses JSON-RPC with session-based auth. SSH access is available for advanced users but is not required for normal operation.
Package Signing
S9PK files are signed with Ed25519 keys. The registry and StartOS verify signatures before installing packages, ensuring that packages have not been tampered with.
Tech Stack
| Component | Technology |
|---|---|
| Backend | Rust (async Tokio, Axum) |
| Frontend | Angular, TypeScript, Taiga UI |
| Container Runtime | Node.js, TypeScript |
| Containers | LXC |
| Database | Patch-DB (custom, diff-based) |
| API | JSON-RPC |
| Package Format | S9PK (merkle archive, Ed25519 signed) |
| Networking | WireGuard, Tor (Arti), mDNS, ACME |
| Supported Archs | x86_64, aarch64, riscv64 |
Source Code
StartOS is fully open source. The main repository is Start9Labs/start-technologies on GitHub. See the repository’s CONTRIBUTING.md for build instructions and development setup.
FAQ
Common issues encountered during setup and daily use of StartOS, including network connectivity problems, diagnostic mode, clock sync failures, and service-specific troubleshooting.
Do I need a surge protector for my server?
Yes. Always plug your server into a surge protector — never directly into the wall. Servers are always-on devices, and a single power surge (from lightning, utility events, or appliances cycling on the same circuit) can permanently damage your hardware and corrupt your data drive. A standard surge protector is the minimum requirement. An uninterruptible power supply (UPS) is strongly recommended, as it also protects against brownouts and gives you time to shut down cleanly during a power loss.
I do not have access to Ethernet
Ethernet is strongly recommended. Servers are always-on, critical devices and should use a wired connection. However, if you do not have access to a router, such as in a work or school environment, there are two options:
-
Server has a WiFi card (DIY builds only — Start9 servers do not ship with one): Connect a monitor and keyboard to your server (kiosk mode). If no Ethernet interface is detected, you will be prompted to connect to a WiFi network. See WiFi for more details.
-
Server does not have a WiFi card: Use a WiFi extender to bridge the local WiFi network to Ethernet, then connect your server to the extender. The extender below has been tested with StartOS, but others should also work.
StartOS boots into “Diagnostic Mode”
If you encounter Diagnostic Mode, your best bet is stop clicking and contact support.
During initial setup, I am unable to connect to “start.local”.
-
Confirm that the server is plugged into power and Ethernet
-
Confirm that your phone/computer is connected to the same network as the server.
-
Confirm your phone/computer is not connected to a “Guest” network
-
Confirm you are not using the Tor Browser.
-
Confirm your phone/computer is not using a VPN, or that if you are, that it allows LAN connections, such as the examples below:
- Mullvad - Go to
Settings -> VPN Settings -> Local Network Sharing - ProtonVPN - Go to
Preferences -> Connection -> Allow LAN Connections
- Mullvad - Go to
-
Very rarely, your firewall settings may block mDNS. In this case:
- From your browser, navigate to your router configuration settings. This is usually an IP address such as 192.168.1.1. A simple web search will usually reveal how to access the router configuration settings for a particular brand.
- Once in the router config settings, find the section that lists the devices on your network. You should see a device labeled
start. Take note of the associated IP address and enter it into your browser’s URL field to enter the setup.
-
Log into your router (the directions for which can be found with a simple web search for your router model and ‘how to log in’). Once you are in your router, find the device labeled “start”, and visit its associated IP address, which will look something like:
192.168.1.9
I am unable to connect to my server’s “server-name.local” URL
-
First, try these steps. If none resolve the issue, continue below.
-
Hard refresh the browser:
- Linux/Windows:
ctrl+shift+R - macOS Firefox:
cmd+shift+R - macOS Safari:
cmd+option+E, thencmd+R
- Linux/Windows:
-
Make sure you have successfully followed the Local Access instructions for your device.
-
If using Firefox from Mac, Windows or Android, ensure you have set
security.enterprise_roots.enabletotrueinabout:configper the instructions -
Try connecting using your server’s IP address. If this works, it means your issue is specific to
.local. Try clearing your browser cache and/or restarting your phone/laptop/router. If all fails, try restarting your server. -
Try connecting using a different browser on the same device. If this works, it means you need to clear cache on your current browser.
-
Try connecting using a different device. If this works, it means you need to clear cache on your current browser and/or restart your current device.
-
Try visiting start.local. Your server may be in diagnostic mode.
-
Try restarting your router.
-
Try restarting your server. Be patient and give it plenty of time to come back online.
A public domain still loads after disabling it
If you previously had a service interface (or the StartOS UI) publicly accessible on a StartTunnel gateway and then disabled it, your browser may still load the page from cache. Attempting to interact will time out because the port forwarding is still active but the interface is no longer being served.
To resolve this, fully quit and restart your browser. A hard refresh or private window is usually not enough — browsers cache TCP connections more aggressively than page content, and sometimes only a full process restart will clear them.
Clock Sync Failure
This means your server was unable to sync its clock with the Internet using the Network Time Protocol (NTP). This is usually due to a firewall issue with your network/router. Make sure you are not blocking NTP. If the issue persists, please contact support.
Issue with a particular service
If a service is misbehaving or crashing, check the logs for that service. Look for any errors that might explain the problem. Often, the solution is to restart the service by clicking “Restart”. If the issue persist, contact support.
Flashing Firmware - Server Pure
This page is for the Server Pure only. It will not work on other devices.
Generally, you do not need to manually flash your device using this guide, as the firmware is now automatically updated on supported devices. Please only use this method if directed by a Start9 Support Technician. If you were told to “flash your device”, you are looking for the StartOS flashing guides instead.
Required Equipment
- A monitor and keyboard.
- A USB stick, formatted FAT32.
Firmware Flashing Steps
-
Power down your server if not already.
-
Connect a monitor and keyboard to your server using two of the USB3 (blue) ports.
-
Download the right firmware:
- Models without WiFi - Download Standard
- Models with WiFi - Download Standard | Download Jailed WiFi
Note
The Jailed WiFi variation deactivates WiFi at the firmware level so it can never be turned on
-
Copy or move the zip file to the USB stick.
-
Eject the USB stick and insert it into your server using a USB3 (blue) slot.
-
Turn on the server while pressing the
ESCkey on the keyboard repeatedly until you see the PureBoot Basic Boot Menu screen. Select “Options –>”.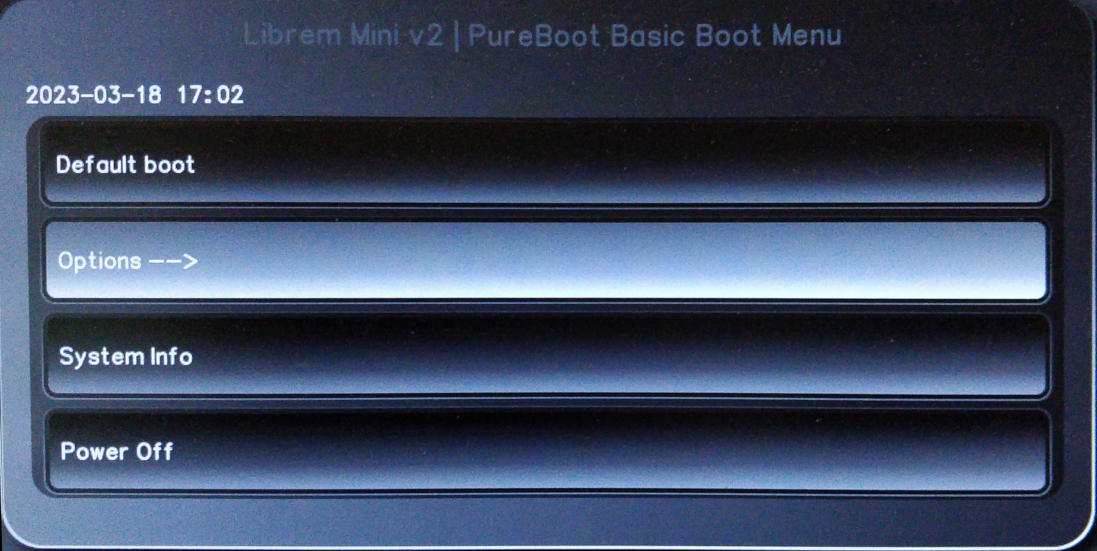
-
Select “Flash/Update the BIOS”.
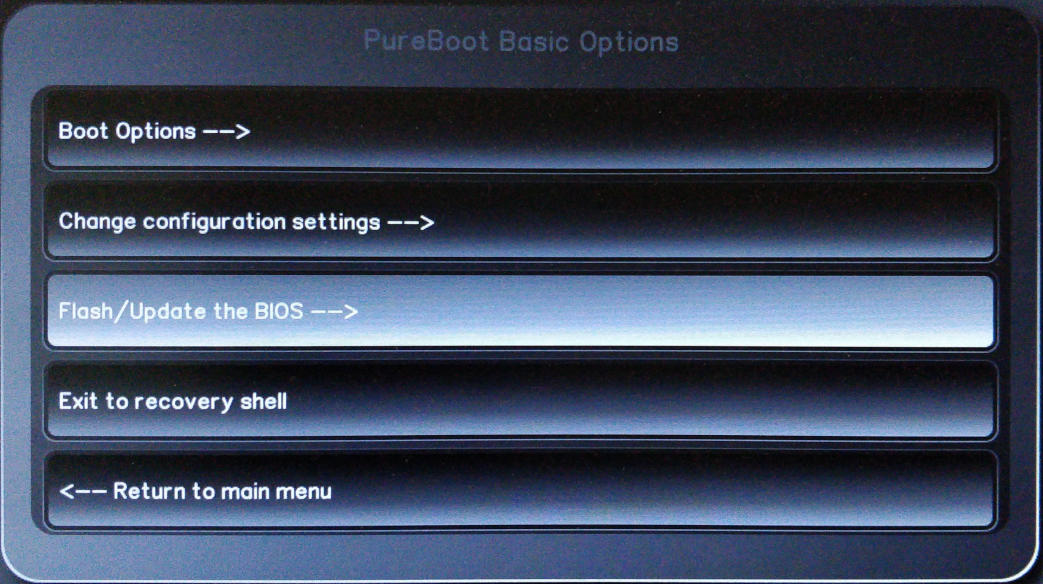
-
Select “Flash the firmware with a new ROM, erase settings”.
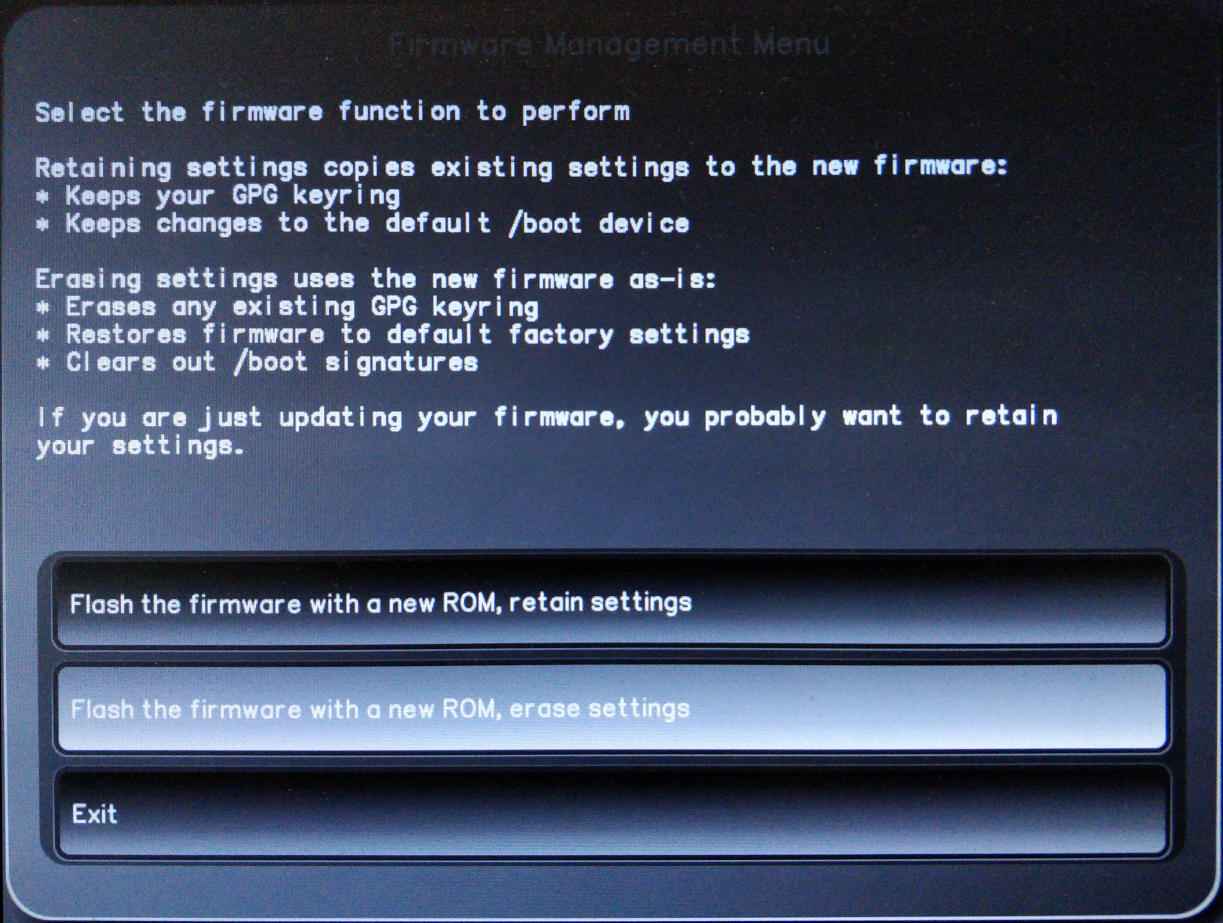
-
The system will ask if you want to proceed flashing the BIOS with a new ROM, select “Yes”.
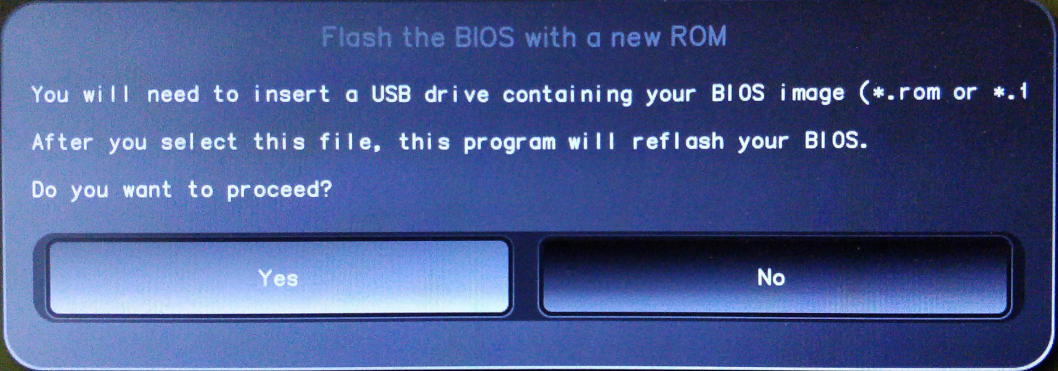
-
Choose the file that we downloaded and copied to the USB stick.
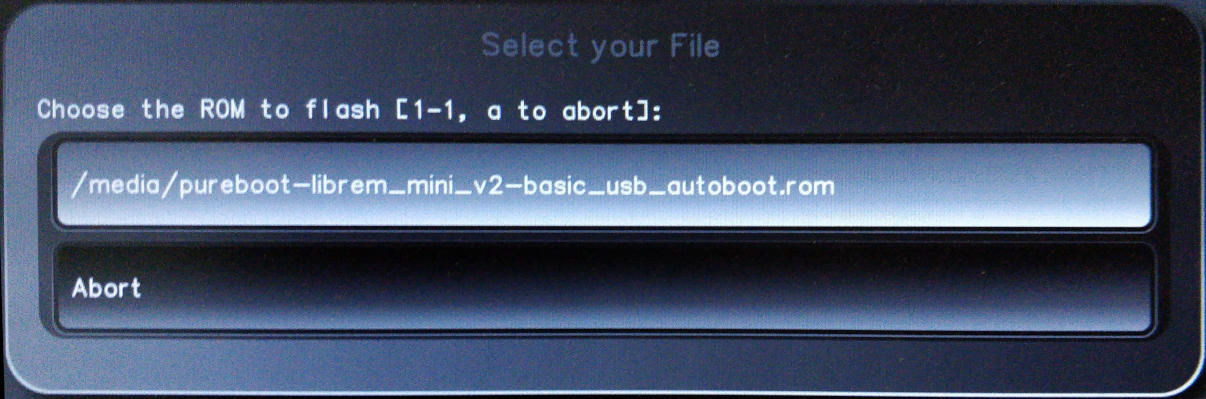
-
Confirm you want to proceed with the flash by selecting “Yes”.

-
The BIOS will be re-flashed with the new firmware. This may take a few minutes. When complete, remove the firmware USB, then select “OK” to complete the process.
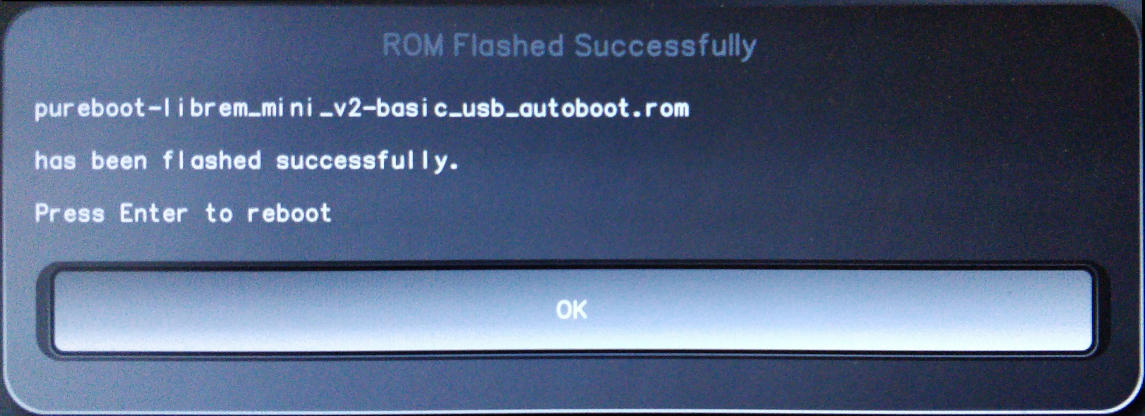
Flashing Firmware - Server One (2023)
Start9’s 2023 Server One was the Intel NUC11ATKC4, whose BIOS was refered to as “ATJSLCPX” by Intel, and whose latest release was AT0043.cap before they officially discontinued support for the product line.
Required Equipment
- A monitor and keyboard.
- A USB stick, formatted FAT32.
BIOS Update Steps
-
Download Intel_ATJSLCPX-AT0043.cap to the USB stick
Tip
If you wish to confirm the integrity of your download before you flash it, here is the sha256sum:
e72c356cdefa90486c031b7bd3d616cfd4e34e76dffb9f3ba72928355db3185b Intel_ATJSLCPX-AT0043.cap -
Insert the power cable, video cable, keyboard, mouse, and USB stick with the ATJSLCPX BIOS into the Server One.
-
Power the unit on and continually press
F7on your keyboard to launch the BIOS update screen. -
Press enter 3 times to update the BIOS by selecting and confirming your intention to flash
Intel_ATJSLCPX-AT0043.capfrom the USB stick. -
Power the unit off when it reboots, and remove the BIOS USB stick.
-
Power the unit on and continually press
F2to enter the bios settings. -
Arrow up, then right to the
Powermenu (near the top right). -
Arrow to
Secondary Power Settingsat the bottom. -
Arrow down to
After Power Failureand set the value to “Power On”. -
Arrow to
Wake on LAN from S4/S5and set the value to “Stay Off”. -
Arrow up, then over to the
Bootmenu (top right). -
Arrow down to
Boot Priority. -
Set all 4
UEFI PXE & HTTP Networkboot options to “Disabled”. -
Arrow down to
Boot USB Devices Firstand enable (check) it. -
Hit
F10to save changes and exit, followed by “Yes”.