Caution
You are not reading the latest stable version of this documentation. If you want up-to-date information, please have a look at 0.3.5.x.
Here we will add your Start9 server’s Root CA (Certificate Authority) to your system’s certificate trust store to ensure that applications can verify connections to your services.
Open Firefox and enter about:config in the URL bar. Accept any warnings that may appear about changing advanced configuration preferences.
Search for security.enterprise_roots.enabled and double click on false so that it turns to true:
Tip
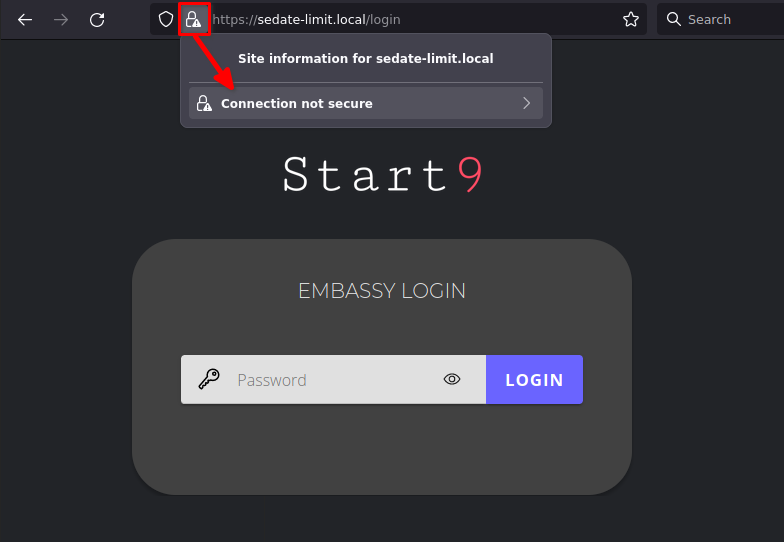
If you see an exclamation point inside a triangle by the lock, you have made a security exception in the browser. You will need to remove it by clicking the lock and then “Connection not secure”:
Then click “Remove Exception”:
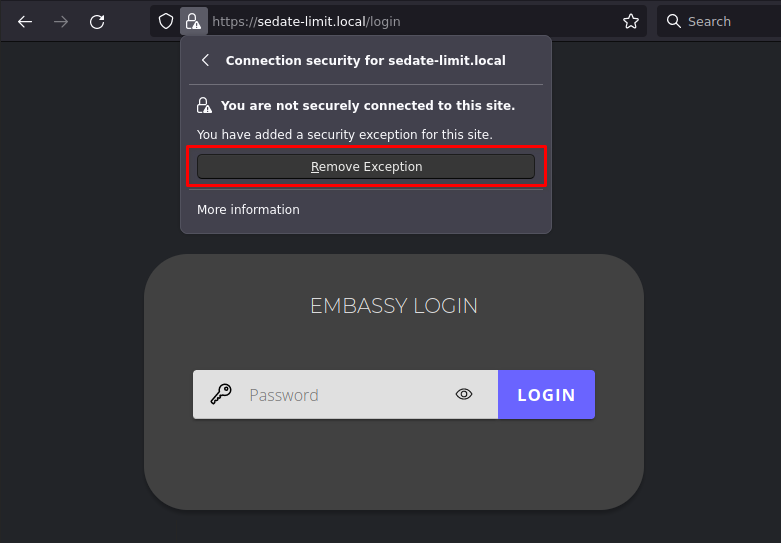
You should now see that the website is trusted as in the final step show above.
Caution
This guide assumes you have completed setting up Tor. Please visit this section first before you proceed as it is required for Firefox to properly work with Tor.
Open Firefox and enter about:config in the URL bar. Accept any warnings that may appear about accessing advanced settings.
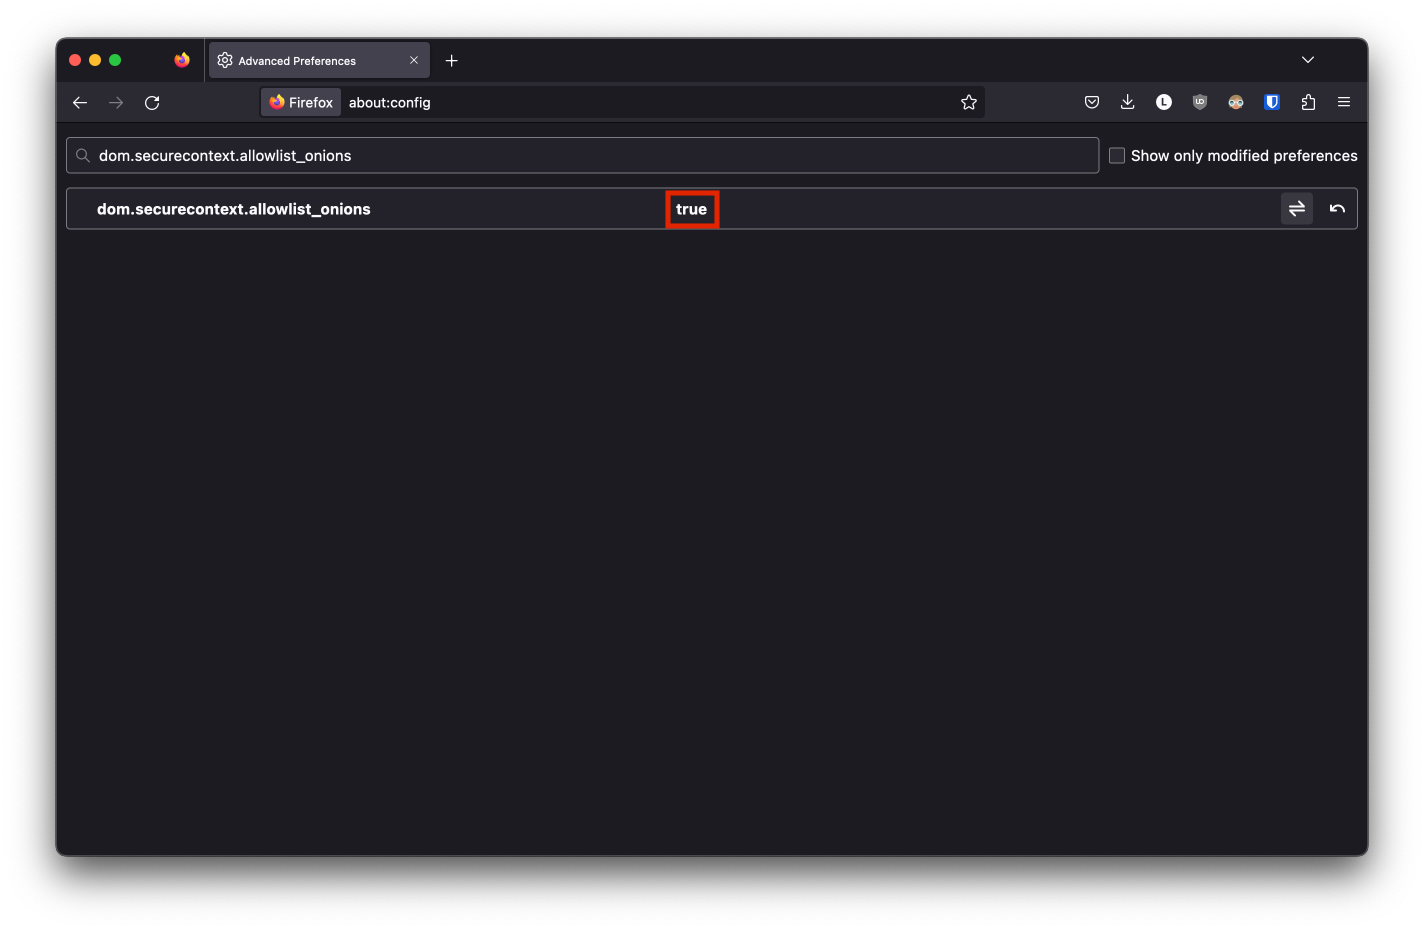
Search for dom.securecontext.allowlist_onions and set the value to true:
Next, search for network.websocket.allowInsecureFromHTTPS and set the value to true:
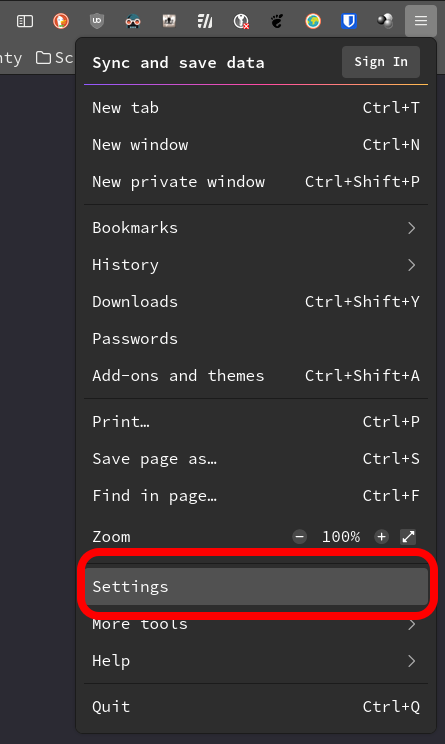
Now go to the right-hand hamburger menu and select Settings:
Search for the term “proxy” in the search bar in the upper right, then select the button that says Settings…:
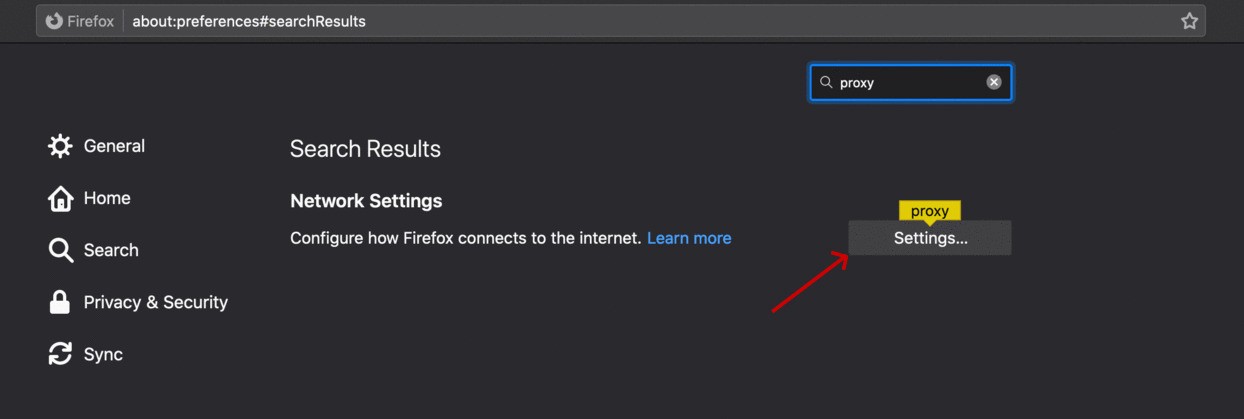
Check the option labeled Use System Proxy Settings
Check the box labeled Proxy DNS when using SOCKS v5:
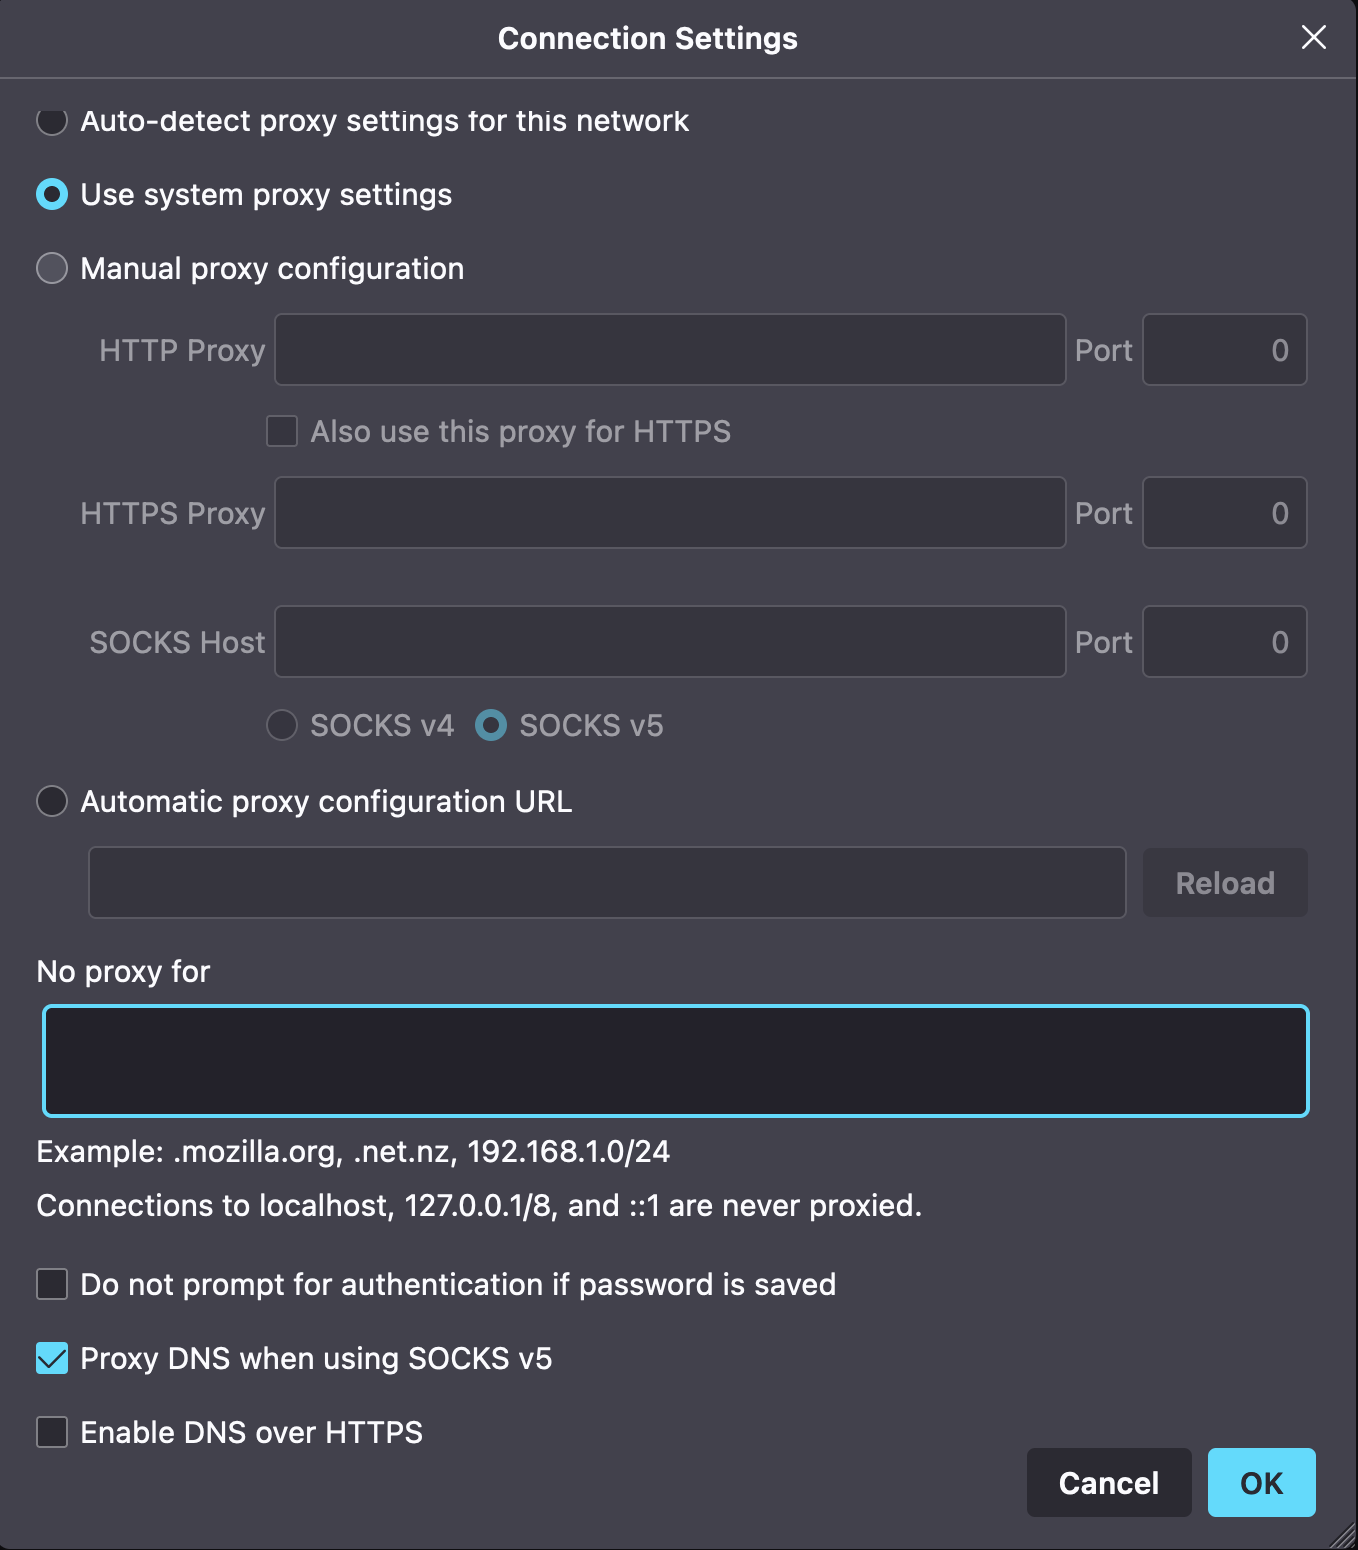
Click OK and then restart Firefox for the changes to take effect.
You’re all set! You should now be able to navigate to .onion URLs in Firefox. You can test this by going to Start9’s .onion homepage, here.
If you still encounter issues, contact support.