Caution
You are not reading the latest stable version of this documentation. If you want up-to-date information, please have a look at 0.3.5.x.
Complete this guide to download your Start9 server’s Root Certificate Authority (CA), and trust it on your client device (iOS). This allows you to use encrypted https connections to your .local (LAN) and .onion (tor) server addresses, access services on LAN, and enhances performance on tor. The Root CA was created by your server when you perfomed the initial setup, and signs the certificate of your server’s main UI, as well as that of all services.
This applies to iOS v15 and v16. For older versions, see the v14 guide.
Download the certificate to your Downloads folder
Note
In order to do this, open Safari and visit your Start9 server’s .local URL while connected to WiFi, but make sure it is prefixed with http:// and not https://.
Log in using your password, then click the hamburger (3 lines) menu at the top right, select System > Root CA > Download Root CA. It may say This website is trying to download a configuration profile. Do you want to allow this? Click Allow.
Once this is done, you can skip to step 3, below.
If you downloaded the certificate from a browser such as Firefox, you will need to copy the file from that Downloads folder to your iCloud Downloads folder. Navigate there via Files > iCloud Drive > Downloads. Otherwise, the “Profile Download” dialog will not appear when you click on the file in the next step.
Open your iCloud Downloads folder and click on the certificate. It will display a dialog box that says “Profile Downloaded.” Click Close.
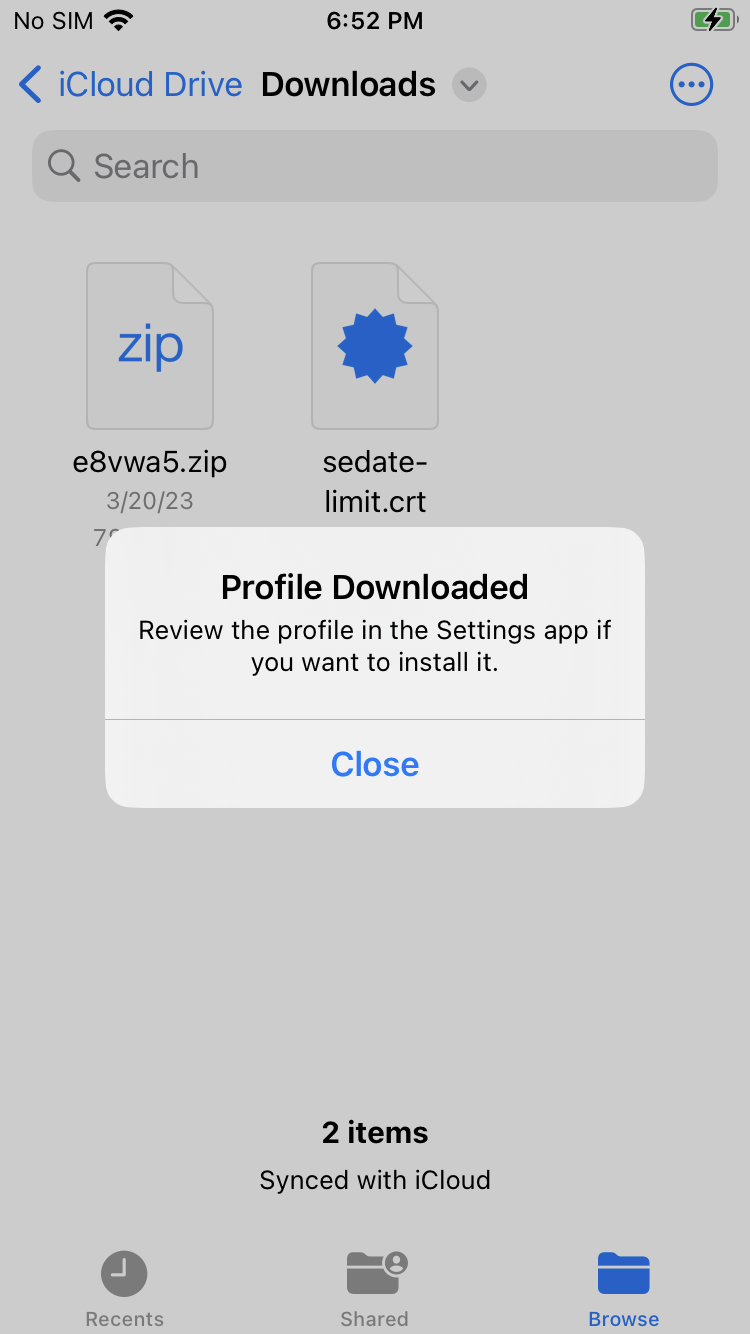
Head to Settings > General > VPN & Device Management

Locate the profile under “DOWNLOADED PROFILE” and tap on it

Tap Install

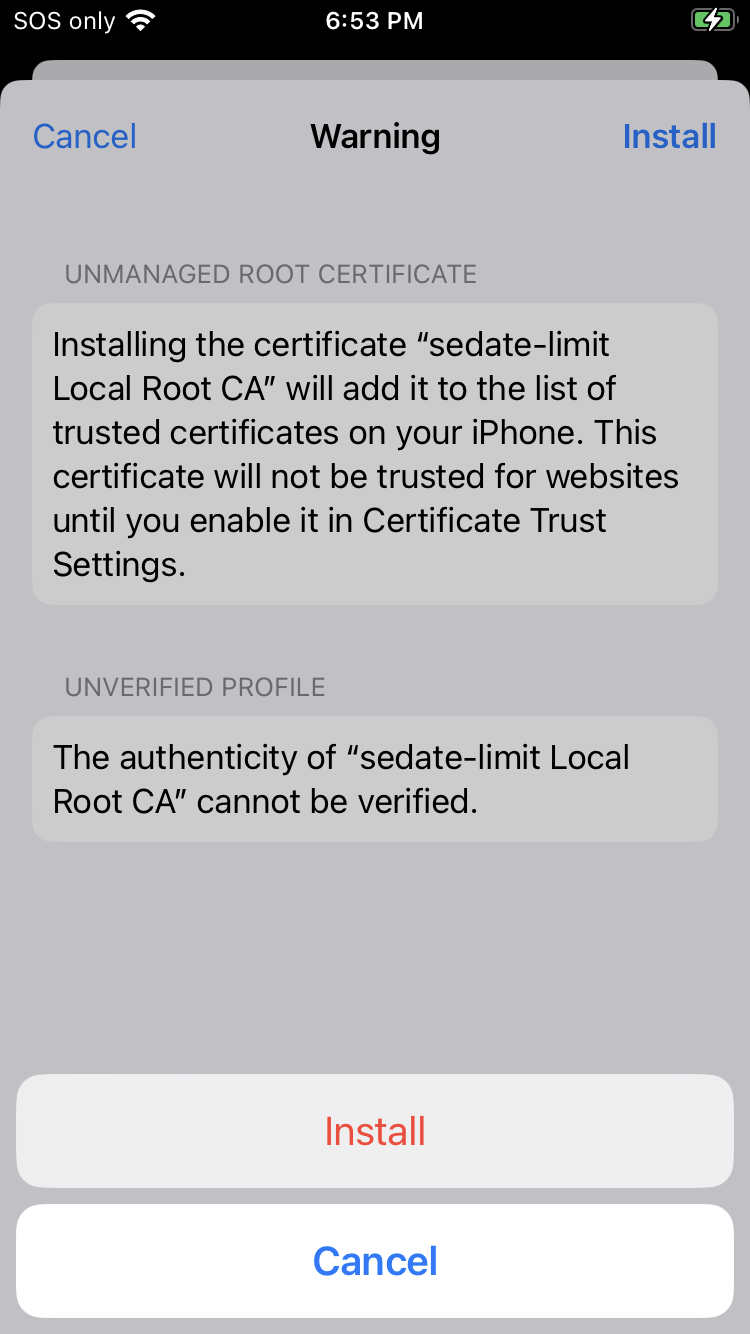
Tap Install again
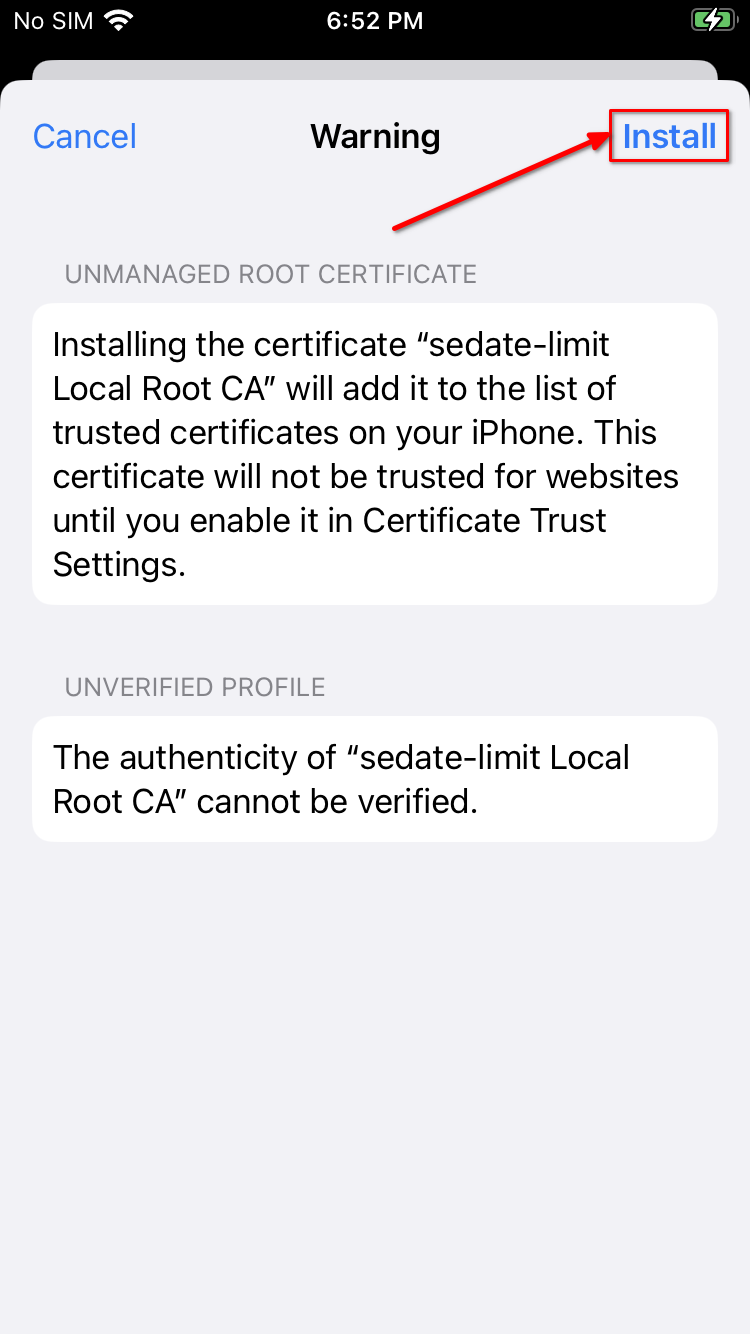
Tap Install yet again
You should see green text with a check-mark saying “Verified” under the Profile Installed dialog.
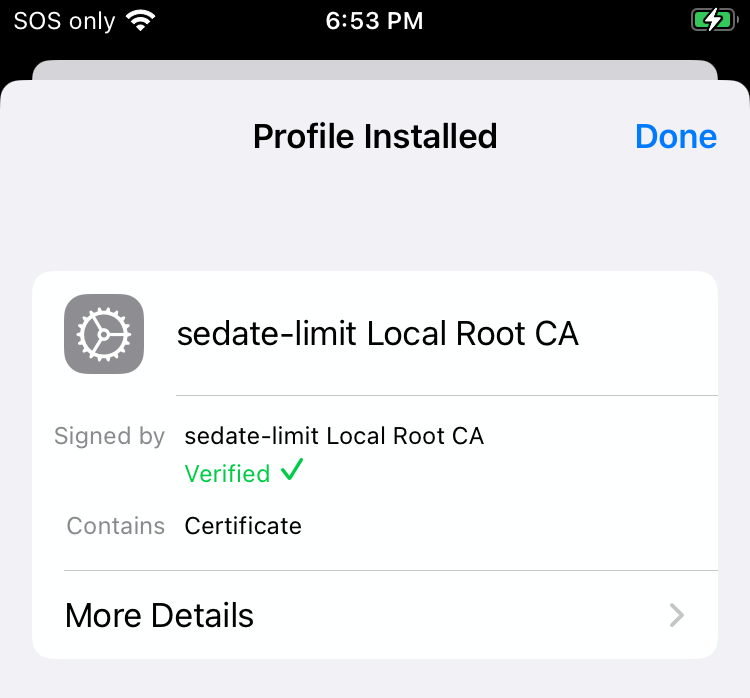
Tap Done near the top right.
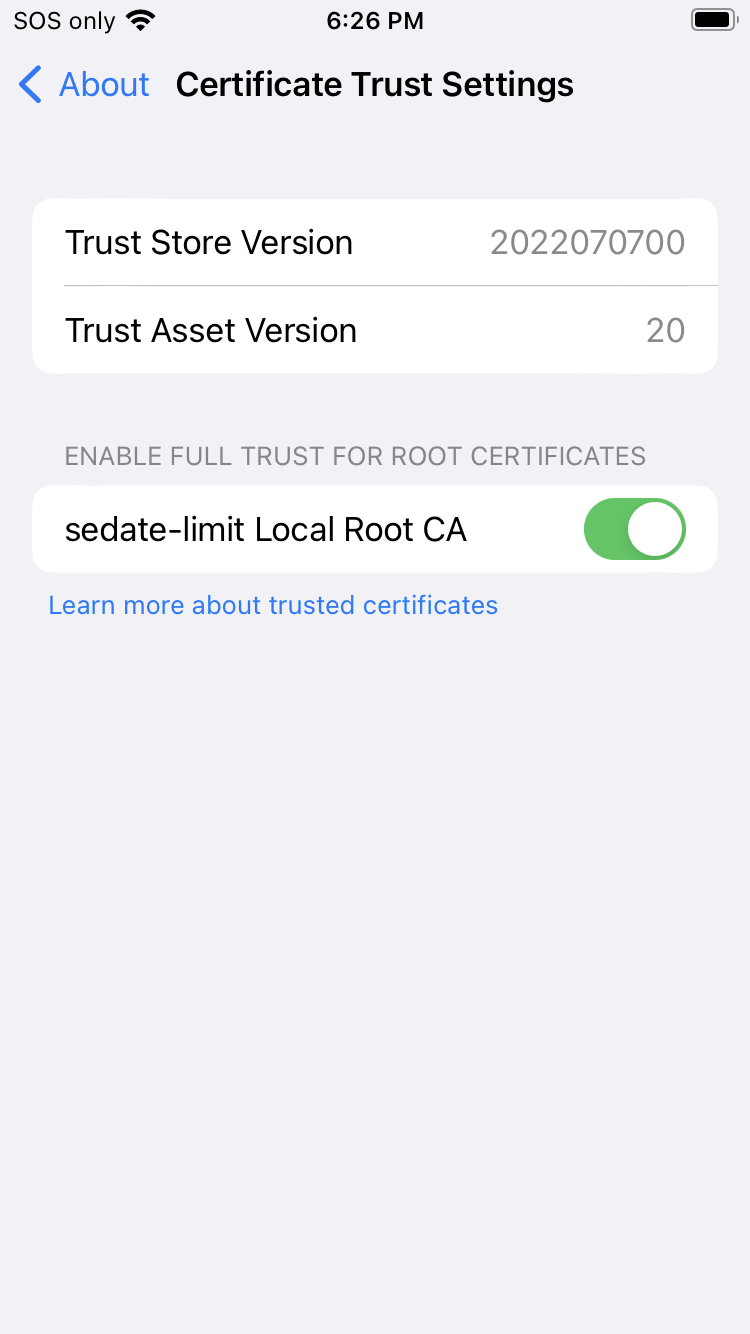
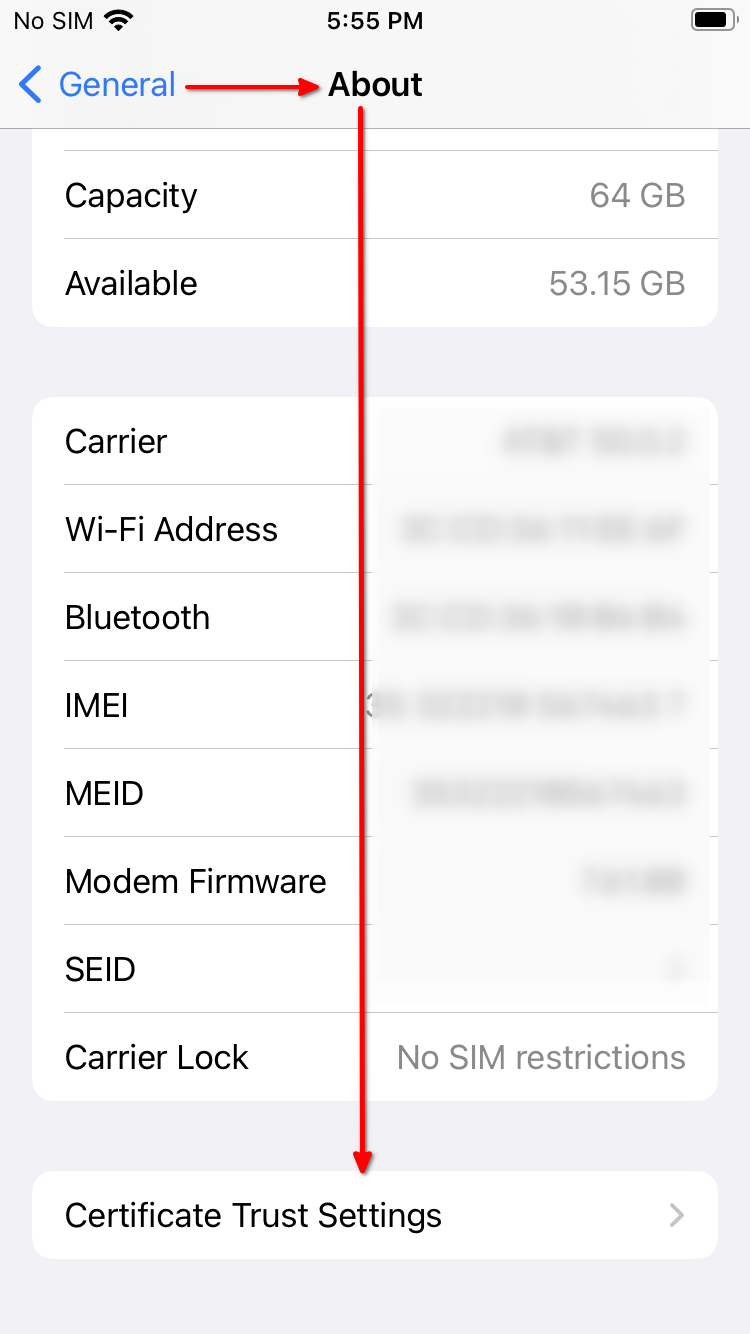
Next, navigate to General > About > Certificate Trust Settings.
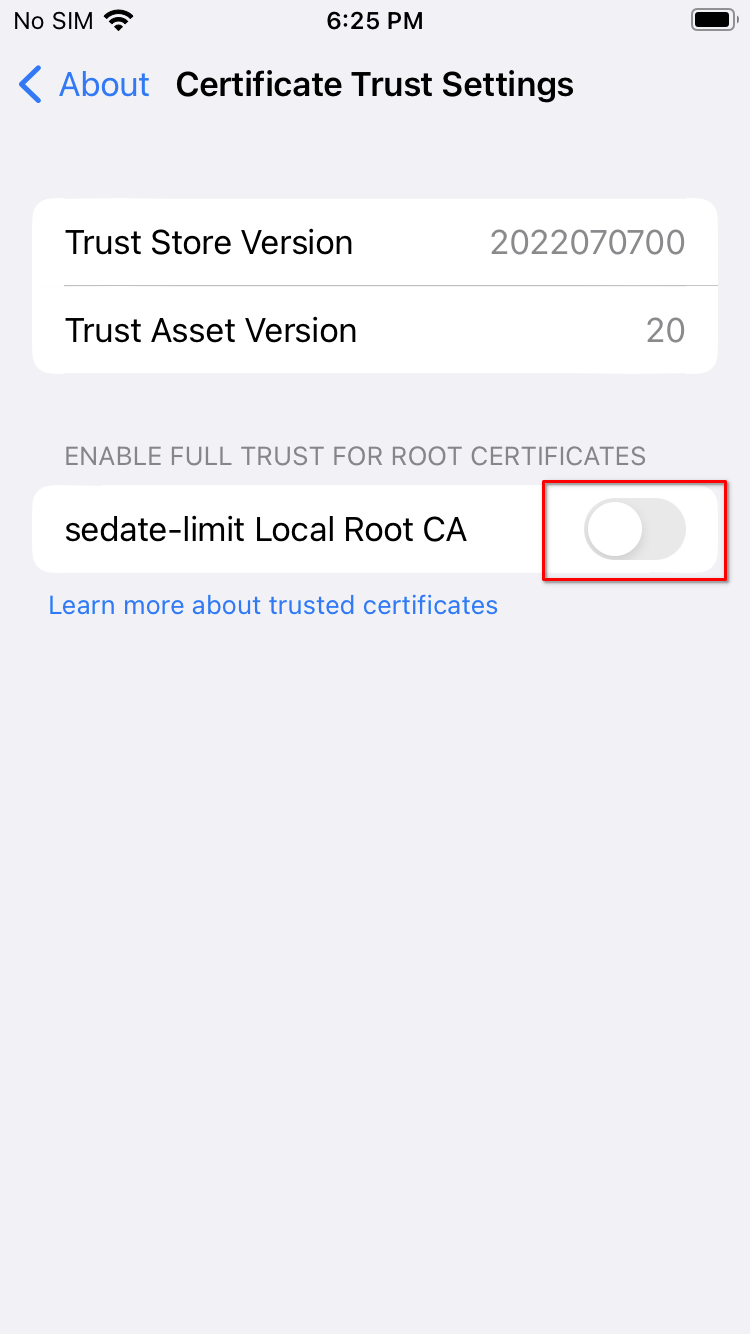
Under “Enable full trust for root certificates”, enable your “<custom-address> Local Root CA”.
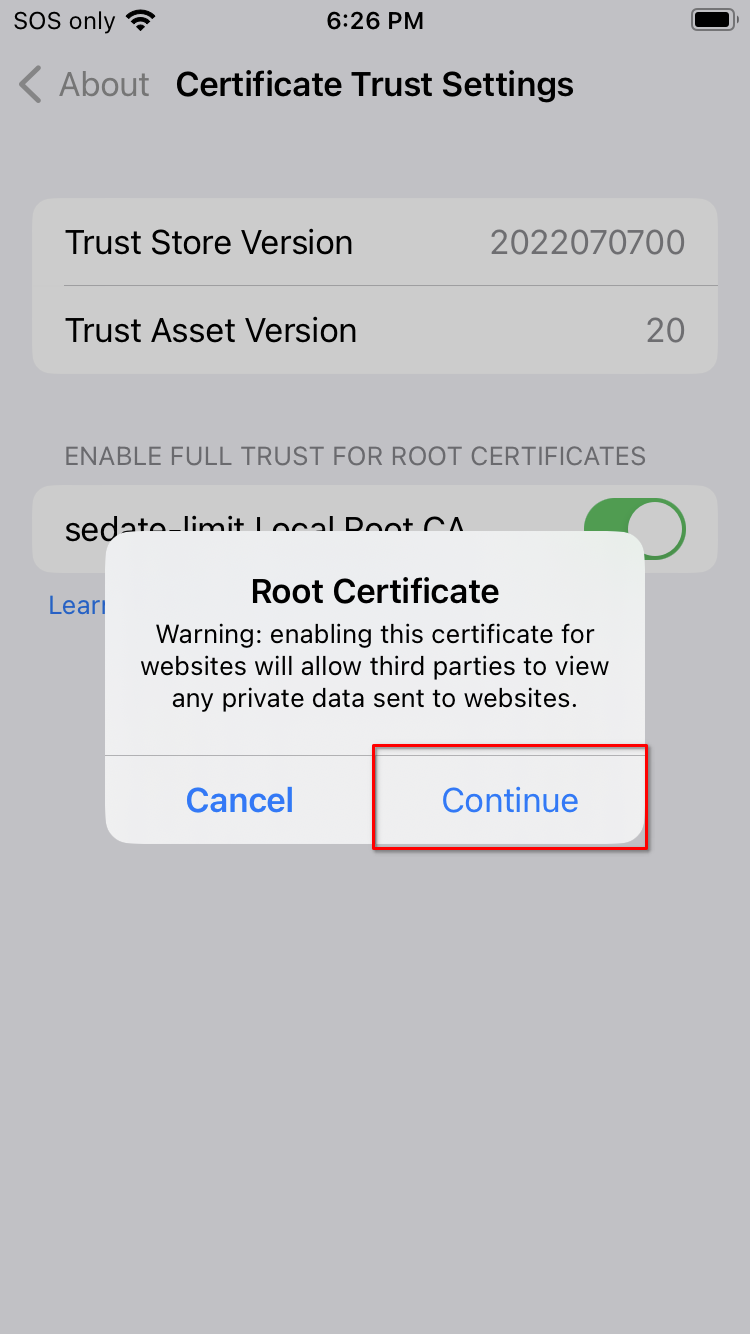
Tap Continue
Your certificate should now be installed and trusted:
